
7 Houseplant Myths That Lost Their Context
Houseplant myths are everywhere online, especially when it comes to repotting, roots, drainage, pot size and homemade plant hacks.
It's been a few years since I started Jungle Floor Creative, but I've been into plants from an early age.

When I was growing up, plant advice came from books, watching Gardeners' World on TV, or asking your grandad to show you the ropes. Whether it was indoor plants or outdoor gardening, knowledge was often passed down through experience and practical advice.
Now, thanks to the internet, plant advice is everywhere. Some of it is brilliant, some of it is questionable, and some of it has gone completely bonkers. Many of the tips and tricks we see shared online started with a grain of truth. The problem is that somewhere along the way, the context got lost.
Advice that was useful for one plant, one situation, or one growing method became a rule that everyone was expected to follow. Suddenly, plant hacks were everywhere, and many of them were being treated as universal truths.
So, I thought it was time to take a closer look at some of the most common houseplant myths. Let's put them back into context, explore where they came from, and figure out what's actually true.
Myth #1: You Should Remove All the Old Soil When Repotting
Okay, so you're either sitting there thinking I'm crazy, or you've seen this advice so many times that you've started to wonder if it's actually true.
Let's unravel it.
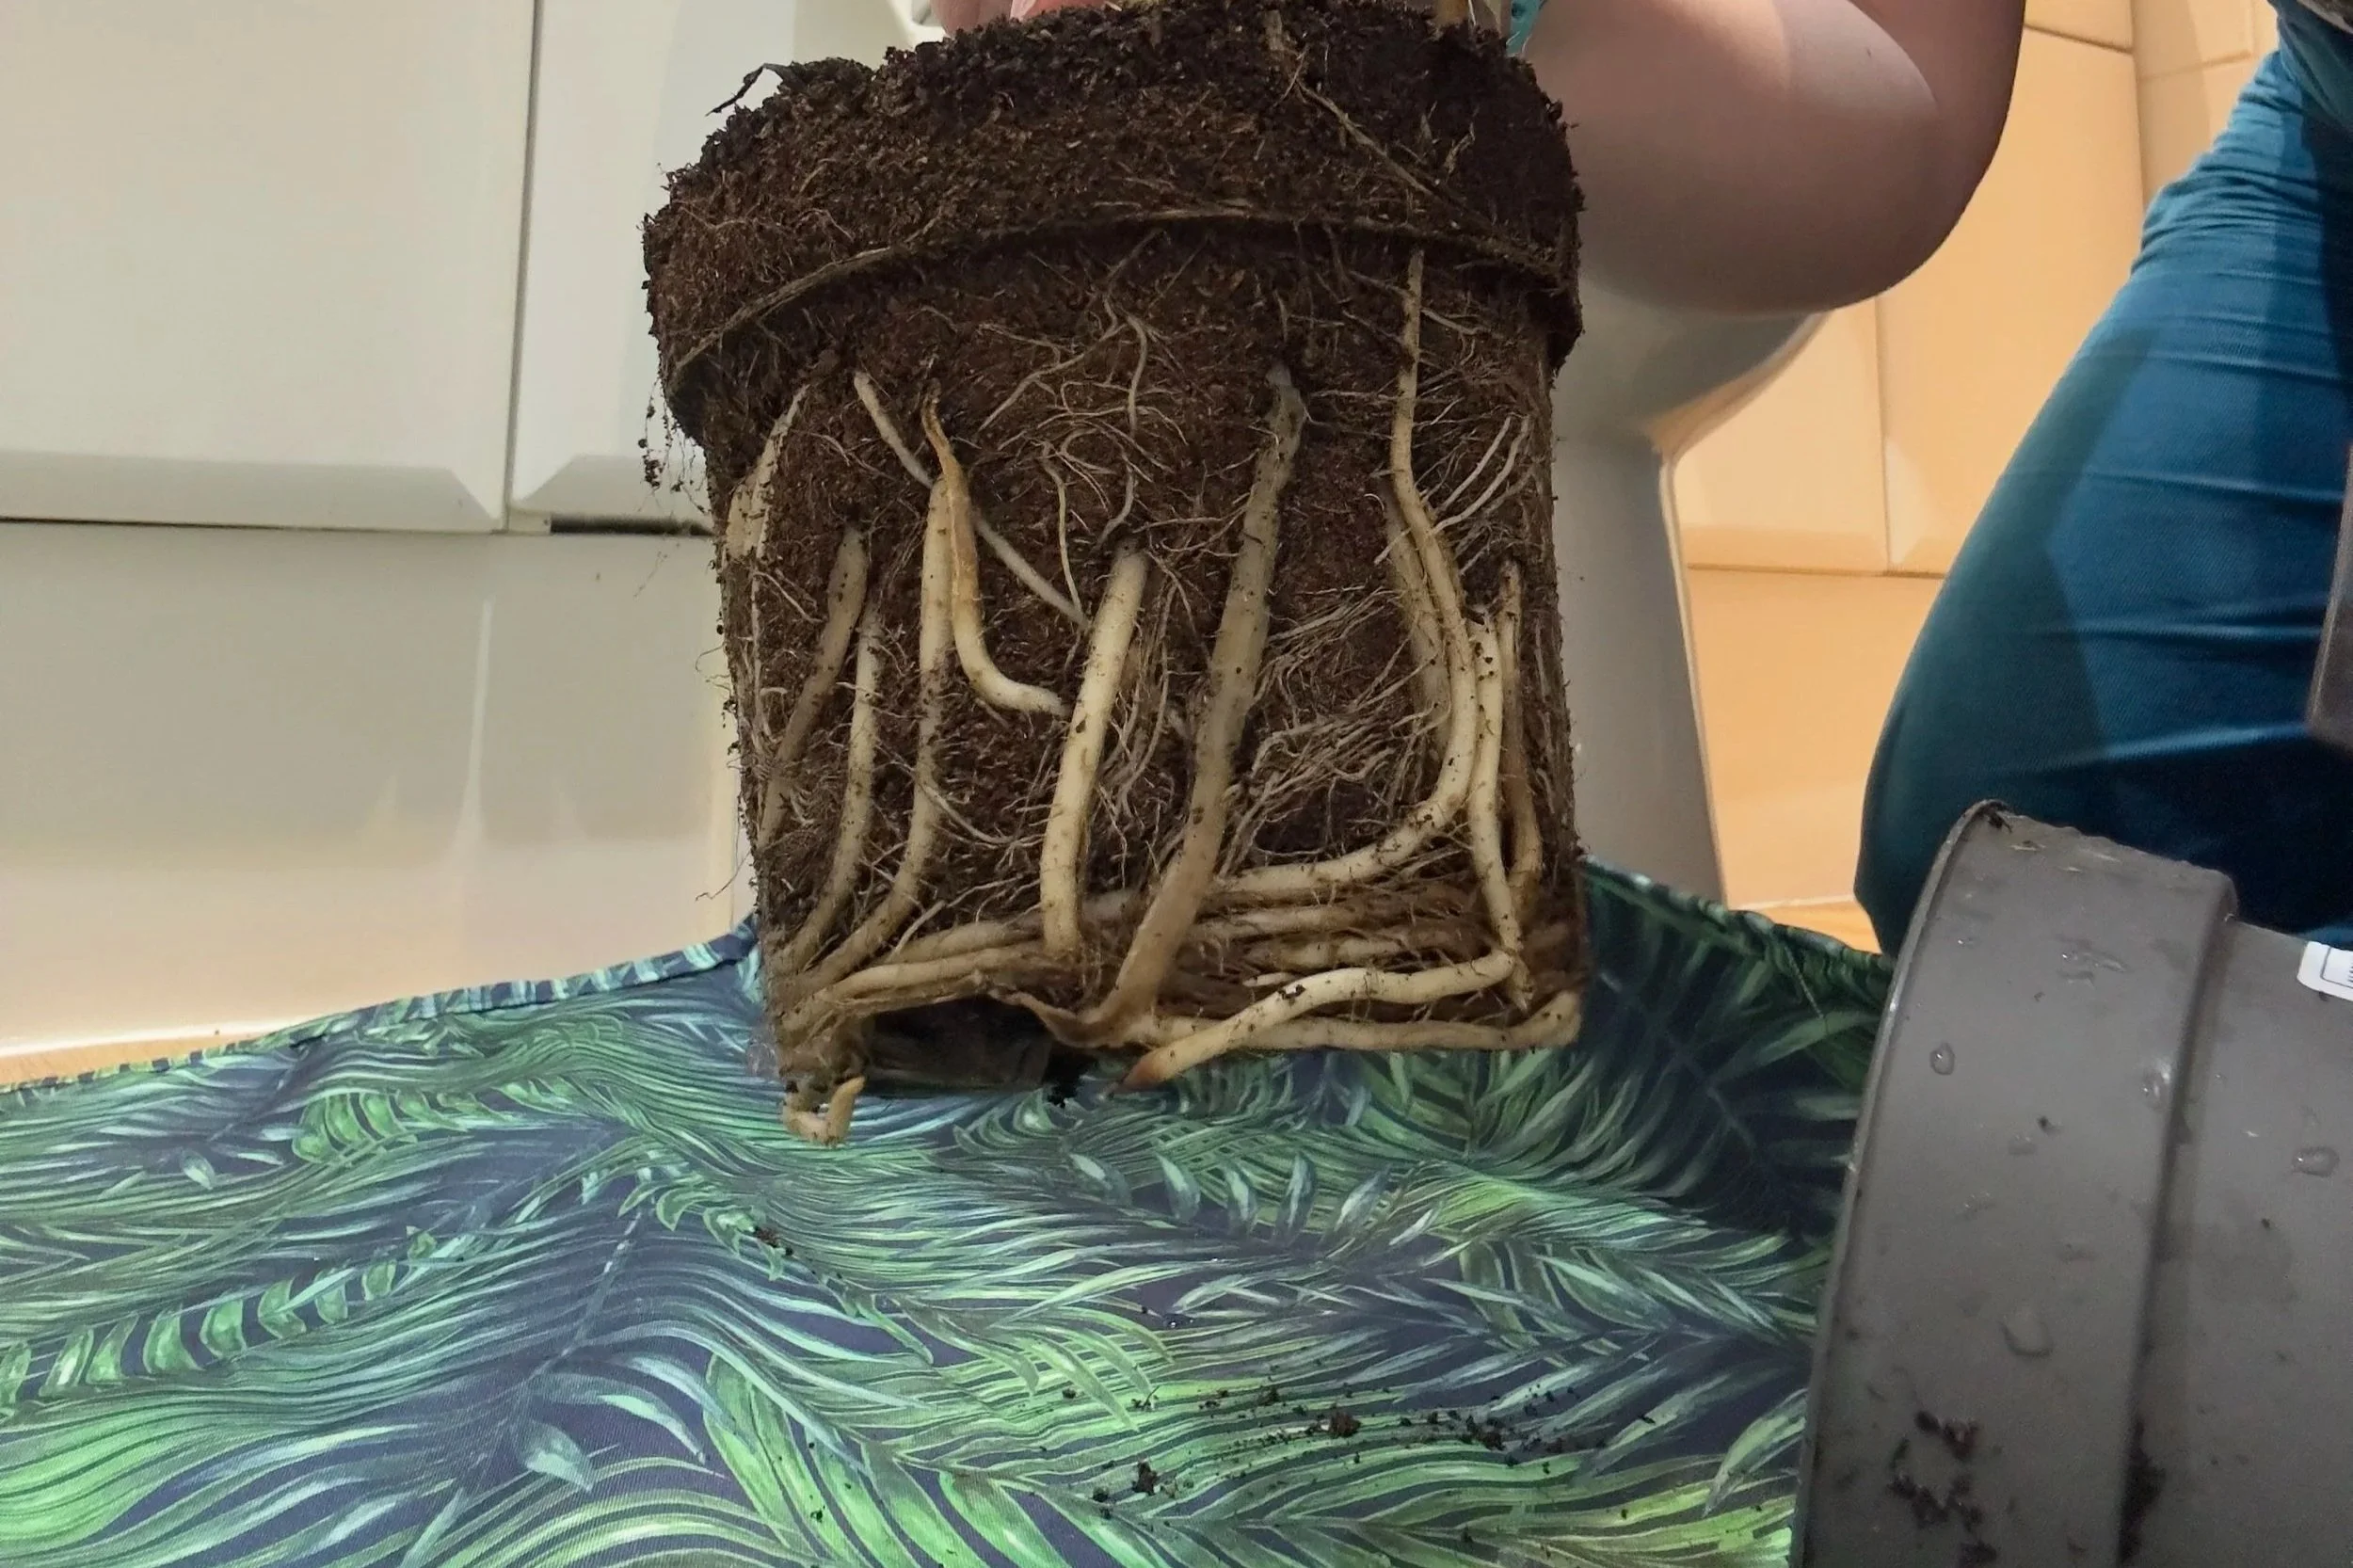
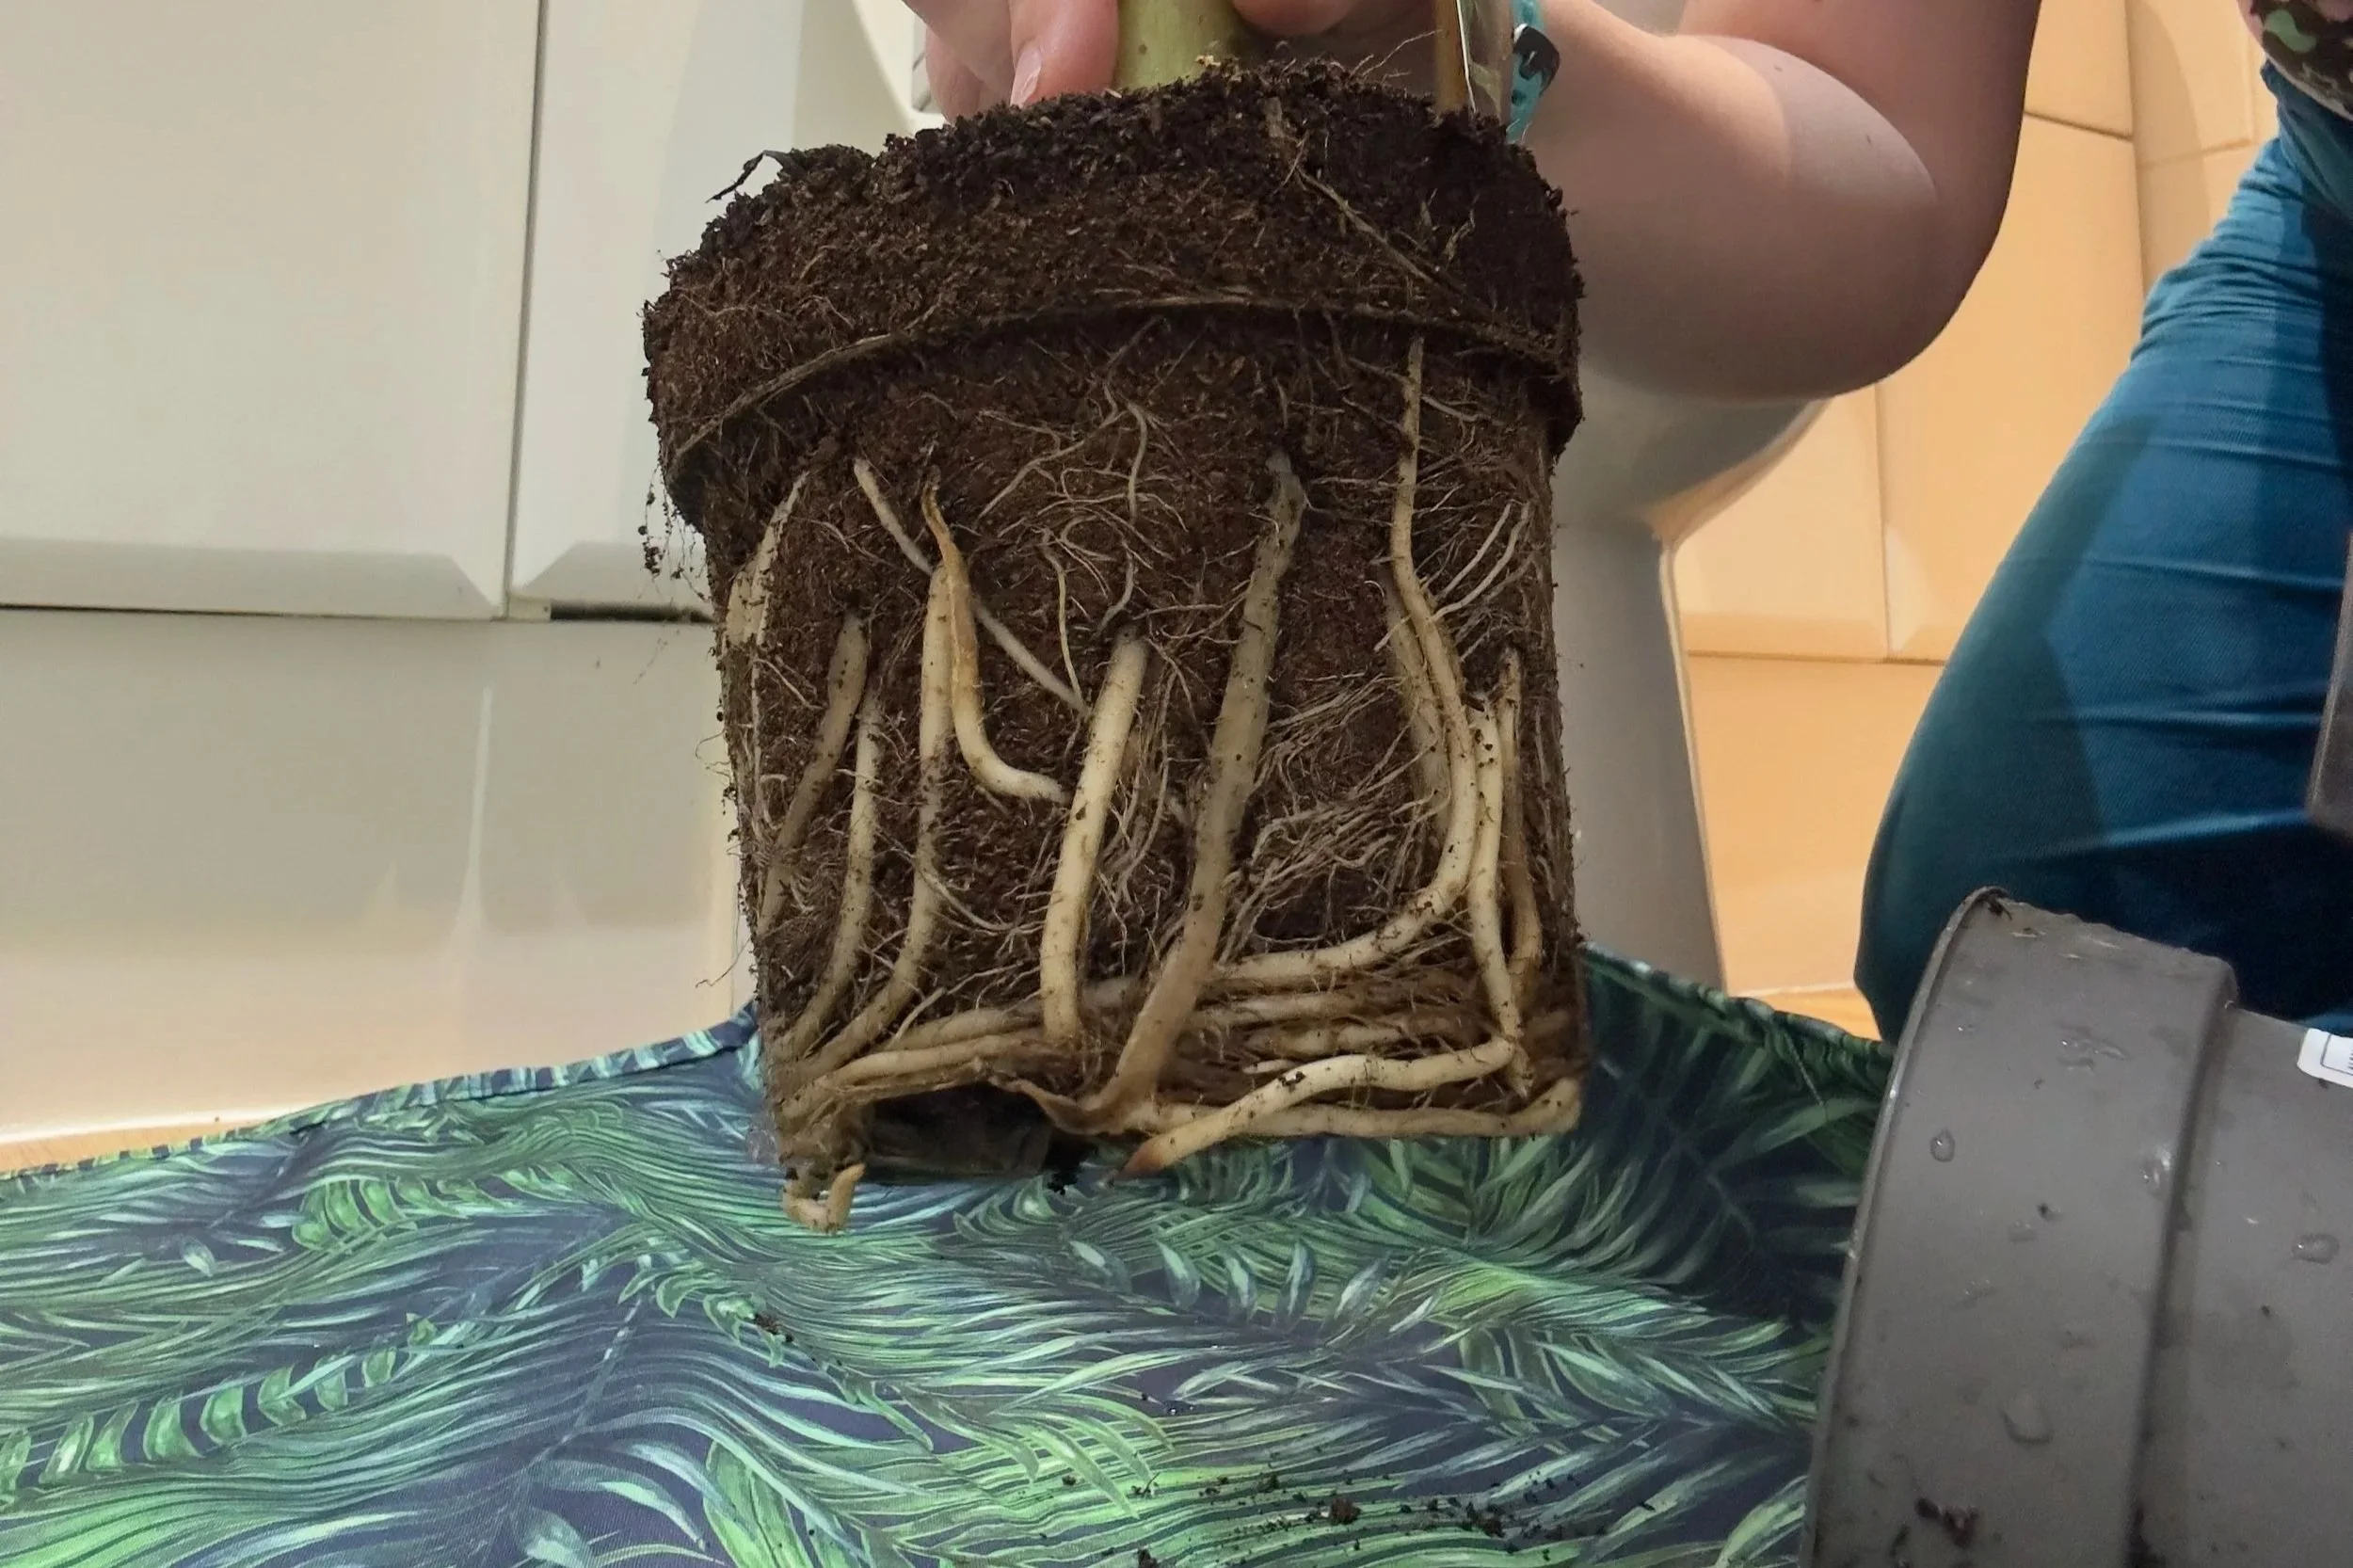
You've got your Jungle Floor repotting mat ready, your fresh soil mix prepared, and the perfect pot picked out. You gently squeeze the nursery pot and slide the plant out.
The first question isn't, "Should I remove all this soil?"
The real question is:
Why are you repotting?
Scenario 1: The Plant Is Healthy

If the roots have simply filled the pot and the plant has become loose because it's outgrown its home, then a standard repot is usually all that's needed.
In this situation, completely removing all the old soil can create unnecessary stress. If the plant is healthy and growing well, it's already telling you it's happy with its current setup. Refreshing some of the potting mix and moving it into a slightly larger pot is often enough.
Scenario 2: The Plant Isn't Happy
Now let's imagine you slide the plant out of the pot and notice something different.
The roots are dry, brittle, and falling away easily. The soil is bone dry and compacted. Or perhaps you spot signs of root rot, stem rot, or a mushy rhizome.
This is where removing more of the old soil can be beneficial.
I often water the plant before repotting because it gives me one less thing to worry about and helps loosen the root ball. Once the roots are hydrated, it's easier to gently shake away old soil and inspect what's really going on beneath the surface.
Even then, slow and gentle is usually best. A cocktail stick can be incredibly useful for teasing away old soil without damaging healthy roots.
Scenario 3: You're Changing Growing Medium
If you're moving a plant from one growing medium to another, such as transferring it into a chunkier aroid mix or a semi-hydro setup, you'll want to remove as much of the old soil as possible.
Soaking the roots can help loosen stubborn soil and make the transition less stressful. But don't panic if a little soil remains attached to the roots. It doesn't have to be spotless.
In many cases, beneficial organisms in the potting mix will help break down any remaining organic matter over time.
The Truth
Removing all the old soil isn't a rule. It's a tool.
Sometimes it's exactly what a plant needs. Other times it's unnecessary stress for an otherwise healthy root system.
The key is understanding why you're repotting in the first place. Once you know the reason, the right approach usually becomes much clearer.
Myth #2: If You Want a Bigger Plant, Put It in a Really Big Pot
I'll happily put my hands up and admit that I used to believe this one.

I thought putting a plant into a pot five times larger than its root ball was the secret to huge leaves and explosive growth. After all, if plants need room to grow, surely more room must be better... right?
Well, yes and no.
This myth actually starts with a grain of truth. As plants grow, they do eventually need larger pots. Roots need space to expand, fresh potting mix provides structure and nutrients, and a plant that's become rootbound may well benefit from moving up a size.
The problem comes when we take that idea and run with it.
The Water Problem
When you place a small root ball into a very large pot, the roots can only absorb water from the area they've already grown into.
The rest of the pot is filled with soil that stays wet for much longer.
Think of it like giving a studio flat's worth of roots a mansion to manage.
Every time you water, the plant is trying to use a small corner of the pot while the rest of the compost is still holding moisture. That can make watering much harder to judge and, in some cases, increase the risk of root rot.
Bigger Pots Don't Equal Faster Growth
One of the biggest surprises for me was learning that plants don't instantly fill a larger pot with roots.
-
The RHS recommends sizing up gradually when repotting. For smaller containers, they suggest choosing a pot around 2.5-5cm, or 1-2 inches, deeper and wider than the previous one. The reason isn't that plants hate space. It's that excess compost around a small root system can stay wet for too long, which makes watering harder to manage.
Growth still depends on light, temperature, water, nutrients, and the plant's natural growth rate.
Giving a small plant a huge pot doesn't suddenly persuade it to grow faster. It simply gives it more soil than it can currently use.
What About in Nature?
This is where a lot of the confusion comes from.
Tropical plants aren't wandering around rainforests thinking, "I'd really like to be rootbound."
In the wild, roots often spread through leaf litter, fallen branches, moss, and organic matter over a surprisingly large area.
What makes houseplants different is that we're growing them in containers. Once a plant is living in a pot, we have to think about water retention in a way that nature doesn't.
The Truth
A bigger pot doesn't automatically create a bigger plant.
Most houseplants are happiest when they're gradually moved up in size as they grow, rather than being placed straight into a pot that's dramatically larger than their root system.

As a general rule, I only move a plant into a pot that's around one or two inches larger than its current root ball or nursery pot. That might not sound like much, especially when you're hoping for huge growth, but it gives the roots room to expand without surrounding them with a huge volume of wet soil.
Of course, there are exceptions. A large, fast-growing Monstera is going to have different needs to a slow-growing succulent. But for most houseplants, sizing up gradually is far easier to manage than jumping straight into a pot that's several times larger than the root system.
So when you're repotting, don't think about giving your plant the biggest house possible.
Think about giving it the right-sized home for the stage it's currently in.
The myth isn't that plants need bigger pots.
The myth is that they need the biggest pot possible right now.
Myth #3: You Must Always Loosen the Roots
This is one of those pieces of advice I've seen repeated so often that many people now treat it as a compulsory step in every repot.
Take the plant out of its pot.

Loosen the roots.
Tease them apart.
Break up the root ball.
Job done.
But is it actually necessary?
Well, not always.
Like many of the myths in this article, this one starts with a grain of truth. If a plant is severely rootbound and the roots have formed a dense mass around the outside of the pot, gently loosening some of those roots can help them spread into the fresh potting mix.
The problem is that somewhere along the way, "sometimes helpful" became "always necessary."
Why Do Roots Circle the Pot?
When roots reach the edge of a pot, they don't stop growing. They simply follow the space available to them, which is why you often see roots circling around the outside of the root ball.
This doesn't automatically mean the plant is struggling.
In fact, many healthy plants will have roots circling the pot simply because they've filled the space they've been given.
Less Can Sometimes Be More
If I take a healthy plant out of its pot and the roots look strong and healthy, I'm often quite happy to leave them largely alone.
A gentle poke with a cocktail stick can help loosen compacted areas of soil, but aggressively pulling roots apart can create unnecessary damage and stress.
After all, the plant has already proven it knows how to grow roots. It doesn't need me to give it a crash course.
What About Plugs?
Sometimes you'll find a propagation plug or nursery plug around the base of the plant.
-
Roots circle a pot because they reach the container wall and continue growing along the available space. This does not automatically mean the plant is unhealthy.
-
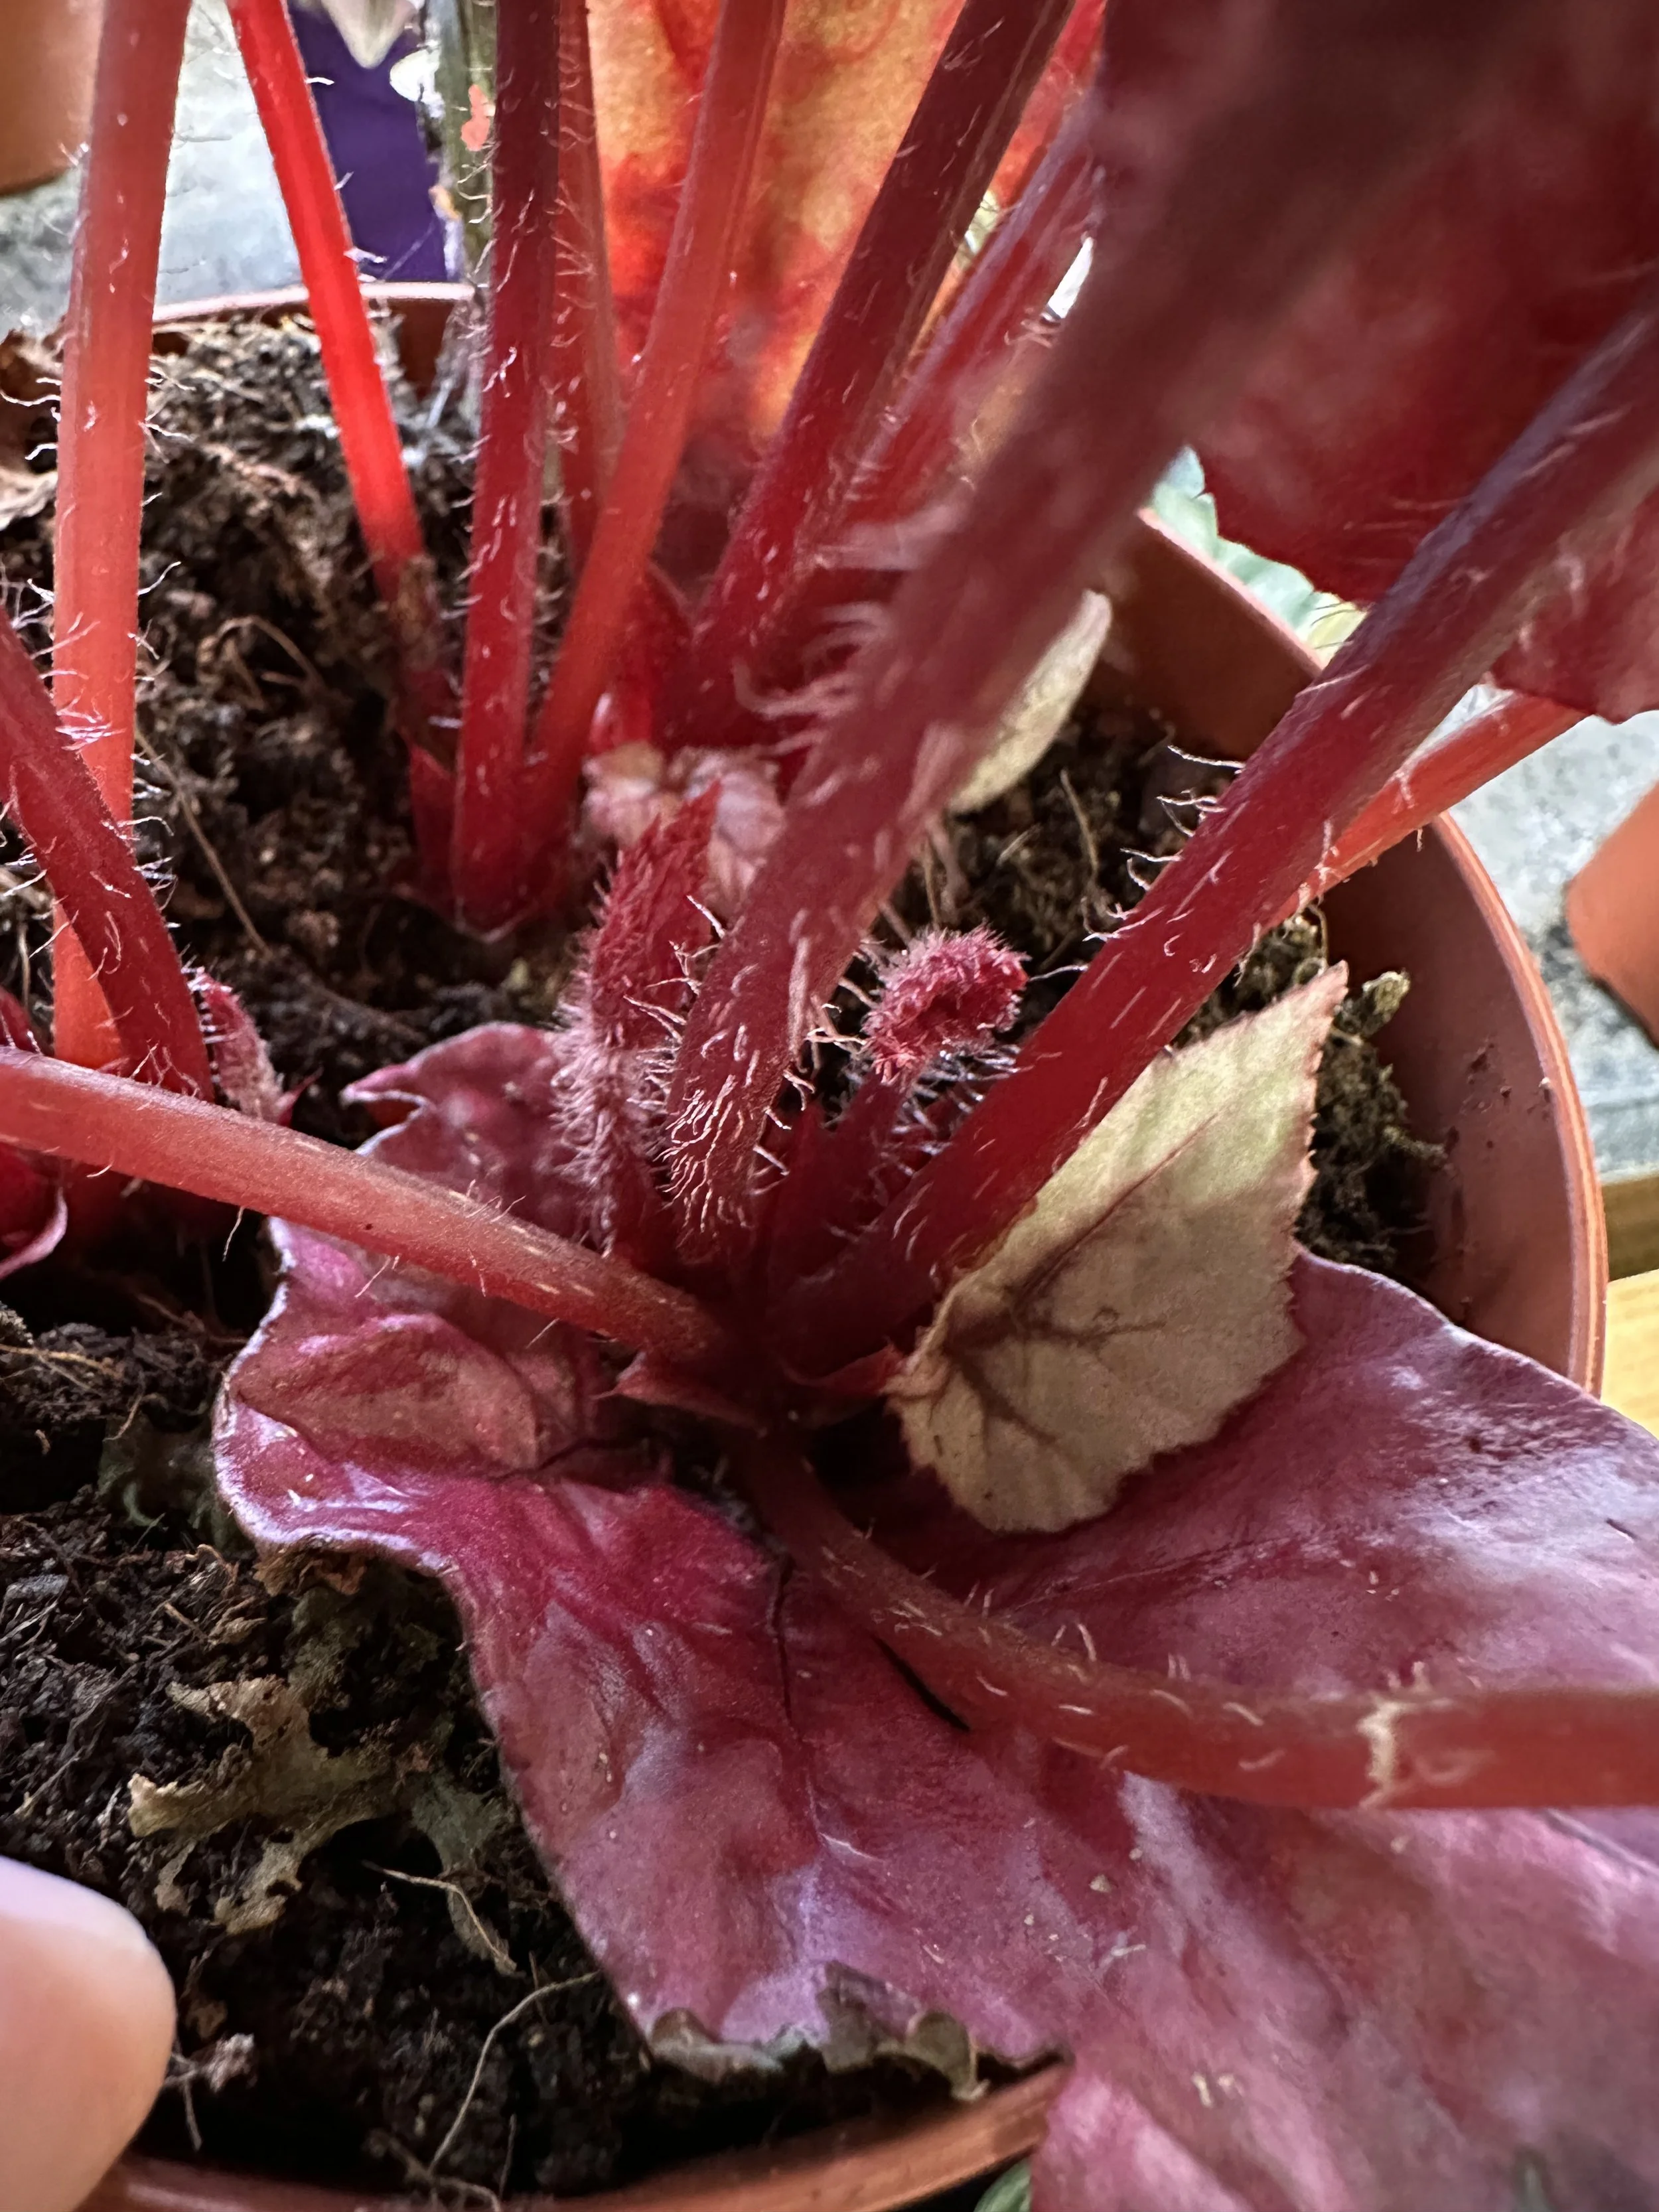
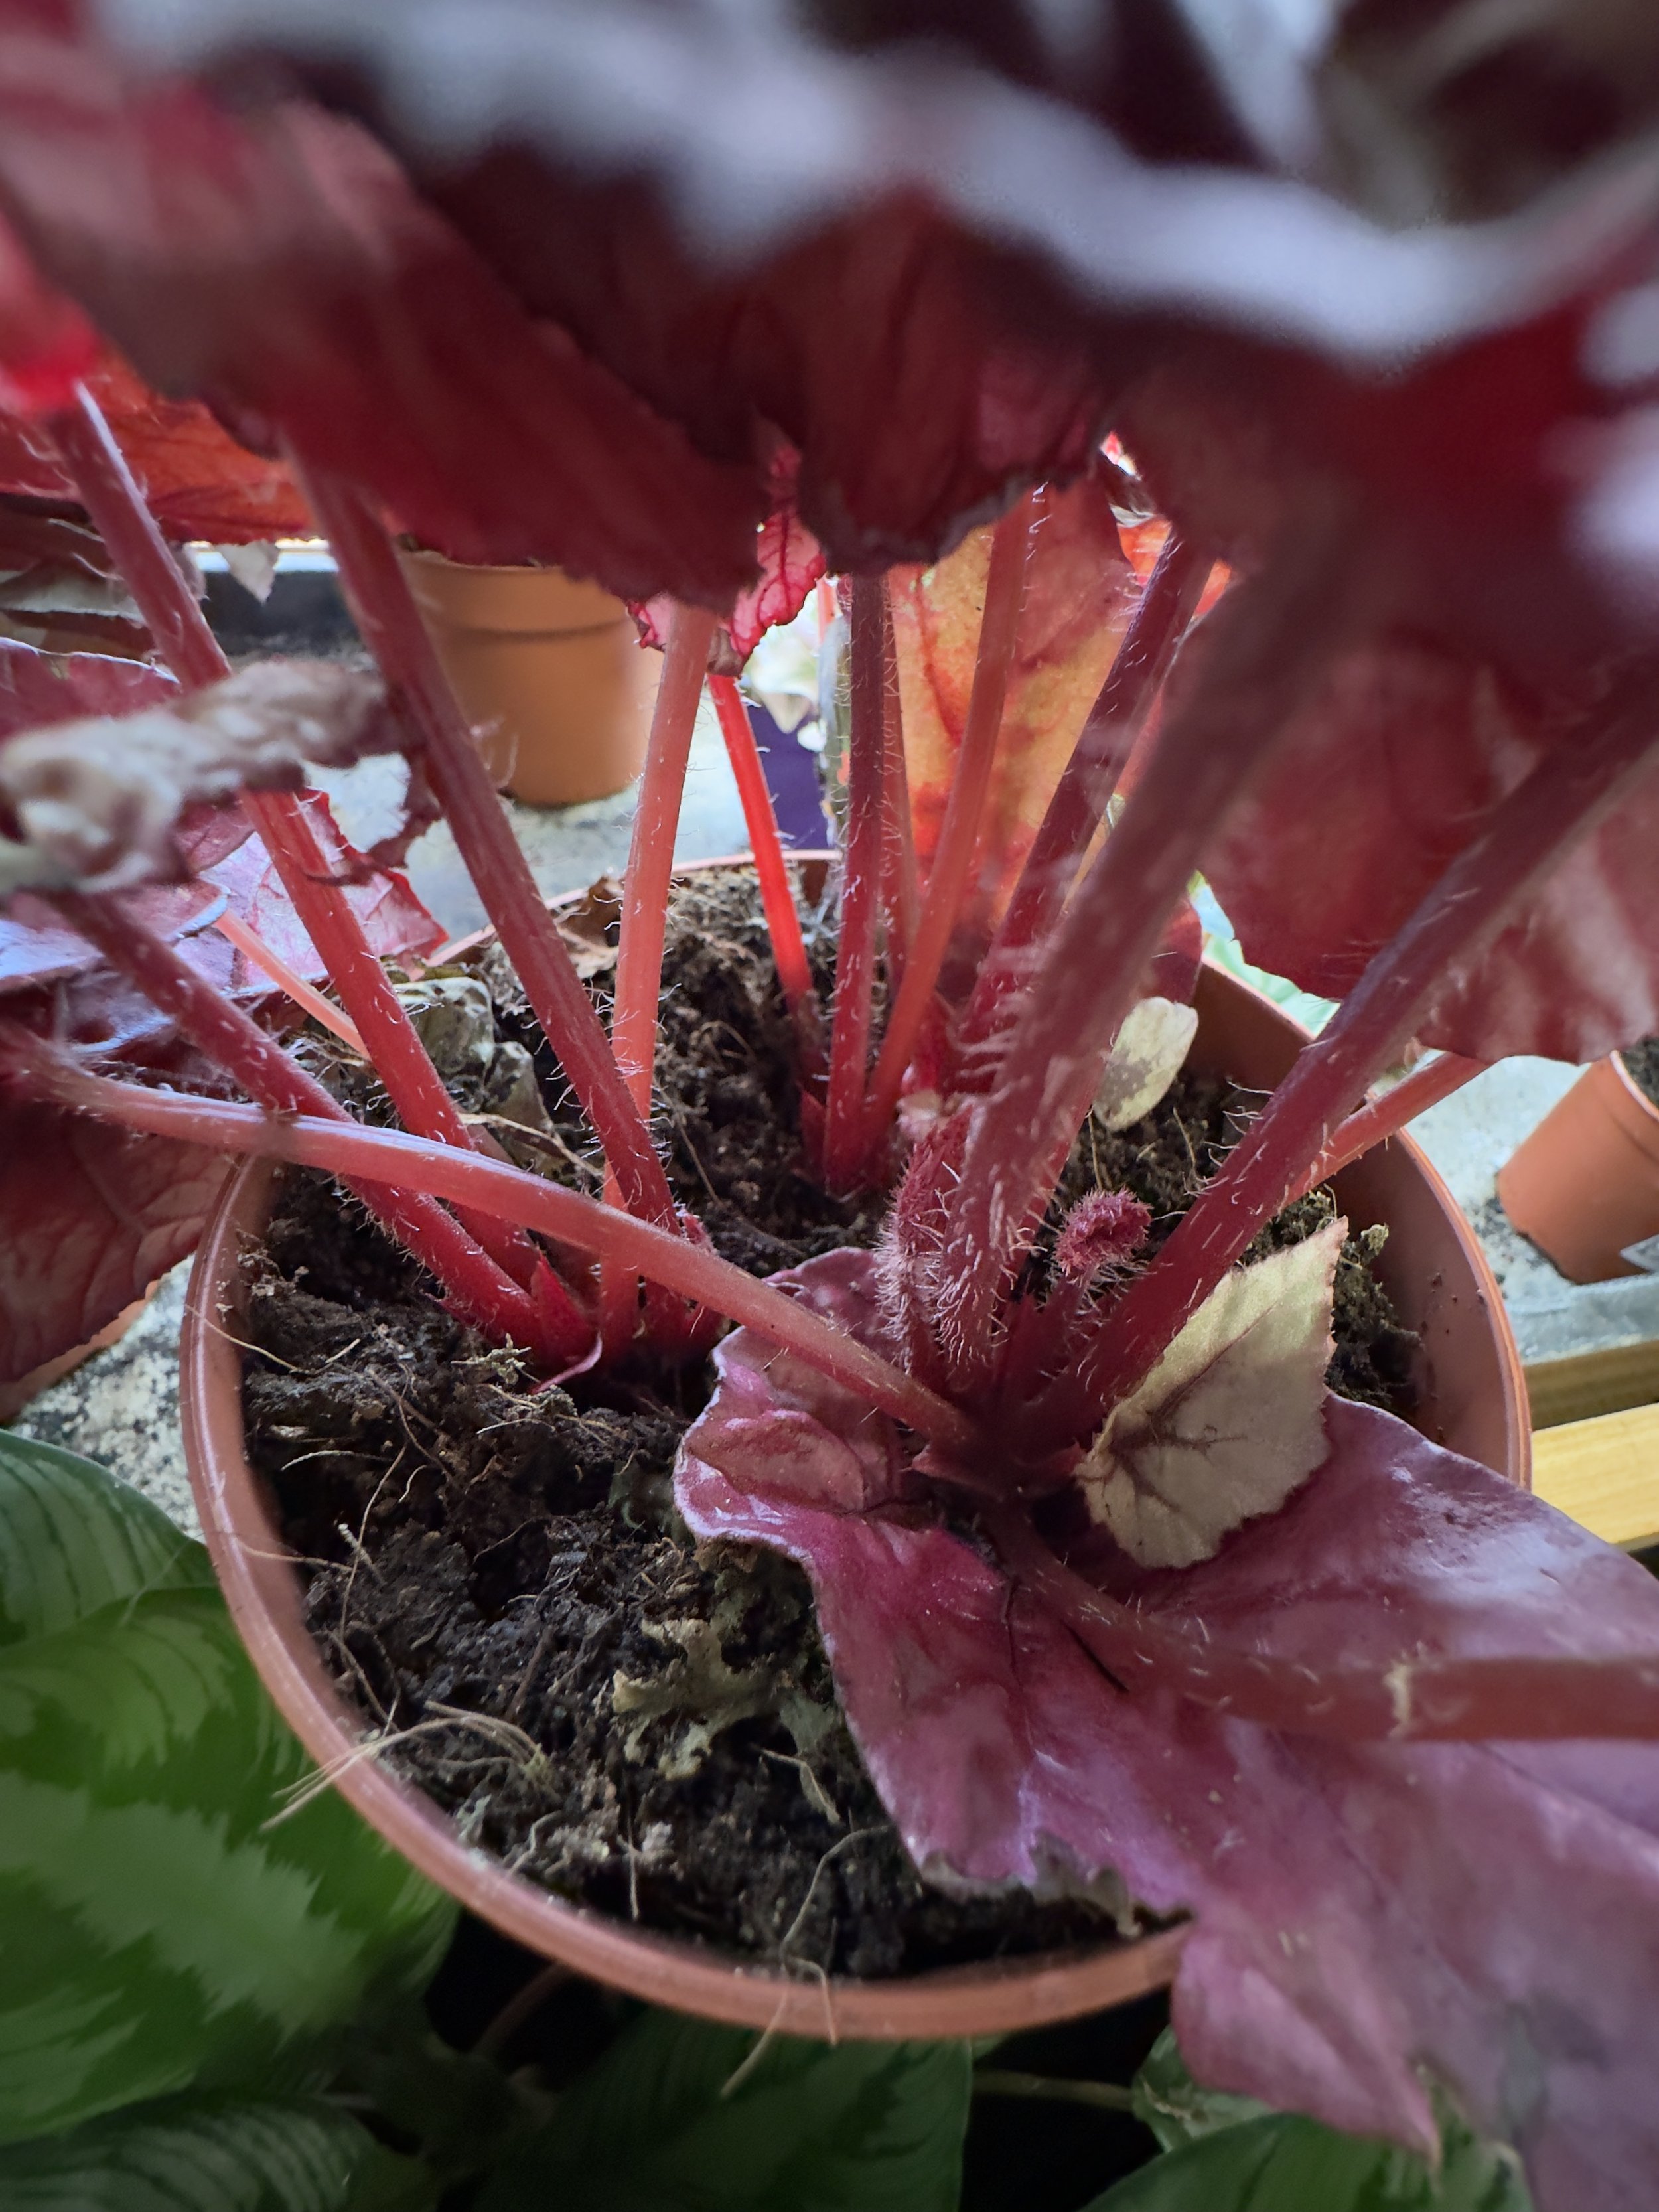
A corm is a storage organ. The more developed it is, the more energy it has to support new growth on its own.
In some cases these can restrict root growth or hold moisture differently to the surrounding potting mix, making it worthwhile to remove them
As with most things in plant care, context matters.
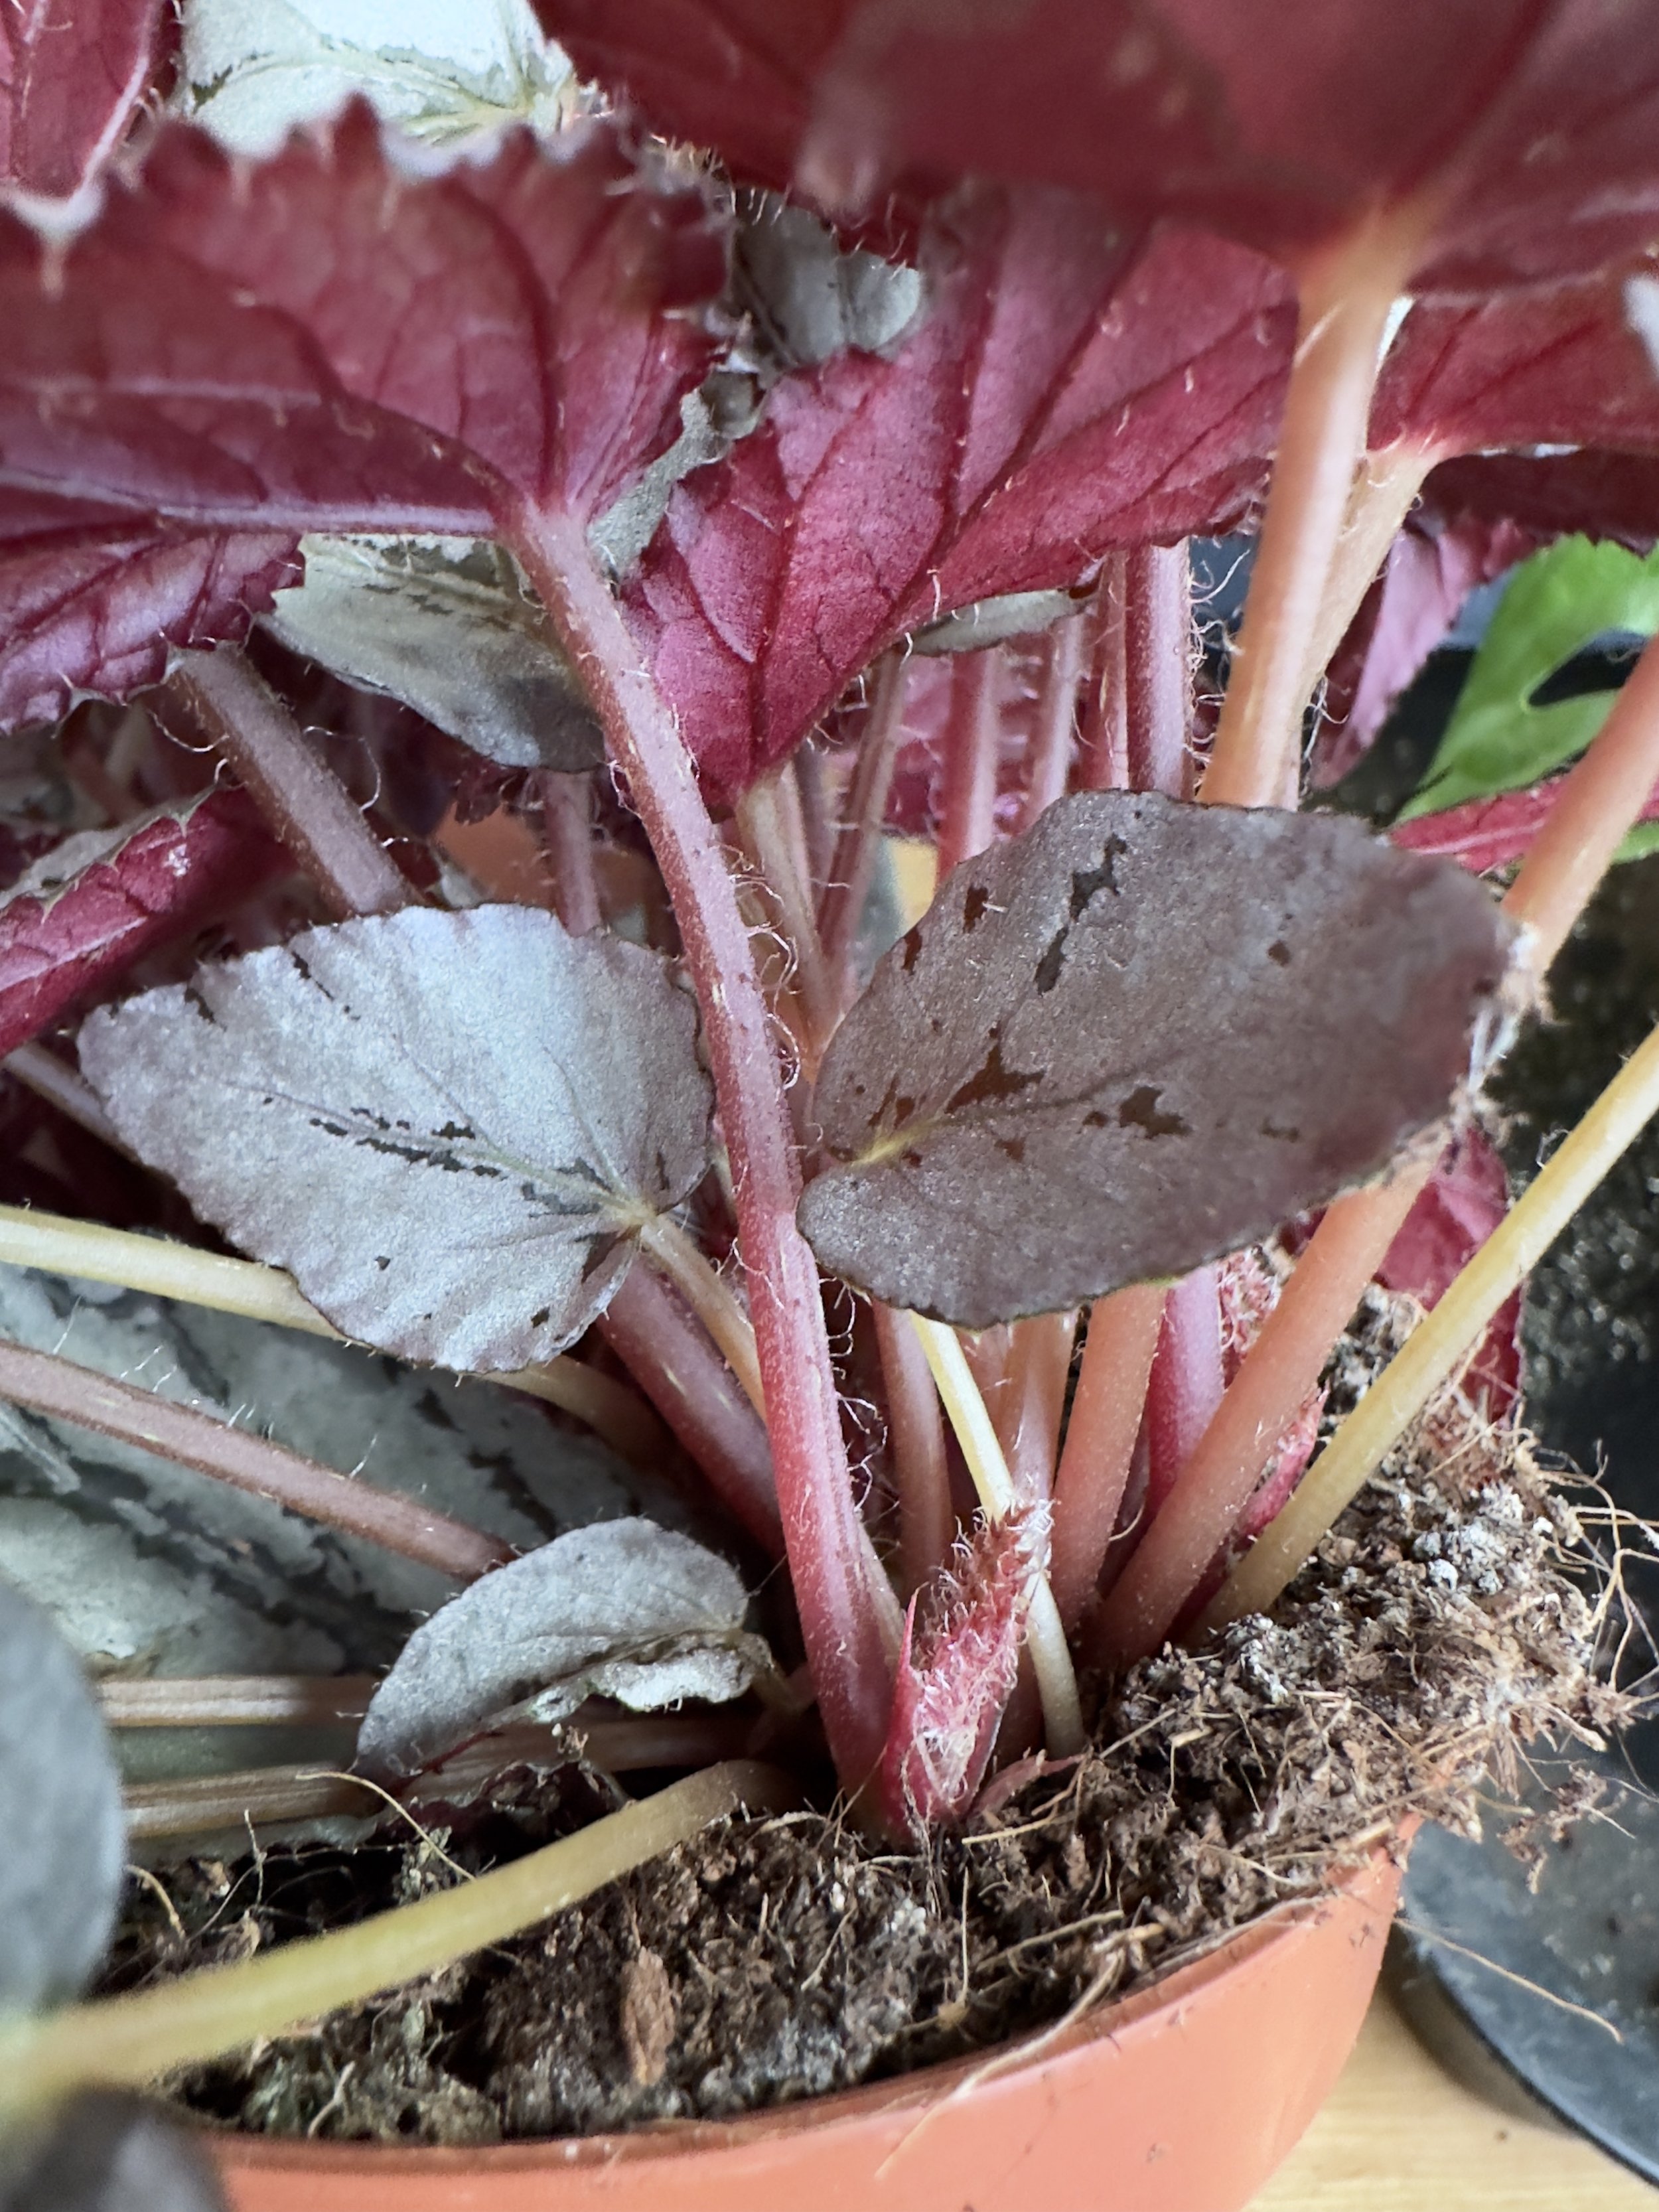
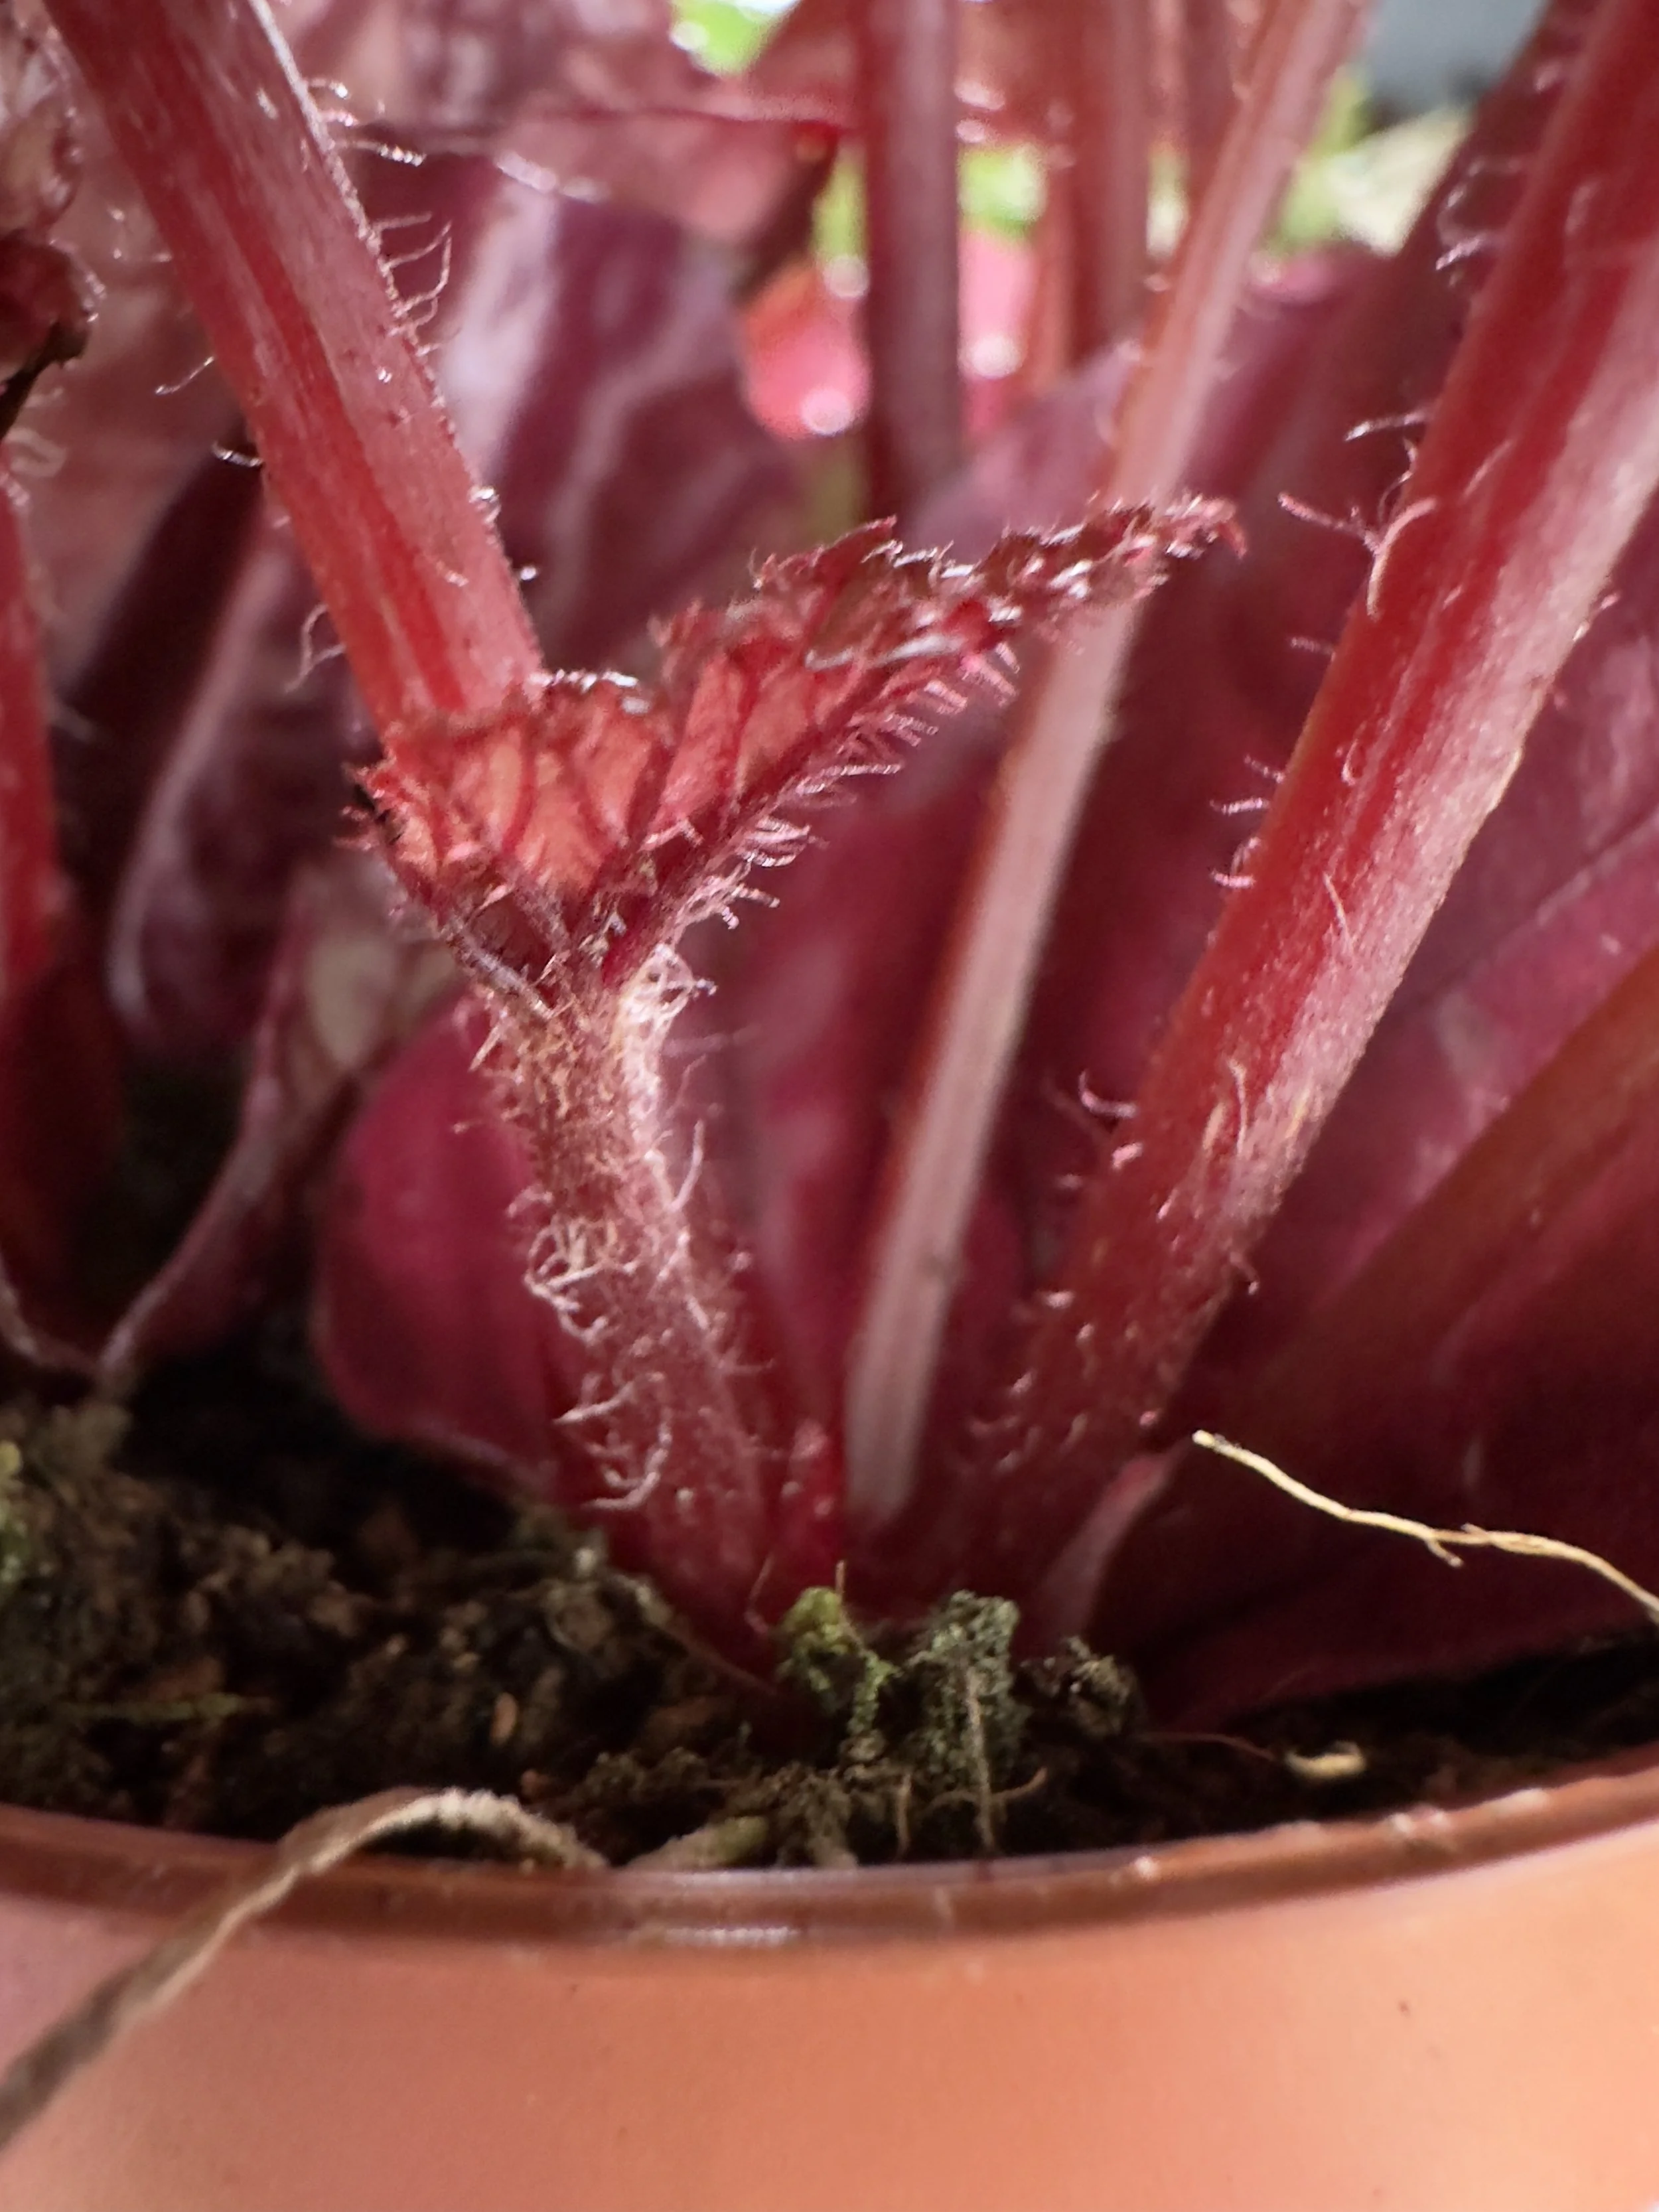
What About Corms?
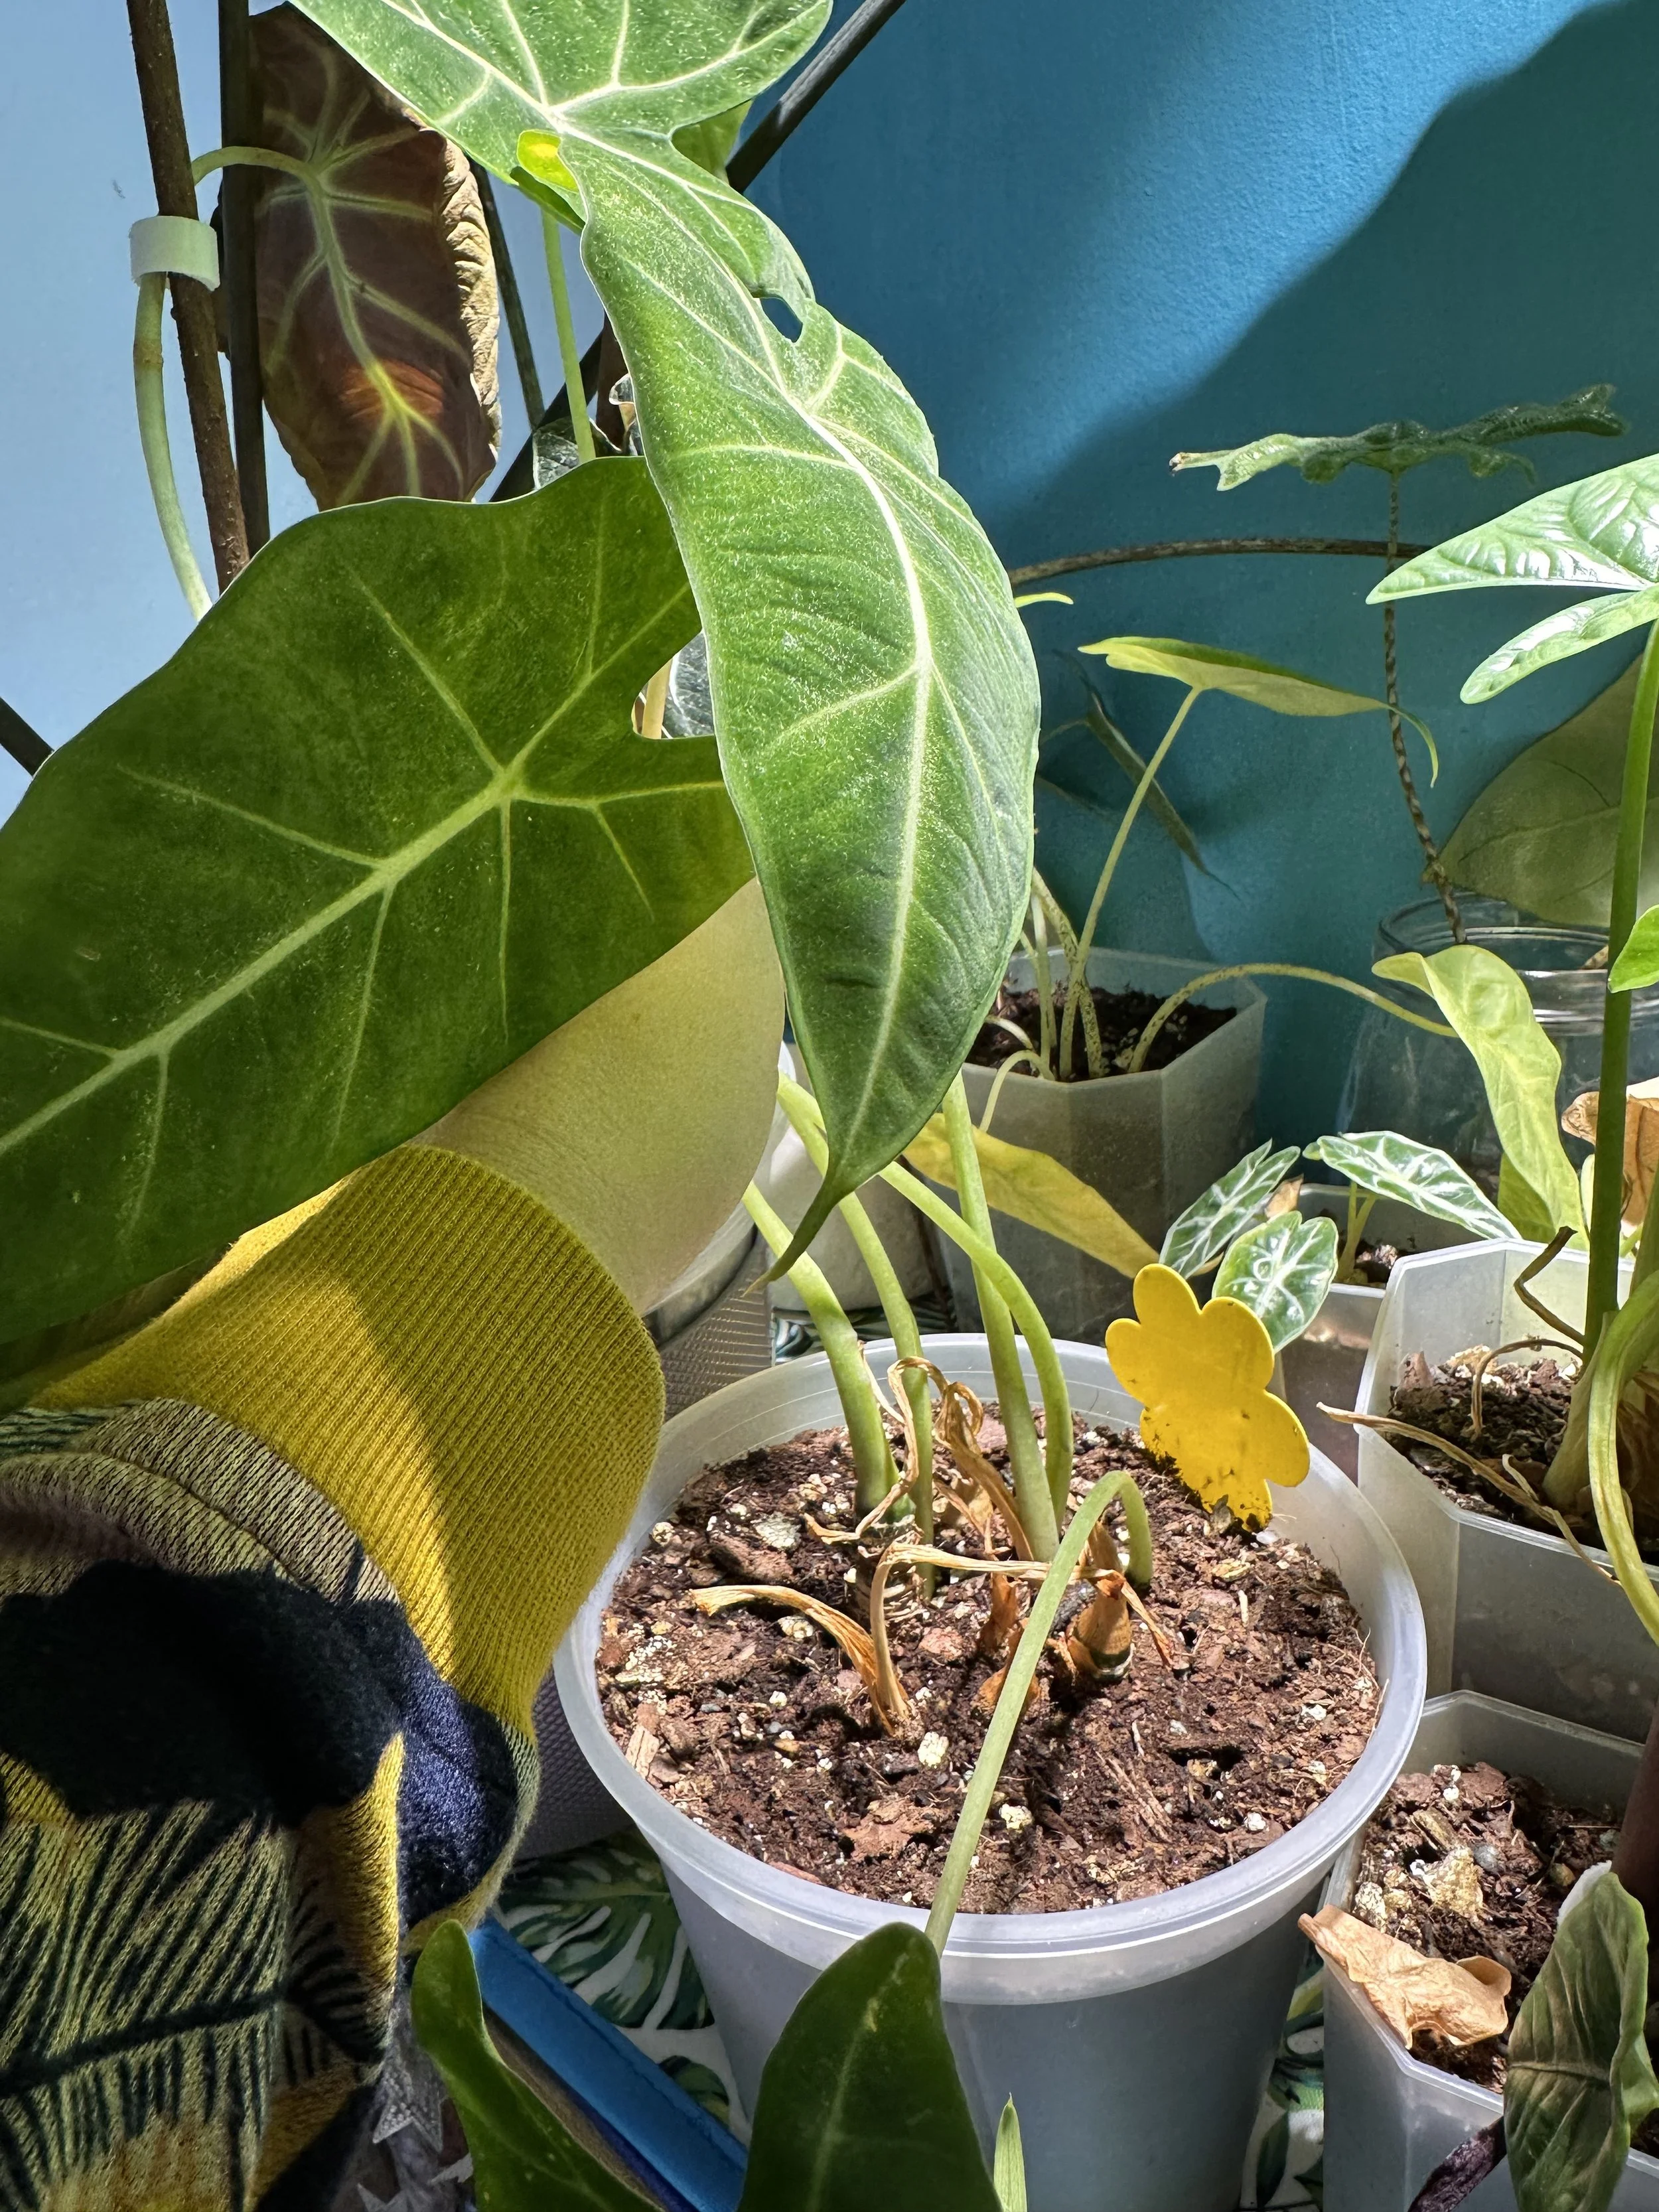
A good example of this is corms, especially if you're an Alocasia collector like me.
I often see advice telling people to remove every corm they find during repotting, but not every corm is ready to leave home just yet.
Many mature corms naturally work their way towards the outside of the root ball and can often be removed with little effort. Those are often the corms telling you they're ready to start life on their own. They've already done much of the hard work and built up the energy reserves they'll need to grow independently.

However, if a corm is still firmly attached to the mother plant, there may be a reason for that. It is still building up energy reserves and benefiting from its connection to the parent plant.
Removing it too early doesn't necessarily harm the mother plant, but it can leave you with a corm that struggles to establish itself because it simply wasn't ready yet.
Sometimes the best thing you can do is leave it where it is and let nature finish the job.
The Truth
Loosening roots isn't a rule. It's a tool.
If a plant is severely rootbound, compacted, or struggling, gently loosening the roots may be helpful.
But if the roots are healthy and the plant is thriving, there's often no need to wage war on the root ball before repotting.
The same goes for corms. A loose, well-developed corm is telling you one story. A tiny corm that is still firmly attached is telling you another.
Whether it's roots, nursery plugs, or corms, the answer isn't always found in a checklist.
The best growers learn to observe first and act second.
The trick is learning to read what the plant is telling you rather than following a fixed rule.
Myth #4: Rocks and Clay Balls Improve Drainage
This is one of those pieces of plant advice that has been around for so long that most of us have probably followed it at some point.
Add rocks to the bottom of the pot.
Add gravel.
Add clay balls.
Instantly better drainage.
Simple.
Or is it?
Like many plant myths, this one has its roots in reality.
Where Did This Advice Come From?
For years, gardeners were told that adding a layer of rocks, gravel, broken terracotta, or clay balls to the bottom of a pot would improve drainage and keep roots away from excess water.
It sounds perfectly logical.
Water drains through the soil, collects below, and the roots stay safely above it.
The problem is that soil doesn't always behave the way we imagine it does.
Potting mix holds onto moisture through capillary action. In simple terms, water doesn't always drop neatly from the soil into the layer below like rain falling through a sieve. Sometimes it is held within the potting mix above the drainage layer instead.
This is where the idea of a perched water table comes in. The wettest part of the potting mix can sit above the coarse layer, rather than disappearing safely below it.
In other words, adding rocks doesn't automatically create a dry zone for roots.
It can also reduce the amount of usable growing space in the pot because part of the container is now filled with rocks instead of soil and roots.
But The Science Is More Nuanced Than That
This is where things get interesting.
Older horticultural advice often warned against drainage layers because they can interfere with how water moves through potting mix.
However, newer research suggests the picture is not quite as simple as "rocks are always bad." A 2025 study looking at drainage layers and potting media found that drainage layers can affect water retention, but the results depend on things like the type of potting mix, the material used for the drainage layer, and how deep that layer is.
So the science doesn't really say, "Never use rocks."

It says, "Understand what job you think they are doing."
And that is a very different thing.
So Are Rocks and Clay Balls Useless?
Not necessarily.
This is where context starts to matter.
One thing I've learned from growing plants over the years is that very few techniques are completely right or completely wrong.
I grow a lot of Alocasia, and I'm always experimenting with different growing methods, potting mixes, and growing mediums. Not because an influencer told me to, but because I'm genuinely curious about what works and why.
One of the challenges with plant advice online is that it can sometimes feel like plant advice telephone. A tip gets shared, then reshared, then simplified, until nobody remembers where it came from or what problem it was originally trying to solve.
That's when a technique becomes a rule.
And that's usually where the trouble starts.
What About Pots Without Drainage Holes?
One place where I do use clay balls is in pots without drainage holes.
Now before the comments section starts sharpening its pitchforks, hear me out.
I don't use them because I believe they're magically improving drainage. Technically, if there is no drainage hole, the water isn't draining anywhere. It is still inside the pot.
What the clay balls can do is create a reservoir area below the soil line.
When watering, I often add water slowly down the side of the pot at an angle rather than pouring directly over the entire surface. I've found this allows me to introduce water more gradually to the lower part of the pot without immediately soaking all of the potting mix at once.
-
Potting mix holds water through capillary action, which means water does not always fall neatly into a drainage layer below. This is why rocks or clay balls do not automatically create a dry zone for roots.
Source: UC Master Gardenerstext goes here -
Newer research suggests drainage layers can affect water retention, but the results depend on the potting mix, the drainage material, and the depth of the layer. In other words, context really does matter.
Source: Rowe, 2025, PLOS One
Does that mean the soil above stays completely dry? No. Water will still move through the potting mix over time.
What I have found, however, is that it gives me a little more control over how moisture is distributed within the pot. For some plants and some growing setups, that can be useful.
Would I do this in every pot? No.
Would I recommend it as a universal solution to drainage problems? Definitely not.
It's simply a technique that works for me in certain situations.
What About Humidity?
Another reason people use clay balls is to create a little extra humidity around the plant.
If water is sitting in the reservoir below the soil or beneath a nursery pot, some of that water will evaporate. So yes, technically, it can add a small amount of moisture to the air immediately around the plant.
But I wouldn't treat it as a magic humidity machine.
In most homes, especially once heating is on, that moisture can disappear into the room very quickly. It may help a little in the tiny microclimate around the pot, but it won't turn your living room into a tropical glasshouse.
The Truth
The best drainage usually comes from a combination of:
A pot with drainage holes
A suitable potting mix
Appropriate watering habits
Rocks and clay balls aren't magic drainage boosters.
They may have uses in specific situations, especially if you're experimenting with different growing methods, semi-hydro setups, cachepots, or pots without drainage holes. But they aren't a cure-all for poor watering habits or unsuitable soil mixes.
Just like every other myth in this article, the problem isn't that the original advice was completely wrong.
The problem is that a technique designed for one situation became a rule that everyone was expected to follow.
Context matters.
#5 Every Houseplant Needs Repotting Every Spring
Myth #5: Every Houseplant Needs Repotting in Spring
Okay, this is another one of those plant rules that sounds sensible at first.
Repot in spring.
Only repot in spring.
Spring is repotting season.
And yes, there is a reason this advice exists.
For outdoor gardening, spring often makes sense. The days get longer, temperatures rise, and many plants start waking up after winter. Growth becomes more active, roots begin moving again, and plants are generally better placed to recover from being disturbed.
You see this with bulbs, garden plants, and seasonal growers. Some plants really do have a clear growing season, and timing matters.
But houseplants are a little different.
Your indoor jungle doesn’t always run on the same clock as the garden outside.
If your plants are growing under grow lights, living in a warm room, sitting in a cabinet, or kept in a fairly consistent environment all year round, they may not follow the traditional spring-and-winter routine quite so neatly.
You might find a plant needs potting up in autumn.
You might discover roots bursting out of the drainage holes in winter.
You might have an Alocasia growing happily under lights while the weather outside is doing its usual grey British performance.
So does spring matter?
Yes, sometimes.
But is spring the only time you can repot?
No.
The Truth
Not every houseplant needs repotting in spring, and not every houseplant needs repotting every year.
The better question is not, “Is it spring?”
The better question is, “Is this plant ready?”
-
Plants respond to their growing conditions, not just the calendar. Light, temperature, moisture, nutrients, and the plant’s own growth cycle all influence when it is actively growing. Spring is often useful because natural light increases, but indoor growing setups can extend or shift that growing period.
Signs your plant may need repotting include:
Roots growing out of the drainage holes
Water running straight through the pot
The plant drying out much faster than usual
Roots circling tightly around the pot
The potting mix breaking down or becoming compacted
The plant becoming unstable in its pot
Spring can be a brilliant time to repot, especially if your plant is starting to grow again.
But if your indoor jungle is actively growing at another time of year, and the plant is clearly telling you it needs more space, then it may not care what month it is.
Plants don’t run on our calendars.
They run on their own little leafy clocks.
Myth #6: Coffee Grounds Are Great for Houseplants
This is one of those plant hacks that seems to come back around every few months.
Sprinkle coffee grounds on your houseplants.
Mix them into the soil.
Use them as fertiliser.
Keep pests away.
Make your plants grow wild and wonderful.
It sounds harmless enough. After all, coffee grounds are natural, and surely adding something natural to soil must be good?
Well, not always.
Like many plant myths, this one has its roots in reality. Coffee grounds can be useful, but usually not in the way people think.
The Compost Context
Used coffee grounds contain organic matter and small amounts of nutrients, including nitrogen. That makes them useful in composting, especially when mixed with plenty of carbon-rich materials like dry leaves, cardboard, bark, or paper.
But there is a big difference between adding coffee grounds to a compost heap and sprinkling them directly onto the top of a houseplant pot.
A compost heap is full of microbial activity. Things break down, change, heat up, cool down, and eventually become a much more balanced material.
A houseplant pot is not a compost heap.
It's a much smaller, more controlled environment, and adding a layer of coffee grounds can sometimes create more problems than benefits.
The Problem With Houseplants
When coffee grounds are added directly to indoor pots, they can form a dense layer on the surface of the soil.
That layer can hold moisture, restrict airflow, encourage mould, and make watering harder to judge.
And if you already struggle with fungus gnats, damp soil, or plants that hate sitting wet, adding coffee grounds may not be the leafy miracle you were hoping for.
-
Research suggests that uncomposted coffee grounds are not the same as a ready-to-use fertiliser. They may contain compounds that can affect plant growth, especially when used in large amounts or before they have properly broken down.
Composted coffee grounds are a different story. Once broken down, they can become part of a useful soil amendment.
In short: coffee grounds are usually better in the compost than straight onto your houseplants.
-
UC Master Gardener material says uncomposted coffee grounds are not a nitrogen fertiliser and recommends combining used grounds with compost rather than applying them directly.
-
Oregon State University explains that used coffee grounds are close to pH neutral after brewing, not strongly acidic, and that they provide only modest nutrition rather than enough nutrients to fully feed plants. They also mention caffeine research relating to slugs and snails.
-
The RHS says spent coffee grounds can add organic matter and small amounts of nutrients, including nitrogen, phosphorus, potassium and magnesium. However, their effect on soil pH is minor and temporary, and they are best used in small quantities or composted first.
It can turn the top of the pot into a tiny composting experiment, and your Calathea did not sign a consent form for that.
But Aren't Coffee Grounds Acidic?
This is another part of the myth that gets repeated a lot.
People often say coffee grounds are good for acid-loving plants because coffee is acidic.
But once coffee has been brewed, used coffee grounds are usually much closer to neutral than people expect. So they are not a reliable way to acidify soil for plants that prefer lower pH.
Again, the advice started with a little truth, then wandered off into the jungle without a map.
What About Slugs and Snails?
This is where coffee grounds do have some interesting research behind them.
Caffeine can affect slugs and snails, and research has shown that caffeine solutions can be harmful to them.
But that doesn't mean a sprinkle of used coffee grounds around a pot is a guaranteed slug forcefield.
Outdoors, rain, watering, soil type, and how much caffeine is actually left in the grounds all change how effective they might be. Indoors, slugs and snails are not usually the main problem for most houseplants anyway.
The Truth
Coffee grounds are not useless.
They are just not a magic houseplant fertiliser.
If you want to use them, composting is usually the better route. Let them break down properly, mix them with other materials, and use the finished compost as part of a balanced approach.
For houseplants, I would rather use a suitable potting mix and a proper fertiliser than guess what my plant is getting from yesterday's coffee.
The myth isn't that coffee grounds can never be useful.
The myth is that every houseplant wants a cappuccino sprinkled on its roots.
Myth #7: Banana Peel Water Is a Miracle Fertiliser
This is one of those plant hacks that sounds almost too wholesome to question.
Eat a banana.
Pop the peel in water.
Leave it to soak.
Water your plants.
Instant natural fertiliser.
Lovely, right?
Well, sort of.
Like many plant myths, this one has its roots in reality. Banana skins do contain nutrients, including potassium, magnesium, calcium and phosphorus. Potassium is important for plants, especially when it comes to water movement, overall plant health and flowering or fruiting.
So the idea itself didn't appear from nowhere.
The problem is what happens when that idea gets simplified into: "banana water will feed your houseplants."
Compost Is Not the Same as Banana Water
Banana skins can be useful when they are allowed to break down properly.
In compost, they become part of a bigger process. Microbes, fungi, moisture, air and time all work together to turn organic waste into something more useful for plants.
But soaking a banana peel in a jar of water for a few days is not the same thing as composting.
-
Banana skins contain useful nutrients, but homemade banana peel water is unpredictable. The nutrient levels depend on the peel, the amount of water, how long it is soaked, and how it is stored.
In short: banana peel water may be a very mild feed, but it is not a balanced fertiliser.
You may extract a small amount of nutrients into the water, but you don't really know how much. You also don't know whether the final liquid is balanced, strong enough to do anything useful, or starting to become a tiny swamp potion on your windowsill.
And as magical as swamp potion sounds, I'm not sure my Alocasia asked for it.
The Houseplant Problem
For outdoor garden plants, a very diluted homemade feed may not cause much trouble, especially if it is watered into the soil.
Houseplants are different.
They are growing in a small pot, often indoors, with limited airflow and carefully managed moisture. Adding sugary, decomposing plant liquid can encourage mould, bacteria, fungus gnats or unpleasant smells.
That doesn't mean one splash of banana water will destroy your plant.
But it does mean I wouldn't treat it as a regular houseplant fertiliser.
What I’d Do Instead
If you want to use banana skins, I would add them to compost rather than soaking them for houseplants.
Let them break down properly first.
If your plant genuinely needs feeding, use a balanced fertiliser that tells you what nutrients it contains and how much to use.
That way you're not guessing what your plant is getting from a banana peel in a jar.
The Truth
Banana skins are not useless.
Banana peel water just isn't the miracle fertiliser social media sometimes makes it out to be.
The myth isn't that banana skins contain nutrients.
The myth is that soaking them in water creates a complete, reliable plant feed for every houseplant.
Once again, context matters.
A Few Other Plant Myths That Lost Their Context
Of course, these are not the only plant myths floating around the internet.
Once you start noticing them, they seem to pop up everywhere like fungus gnats after one overenthusiastic watering.
Here are a few honourable mentions.
Ice Cubes Are a Good Way to Water Plants
-
Ice Cubes Are a Good Way to Water Orchids
This one always makes me pause because, honestly, why are we putting frozen water on a tropical plant?
The context usually comes from Phalaenopsis orchids, the common houseplant orchid often sold in supermarkets and garden centres. The idea was to make watering feel simple and measurable: a few ice cubes, once a week, slowly melting into the bark.
There has even been research showing that controlled ice cube watering did not reduce plant quality in potted Phalaenopsis orchids grown in bark.
But that is the key bit: Phalaenopsis orchids, in bark, with a controlled amount of ice.
Somewhere along the way, that specific advice became a viral plant hack.
The myth is not that one ice cube will instantly kill every orchid.
The myth is that frozen water is the best way to water tropical houseplants.
-
Research on potted Phalaenopsis orchids grown in bark found that controlled ice cube watering did not reduce display life or plant quality. But this evidence is specific to Phalaenopsis orchids in bark, not all tropical houseplants. Sources: Ohio State University and HortScience.
-
Flowers Are Bad for the Plant's Energy
This is one I see a lot with Alocasia.
As soon as an Alocasia produces an inflorescence, people often panic and say to cut it off so the plant can put its energy back into leaves.
I understand where the idea comes from. Flowers do take energy to produce, and if you grow Alocasia mainly for the foliage, it can feel frustrating when the plant suddenly decides to make blooms instead of leaves.
But this is another myth that has lost its context.
Alocasia breeder and aroid grower LariAnn Garner has explained that flowering is driven by internal hormonal processes and environmental triggers. In other words, once the plant has entered a flowering cycle, cutting off the bloom does not simply switch the plant back into leaf mode.
The plant may still continue trying to flower, and if the inflorescence is removed too early, it may lose the chance to recycle some of the nutrients from that structure as it naturally fades.
So no, I wouldn't panic-cut Alocasia flowers just because someone online said they are stealing energy.
For me, if the plant is healthy, I let the inflorescence do its thing and remove it once it has naturally died back.
The myth isn't that flowers use energy.
The myth is that cutting them off always gives that energy back to the leaves.
-
Alocasia inflorescences are part of the plant's natural reproductive cycle. According to Alocasia breeder LariAnn Garner, removing blooms does not stop the internal flowering cycle that has already begun. Letting the bloom fade naturally may allow the plant to recycle some nutrients before it dies back.
This one is often linked to orchids, but most tropical houseplants are not asking for tiny frozen boulders on their roots.
For most plants, room-temperature water and a proper watering routine are far better.
Flowers Are Bad for the Plant's Energy
Flowering does take energy, but that does not automatically make it bad.
For many plants, flowering is a sign that they are mature, healthy, or responding to their environment. You might remove flowers if you want the plant to focus on foliage, but blooms are not automatically a problem.
Mayonnaise Makes Leaves Healthy and Shiny
Mayo might make leaves look shiny for five minutes, but it can also leave a greasy coating that attracts dust and may interfere with the leaf surface.
A damp cloth is usually a much better option.
Misting Dramatically Increases Humidity
Misting can temporarily wet the air and leaf surface, but it does not usually raise humidity for long.
If a plant genuinely needs higher humidity, a humidifier, cabinet, grouped plants, or a more suitable growing environment will usually make a bigger difference.
Yellow Leaves Always Mean Overwatering
Yellow leaves can mean many things: overwatering, underwatering, low light, old leaves naturally dying off, nutrient issues, temperature stress, pests, or root problems.
The yellow leaf is not the answer.
It is the plant asking you to investigate.
Final Thoughts: Context Matters
The more I look at houseplant myths, the more I realise that most of them did not appear from nowhere.
They usually started as advice for a specific plant, a specific problem, or a specific growing setup.
Remove old soil if there is rot.
Size up your pot when the roots need more room.
Loosen roots if they are severely compacted.
Use clay balls if they are part of a growing method you understand.
Compost coffee grounds and banana skins instead of treating them like instant plant magic.
The problem starts when that context disappears.
A useful technique becomes a rule.
A small experiment becomes a hack.
A bit of gardening wisdom gets passed around until nobody remembers what it was originally trying to solve.
And that is where plant care can become confusing.
For me, good plant care is not about following every rule perfectly. It is about learning to notice what your plant is actually telling you.
Is it actively growing?
Are the roots healthy?
Is the potting mix still working?
Is the plant drying out too quickly, staying wet too long, or looking unstable in its pot?
Those questions will usually teach you far more than a one-size-fits-all plant hack ever could.
So the next time you see a piece of houseplant advice online, maybe pause before adding it to your routine.
Ask where it came from.
Ask what problem it is trying to solve.
Ask whether it applies to your plant, your pot, your home, and your growing setup.
Because the truth is, plants do not need us to follow myths.
They need us to pay attention.
And that is where the real magic of growing begins.
Whether you're refreshing soil, checking roots, rescuing a struggling plant, or just having a nosey at what's happening below the surface, repotting is one of the best ways to understand your plants better.
And of course, having a good repotting setup makes the whole process much less chaotic.
So grab your potting mix, choose the right-sized pot, roll out your Jungle Floor Creative repotting mat, and let the plant show you what it needs.
Understanding Begonias: From Forest Floor to Stone (And How to Care for Them Indoors)
It’s easy to read the care tags that come with plants, but they rarely tell the full story, and can often leave you more puzzled than before.
🌿 Understanding your begonia’s world
It’s easy to read the little care tag that comes with a plant… but if you’ve ever stood there thinking “okay, but why?” — you’re not alone.
Begonias don’t all come from the same place, and that’s where things get interesting.
Some grow low along soft forest floors, others stretch upwards through the understory, and some cling to rock where soil barely exists at all. So when we try to care for them all in the same way, it’s no surprise things don’t always go to plan.
According to the Royal Botanic Garden Edinburgh, there are over 2,200 species of Begonia, found across tropical and subtropical regions of Central and South America, Africa, and Asia. But what really matters isn’t just where they grow, it’s how they grow once they’re there.
Each begonia carries a little piece of its environment with it. And once you start to notice that, care becomes a lot less confusing.
In this blog, I want to simplify things by looking at three main environments:
🌱 Forest floor
🌿 Vertical understory
🪨 Limestone and rocky habitats
From these, we can understand the three most common types of begonia you’ll come across indoors:
Rhizomatous / Rex
Cane begonias
Limestone and rocky types
I’ll share what I’ve learned through research, along with my own experience growing them, so you can start to read your plant a little differently.
Because once you understand where a begonia comes from, caring for it stops feeling like following rules… and starts feeling more like a conversation.
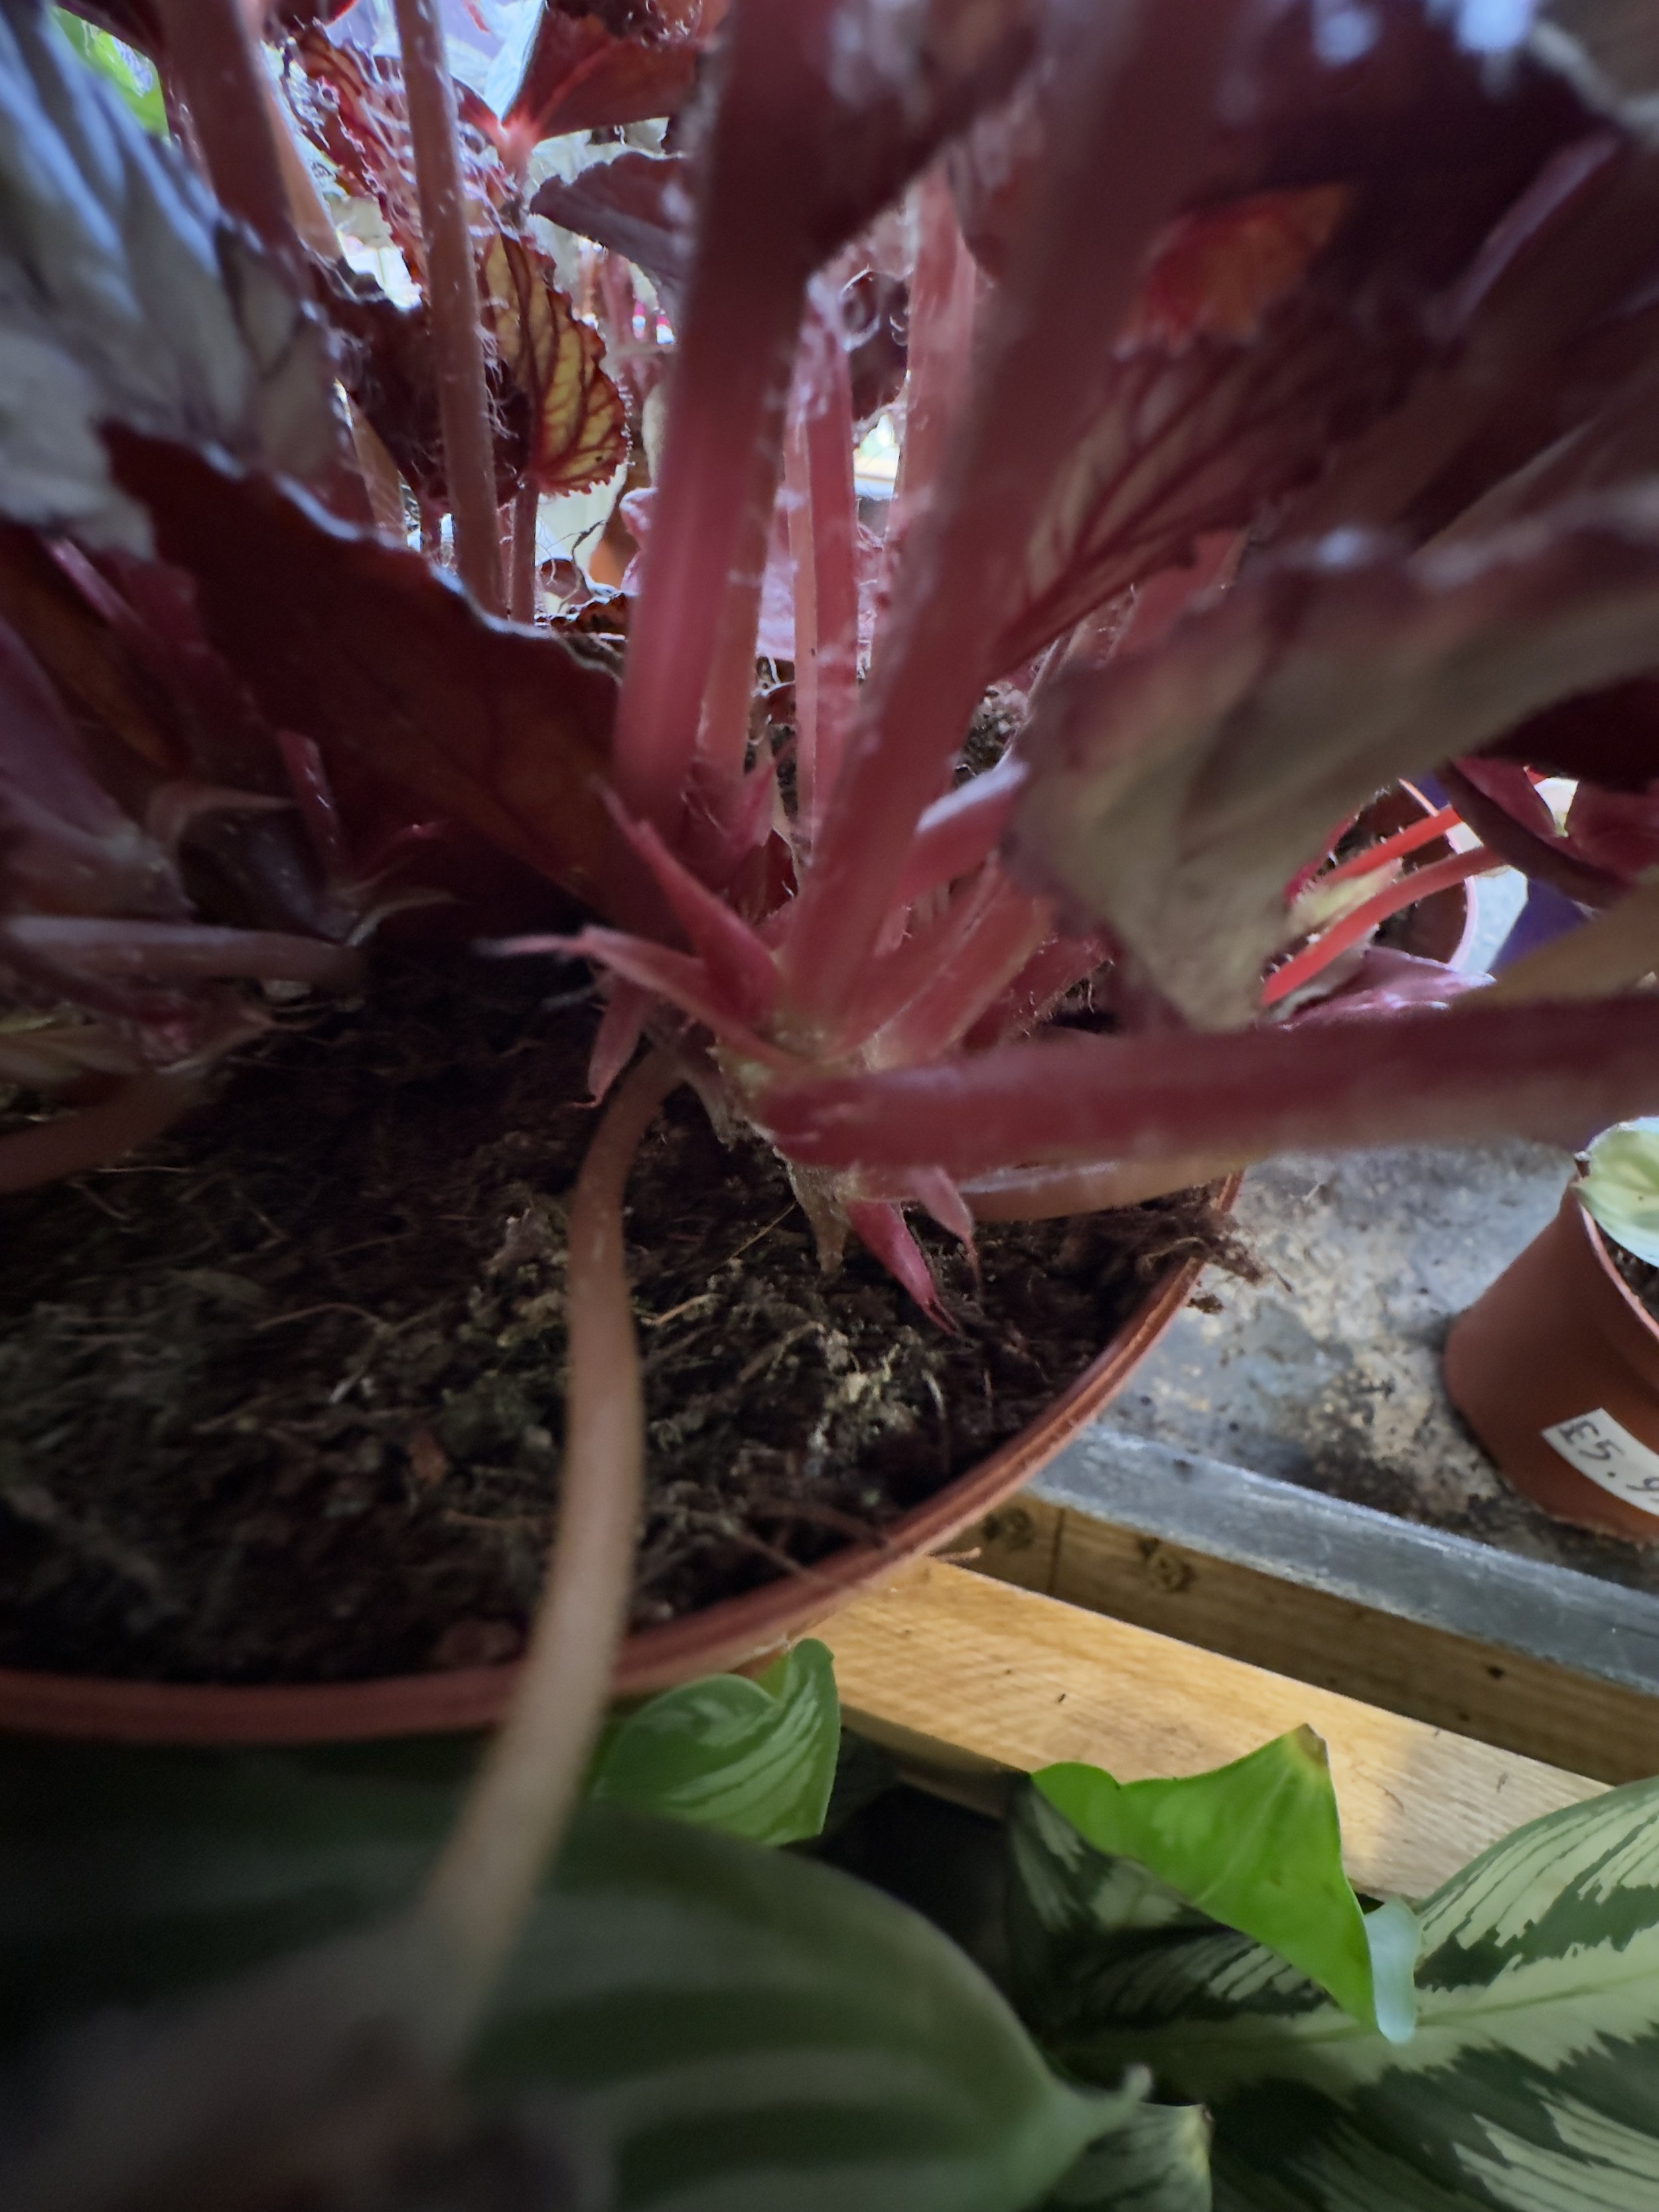
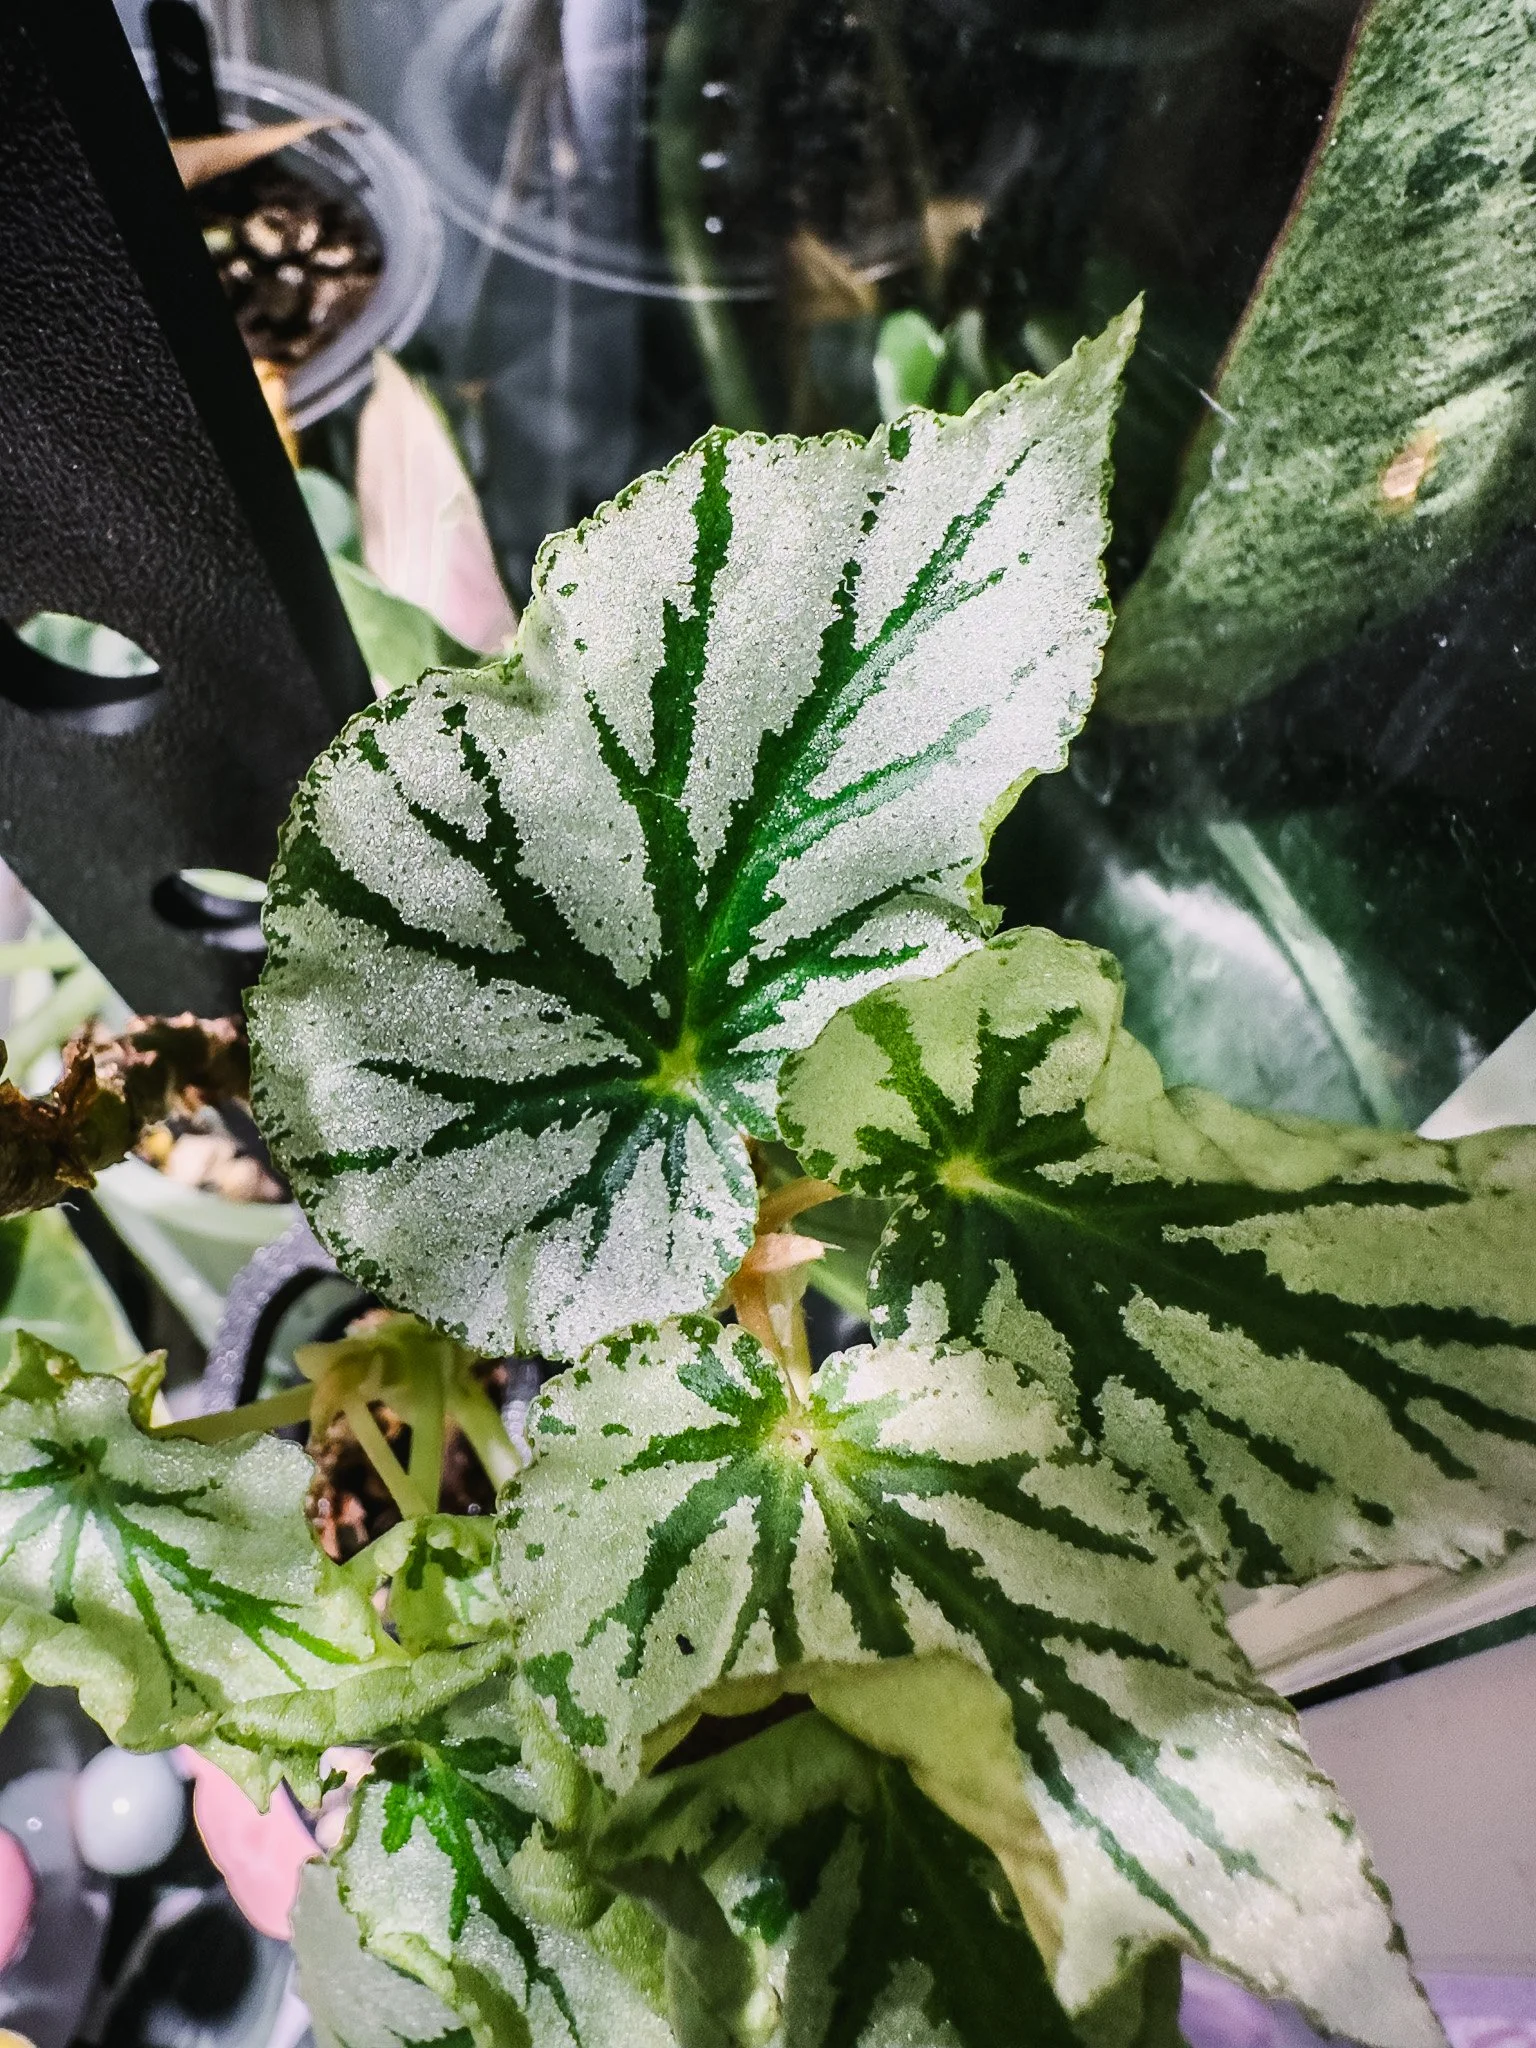
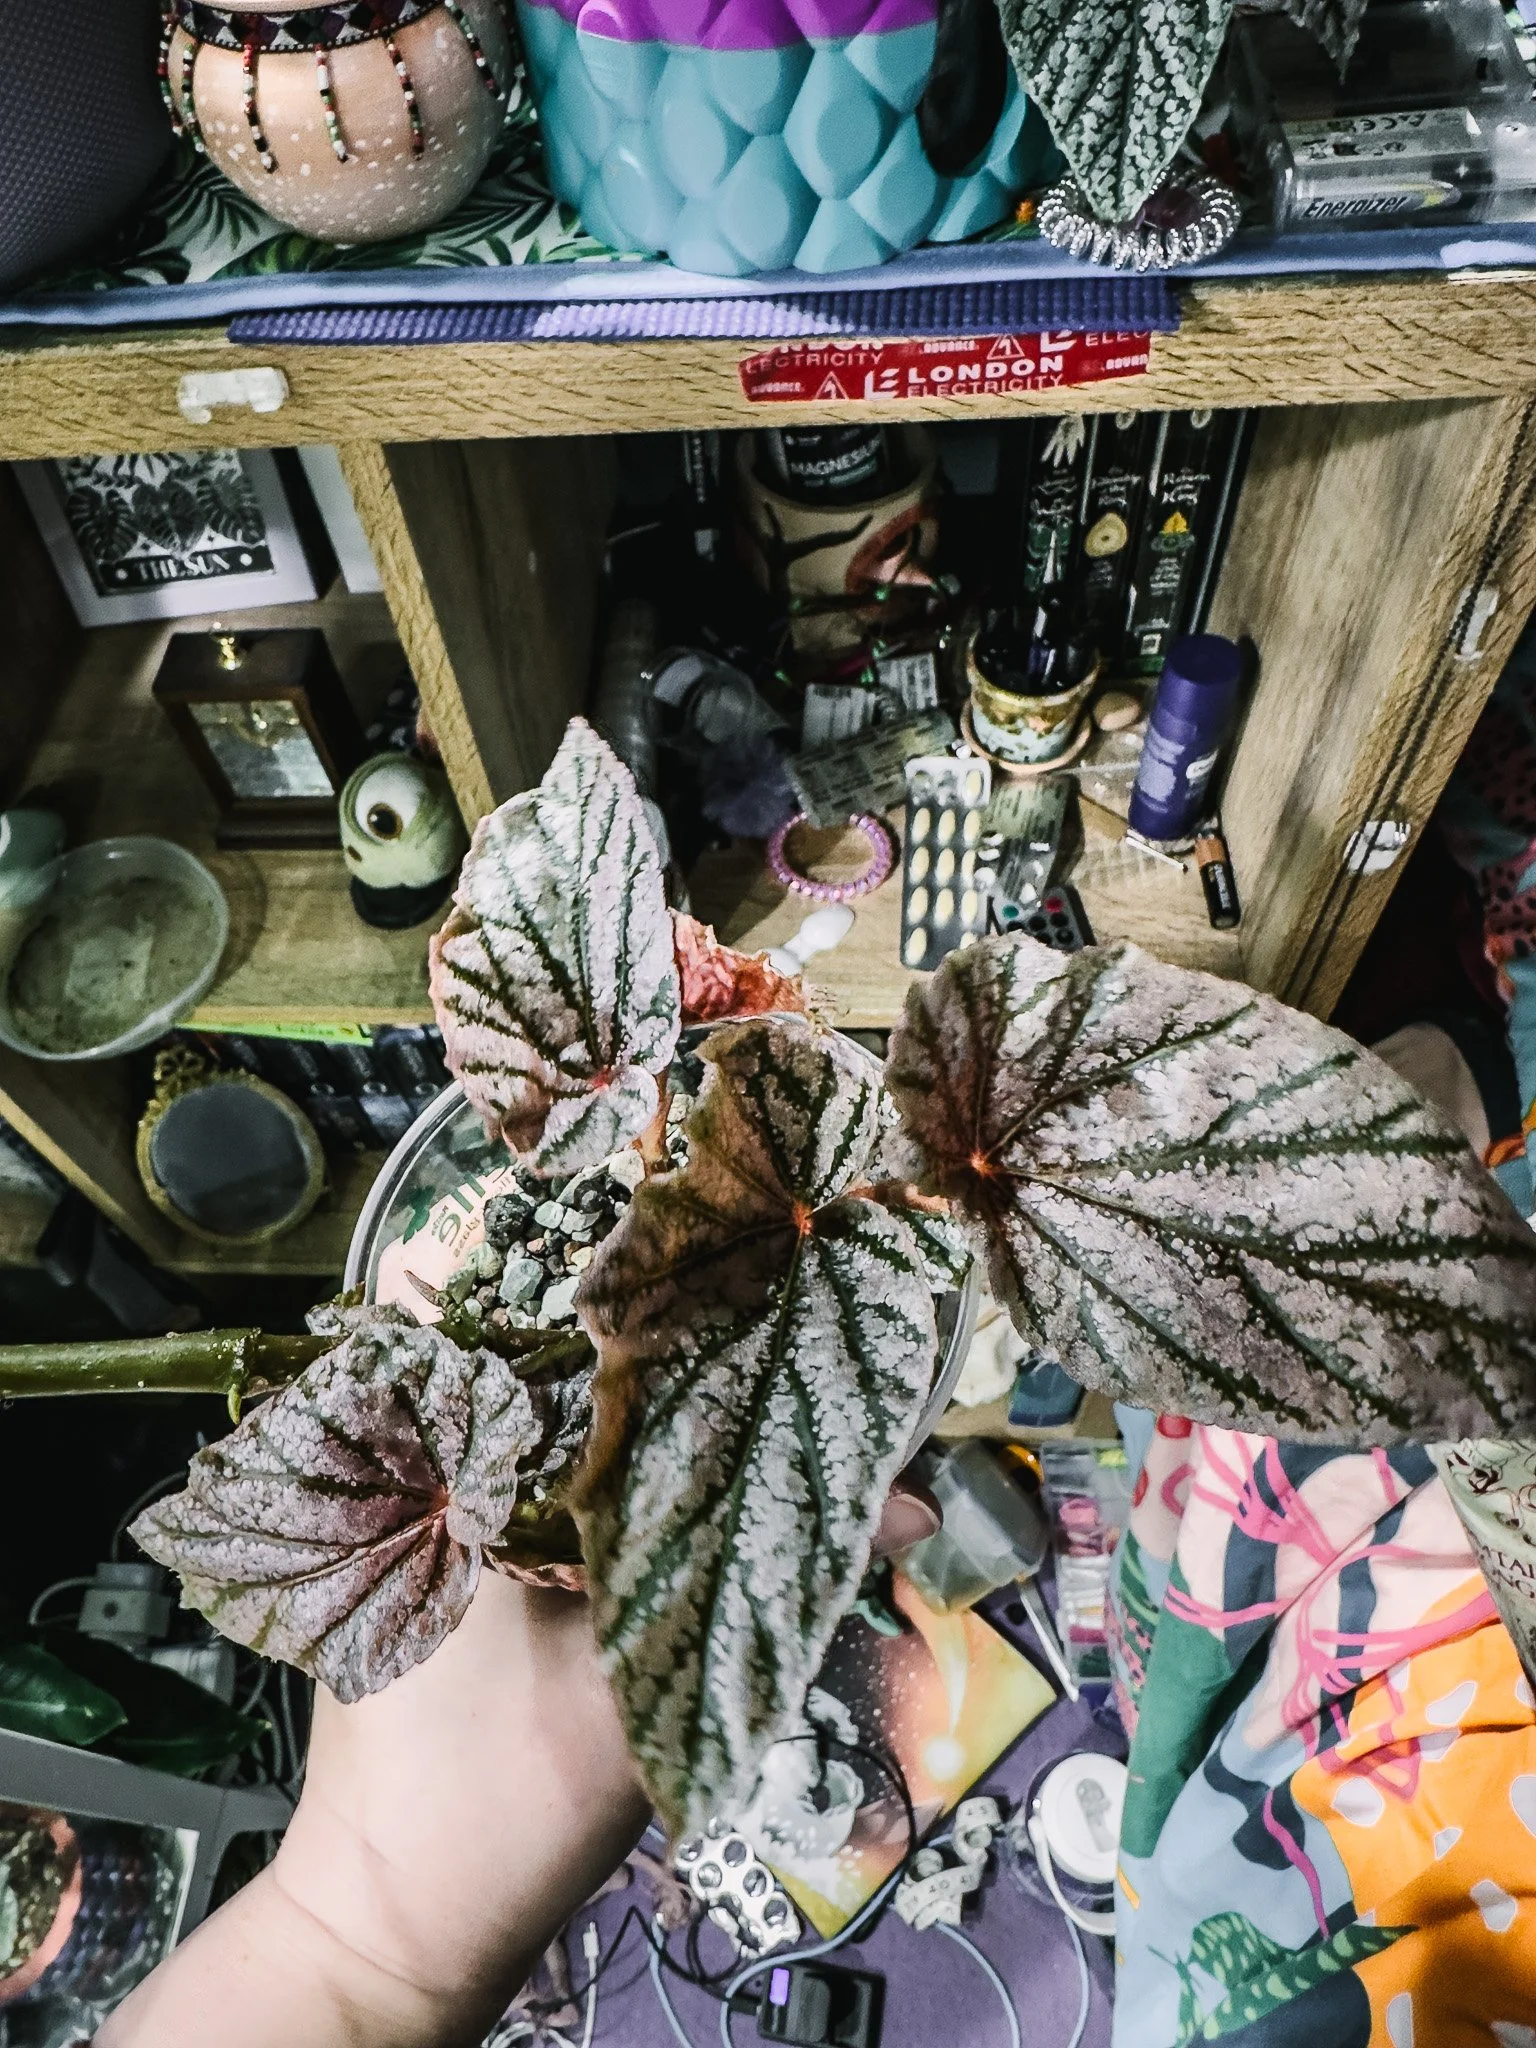
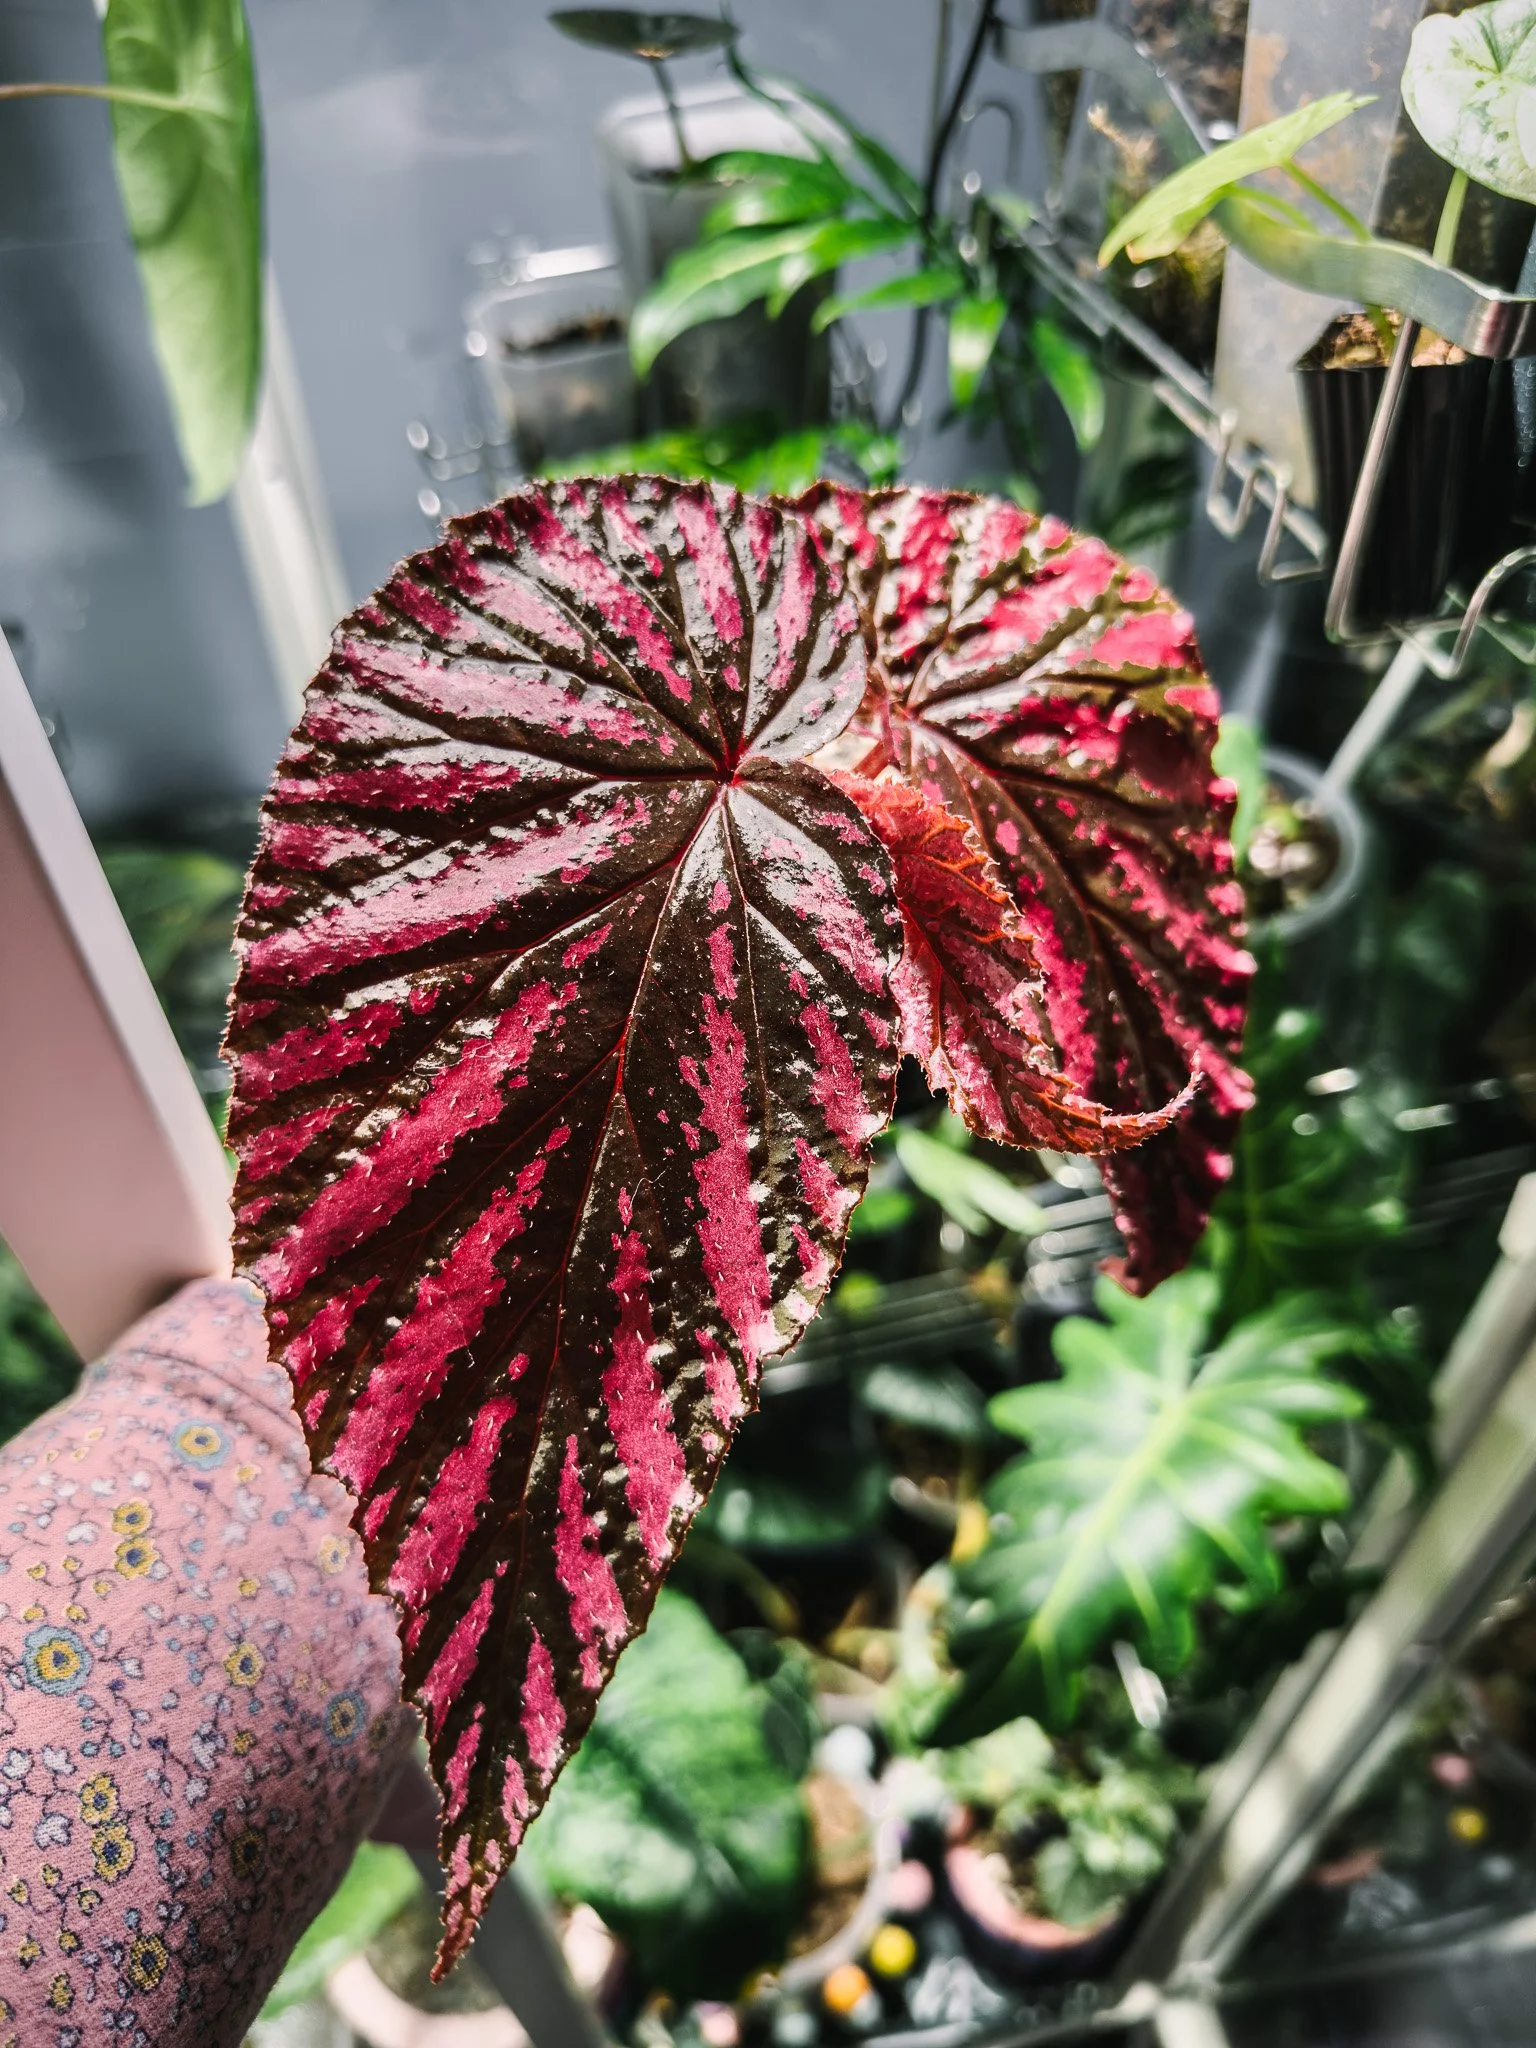
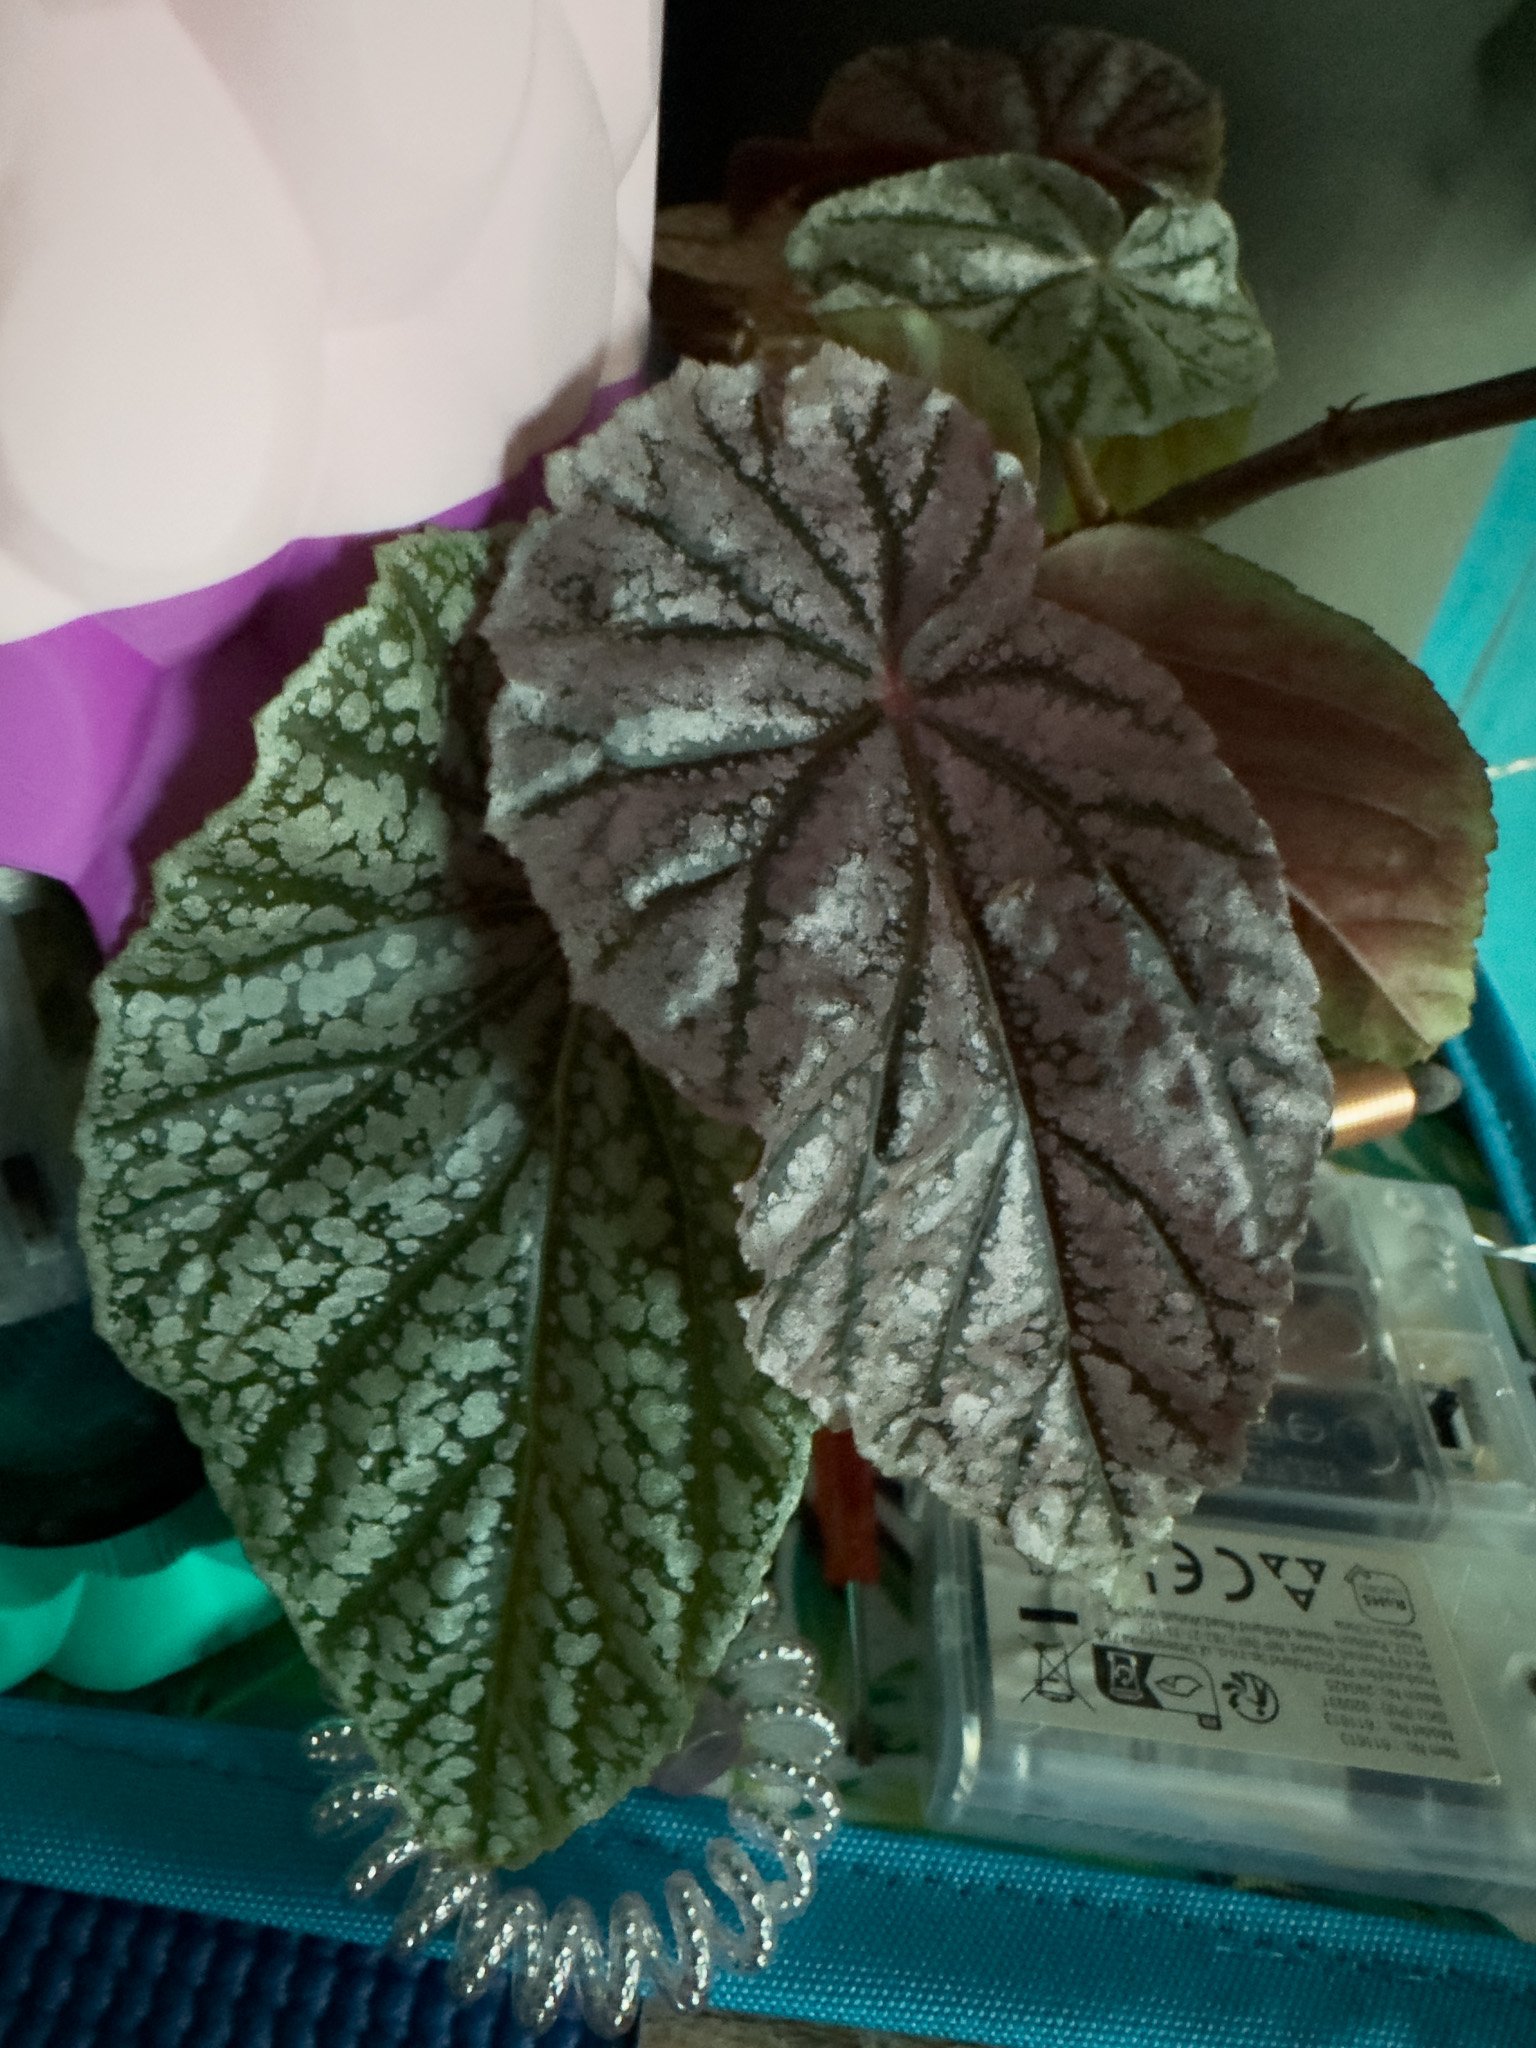
🌱 Forest floor (Rhizomatous / Rex begonias)
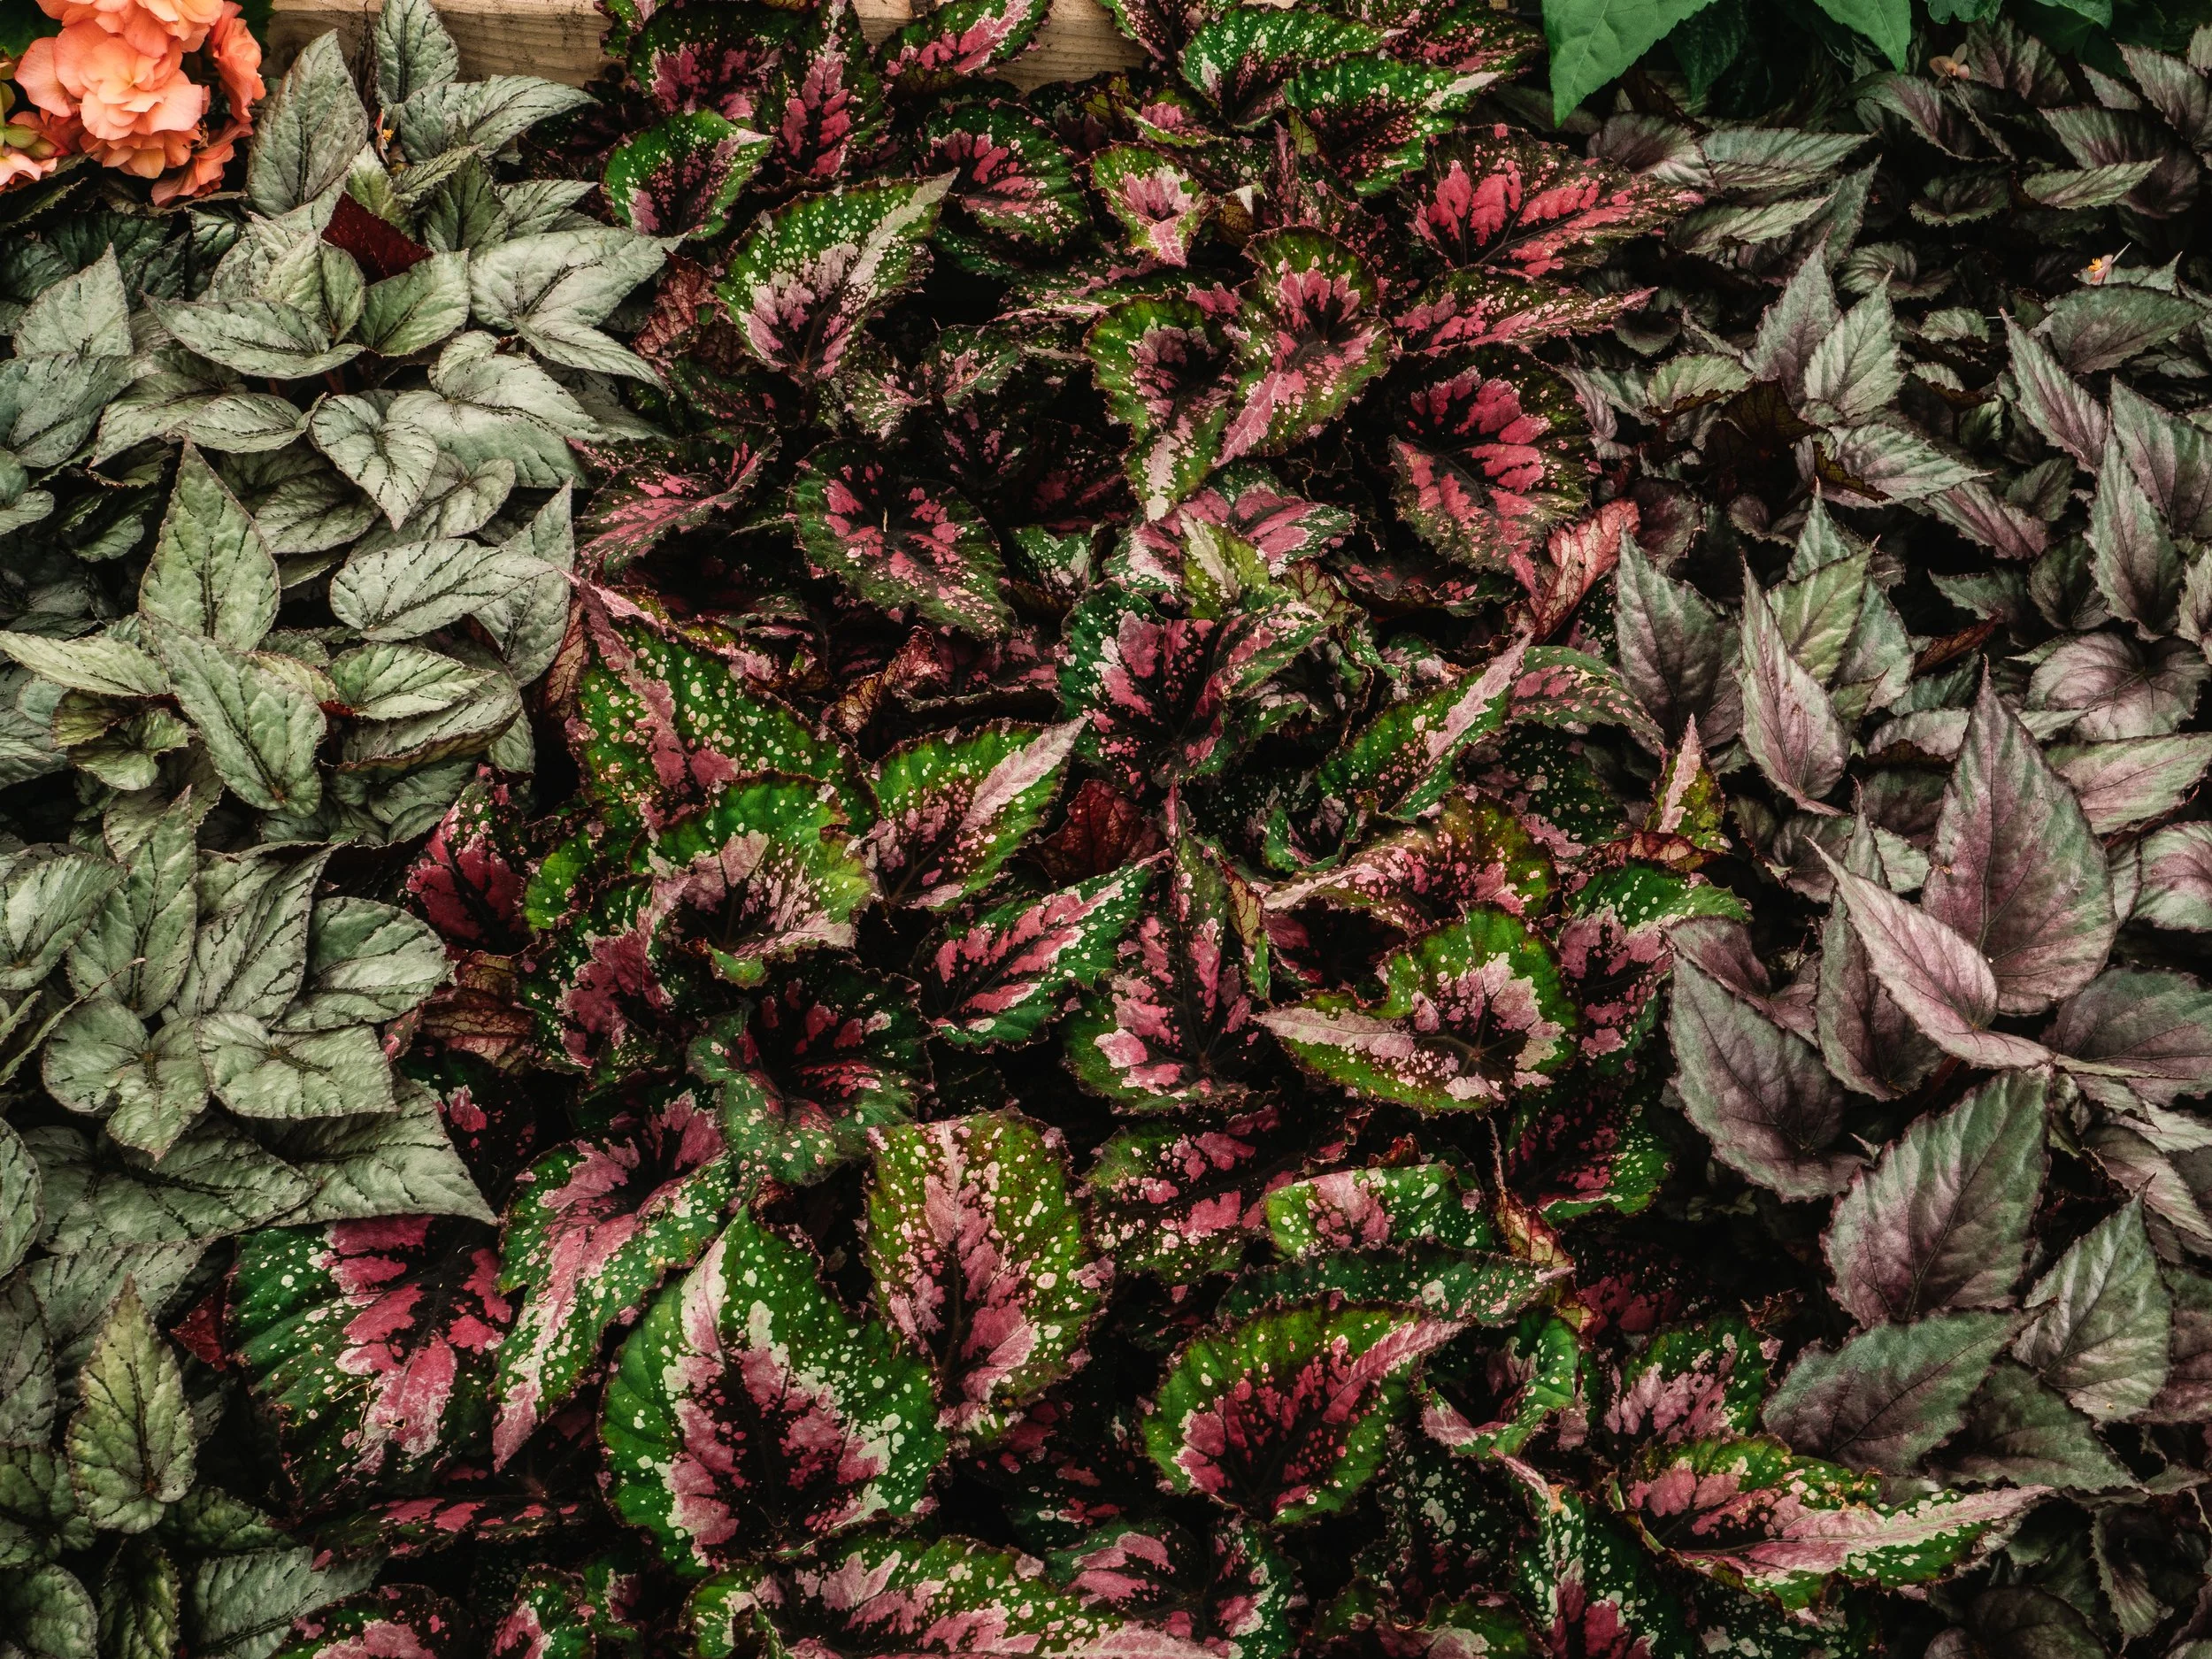
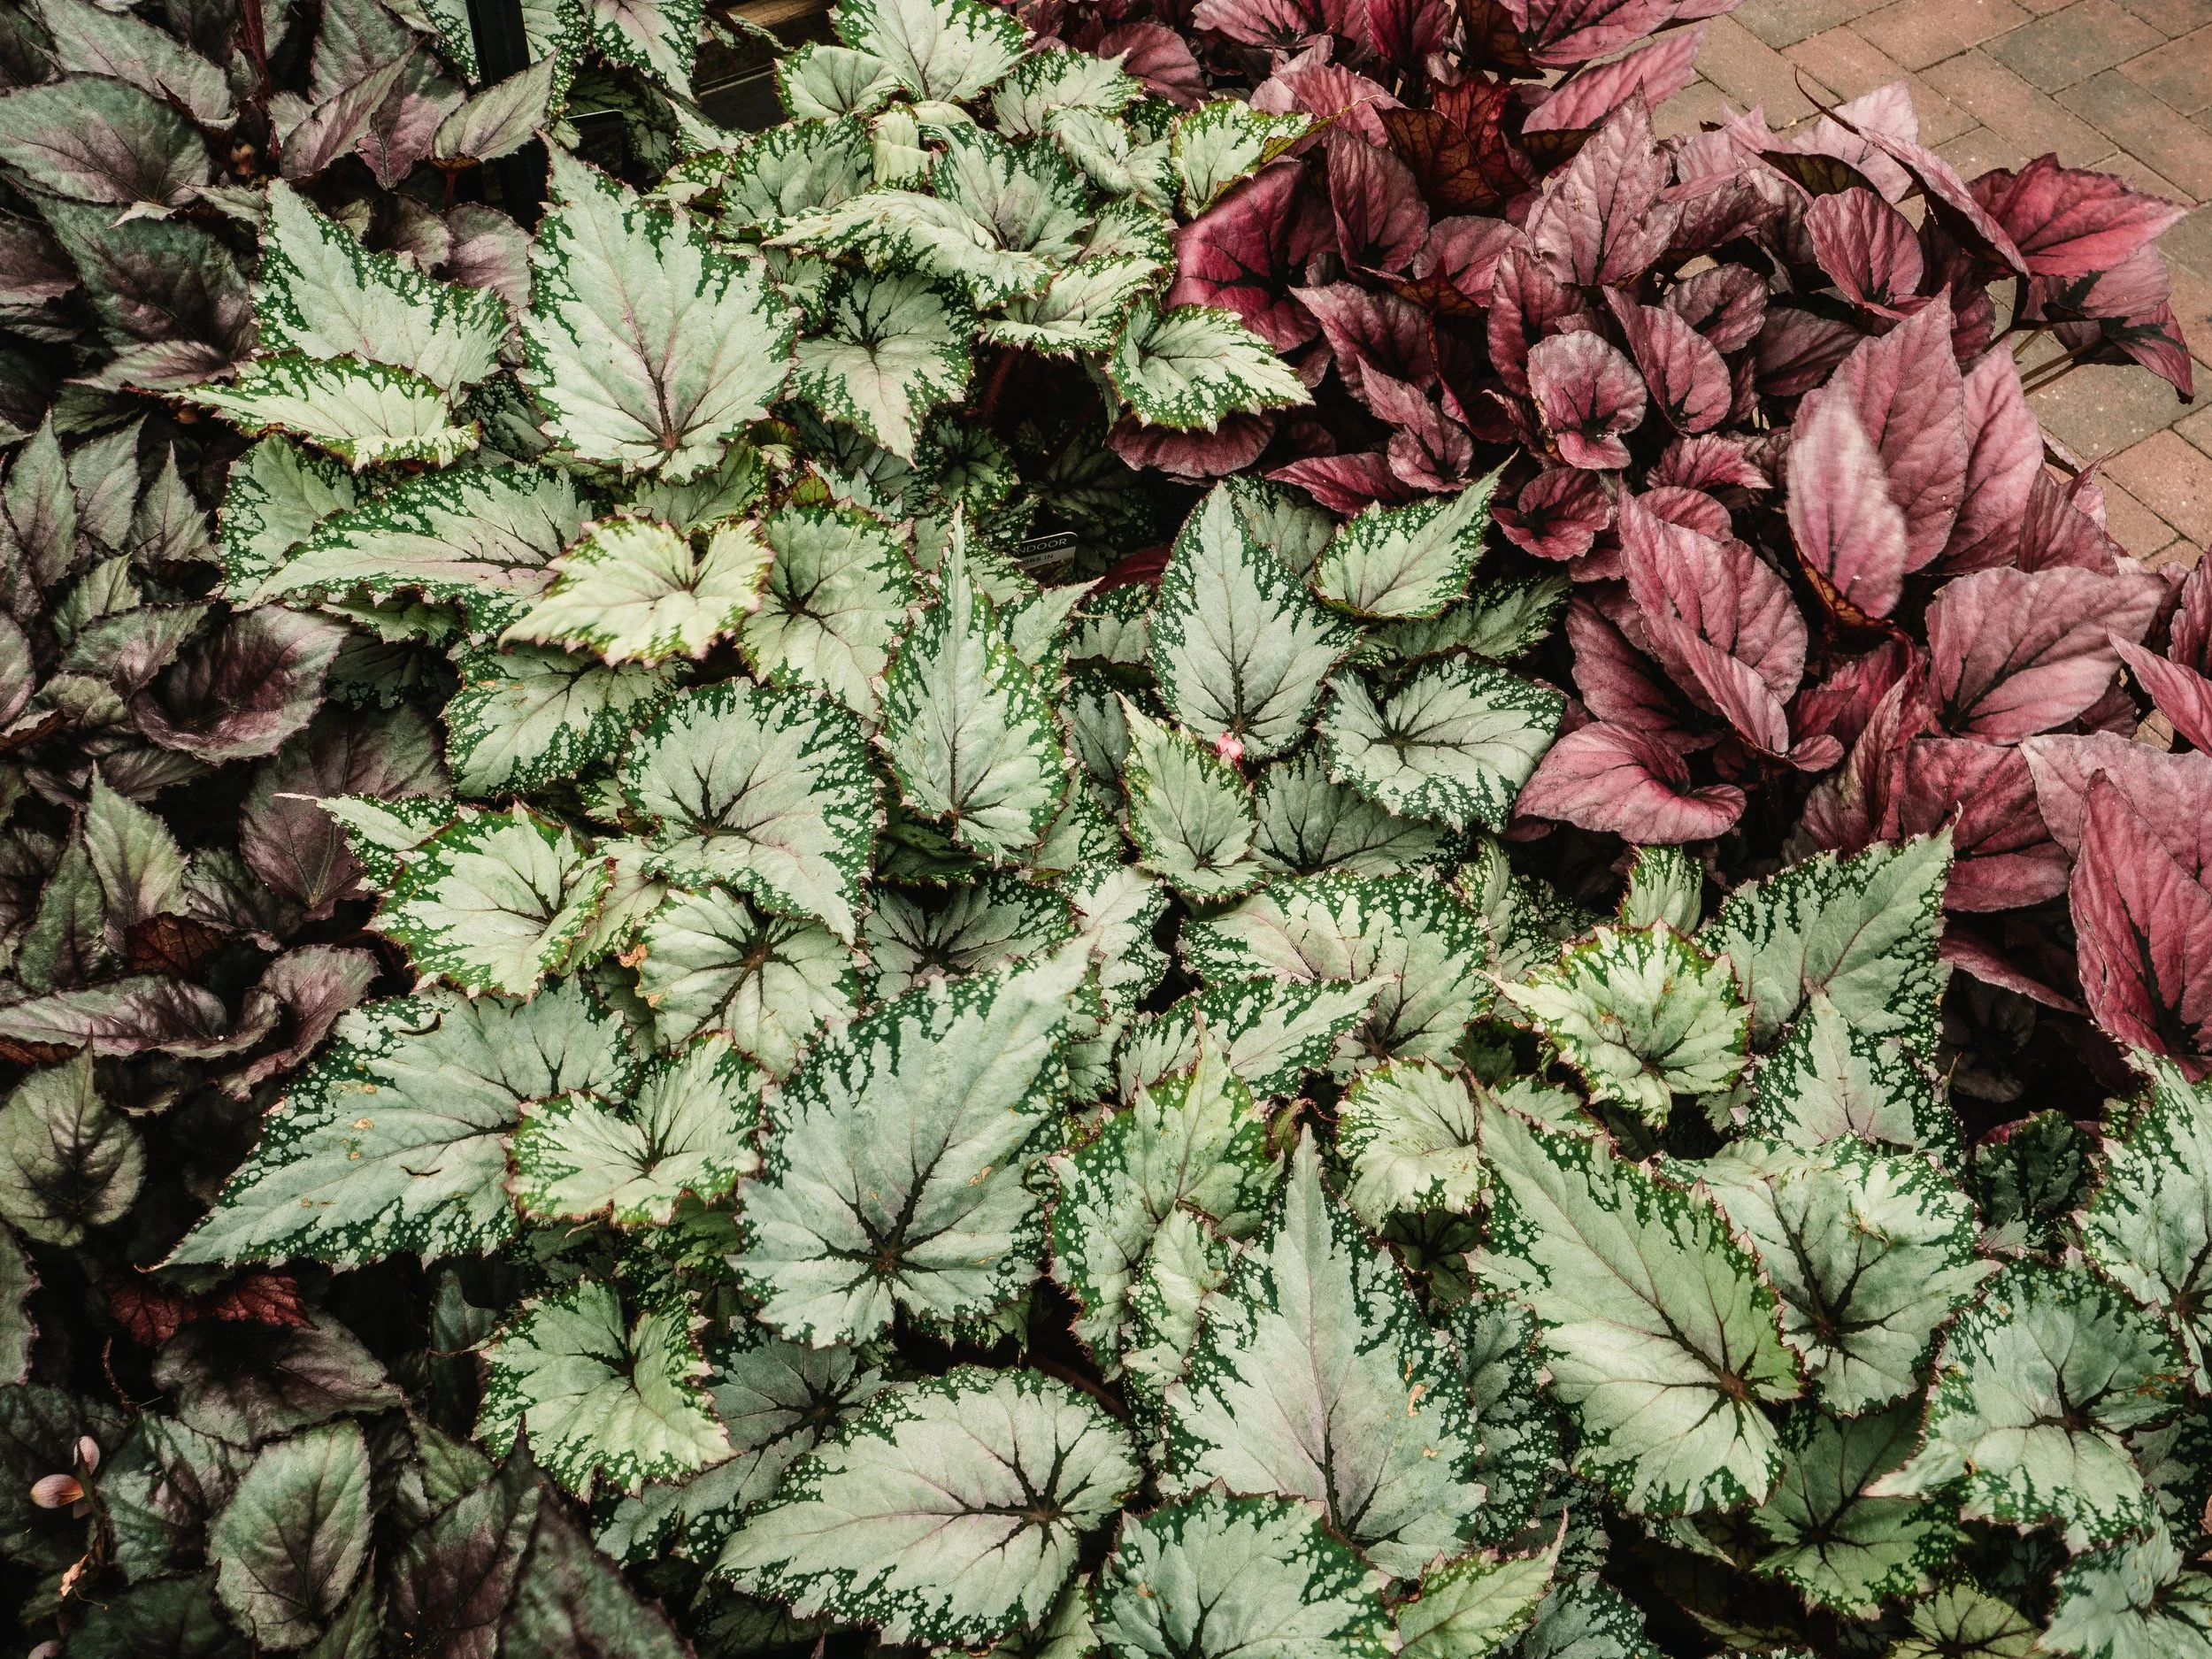
Rhizomatous and Rex-type begonias are some of the most striking indoor foliage plants, grown for their beautifully patterned, often shimmering leaves in a wide range of colours.
These begonias grow from a creeping rhizome, which sits along or just above the surface of the soil, creating a compact, spreading form.
In the wild, many originate from regions such as the eastern Himalayas, where they grow along shaded forest floors and sloped terrain, often in loose organic matter over rock. These environments provide excellent drainage while still holding gentle, consistent moisture.
This gives us an important clue to their care: they prefer a well-draining, airy soil mix and dislike sitting wet, especially around the crown, which can lead to rot.
During winter, when light levels and temperatures drop, their growth naturally slows. If you’re unable to provide consistent warmth and bright light, it’s best to reduce watering slightly. Keep the soil lightly moist, but avoid letting it become waterlogged or completely dry.
🌿 Why they work so well as houseplants
Rhizomatous begonias are loved for their texture, detail, and variety. They tend to stay more compact than cane types, making them ideal for:
shelves
terrariums
bright bathrooms
smaller indoor plant spaces
They bring that forest floor softness into your home, grounding a space rather than reaching through it.
Some well-known and much-loved varieties include:
‘Escargot’
‘Fireworks’
Begonia chloroneura
Begonia masoniana
Begonia cleopatrae
Begonia bowerae (Tiger Paws)
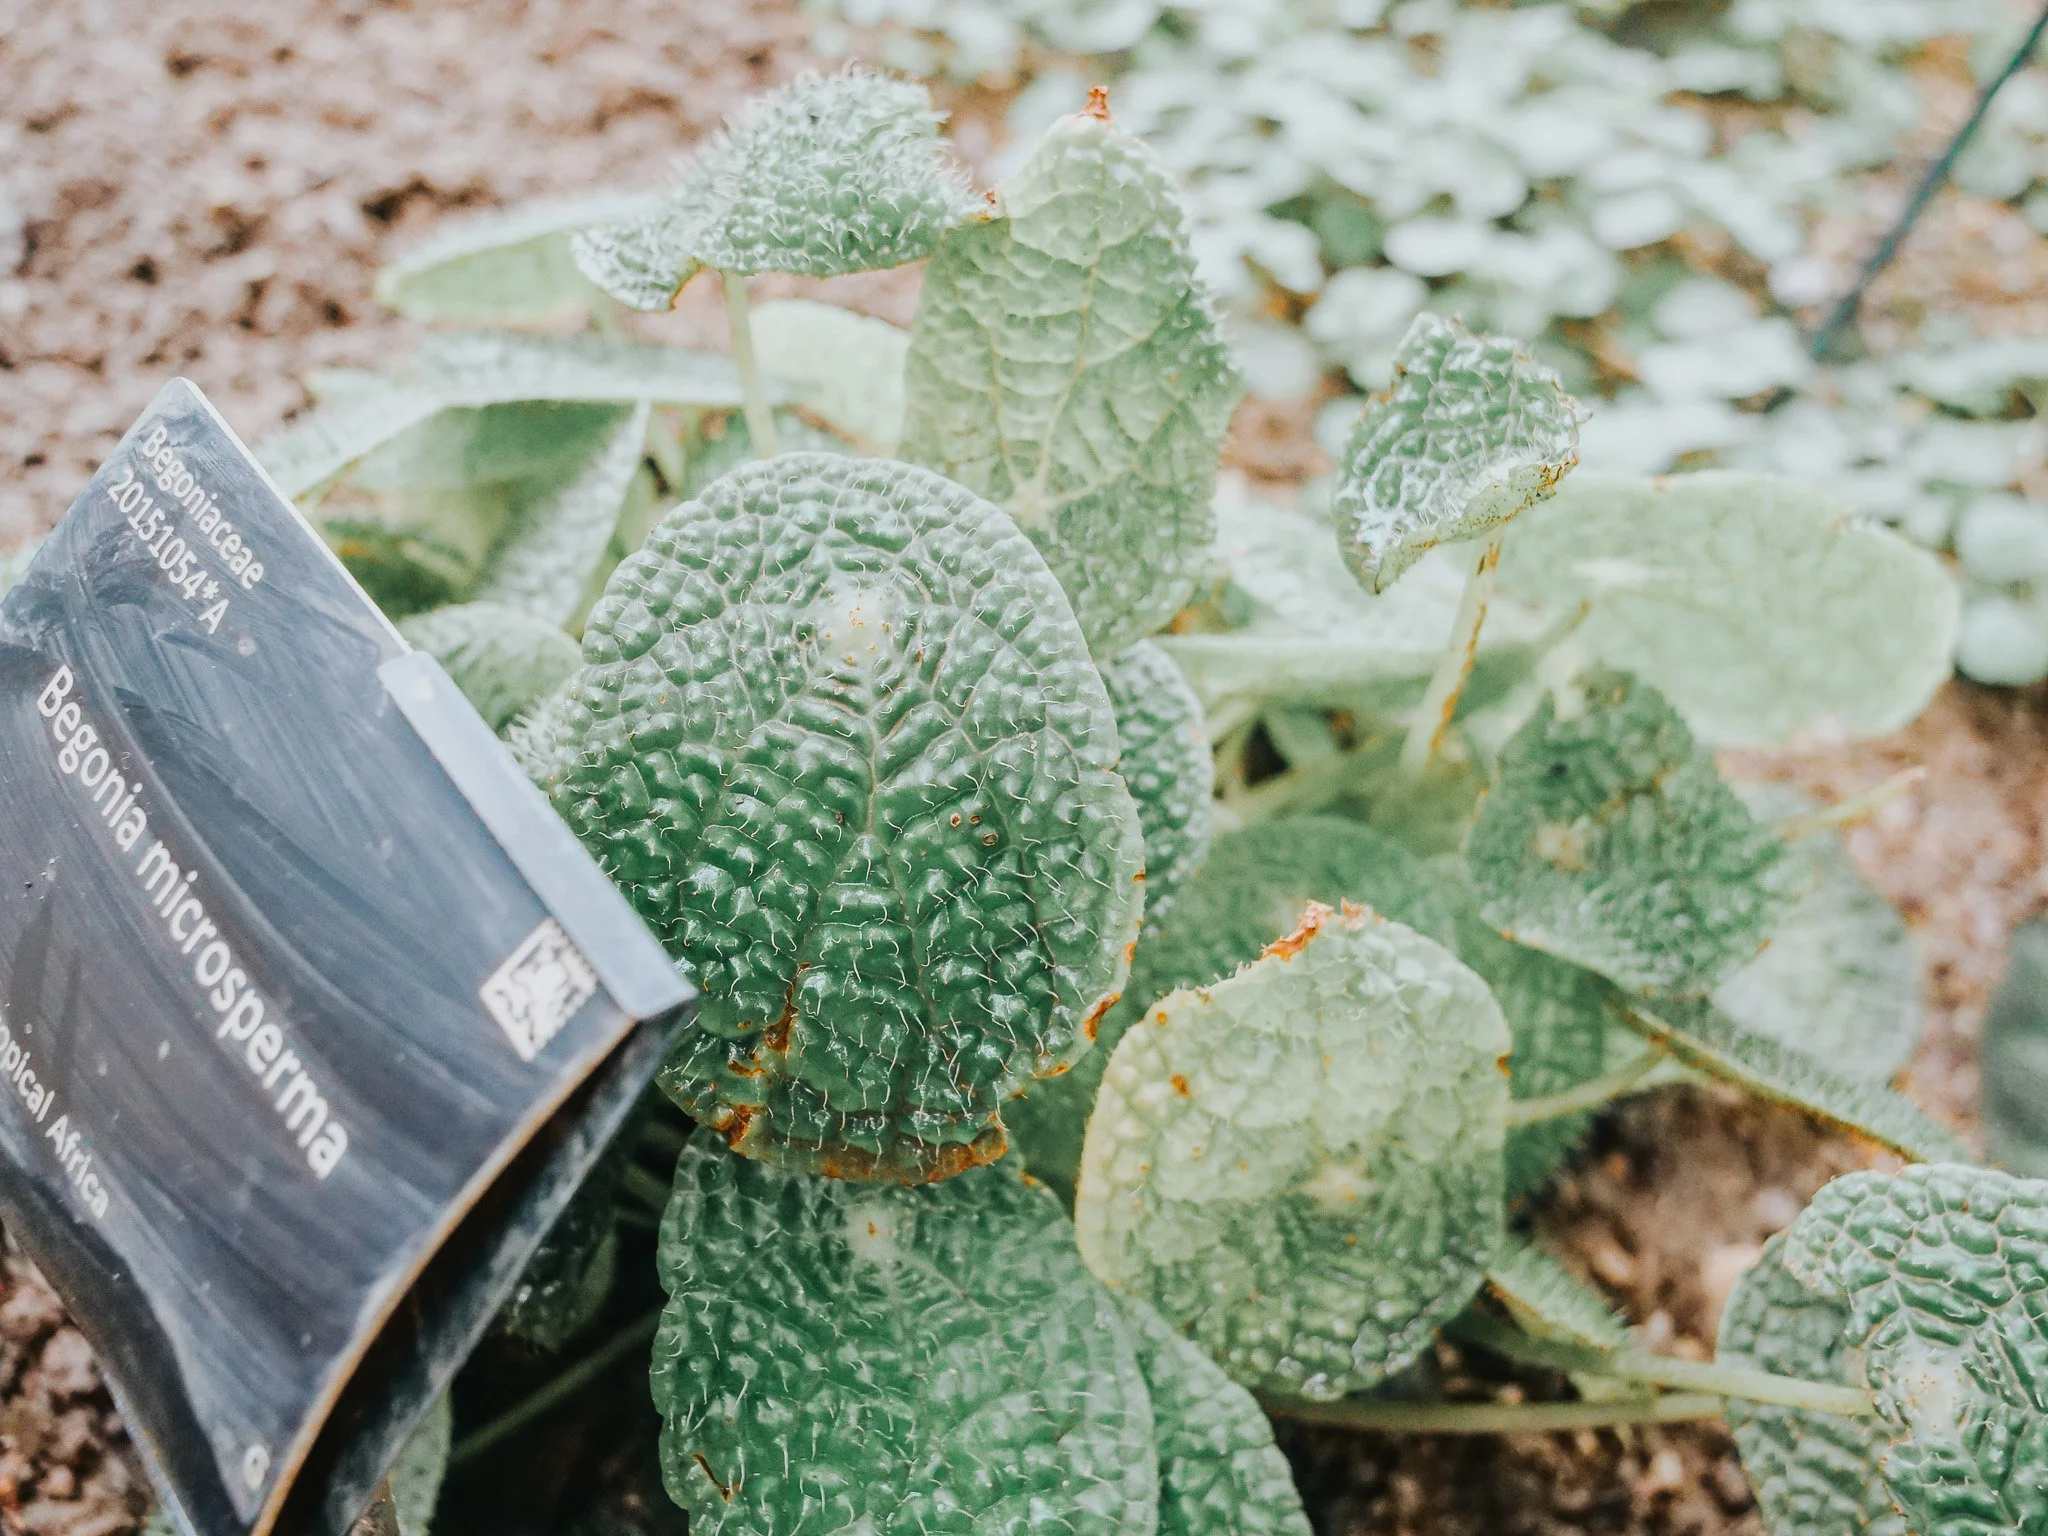
Begonia microsperma
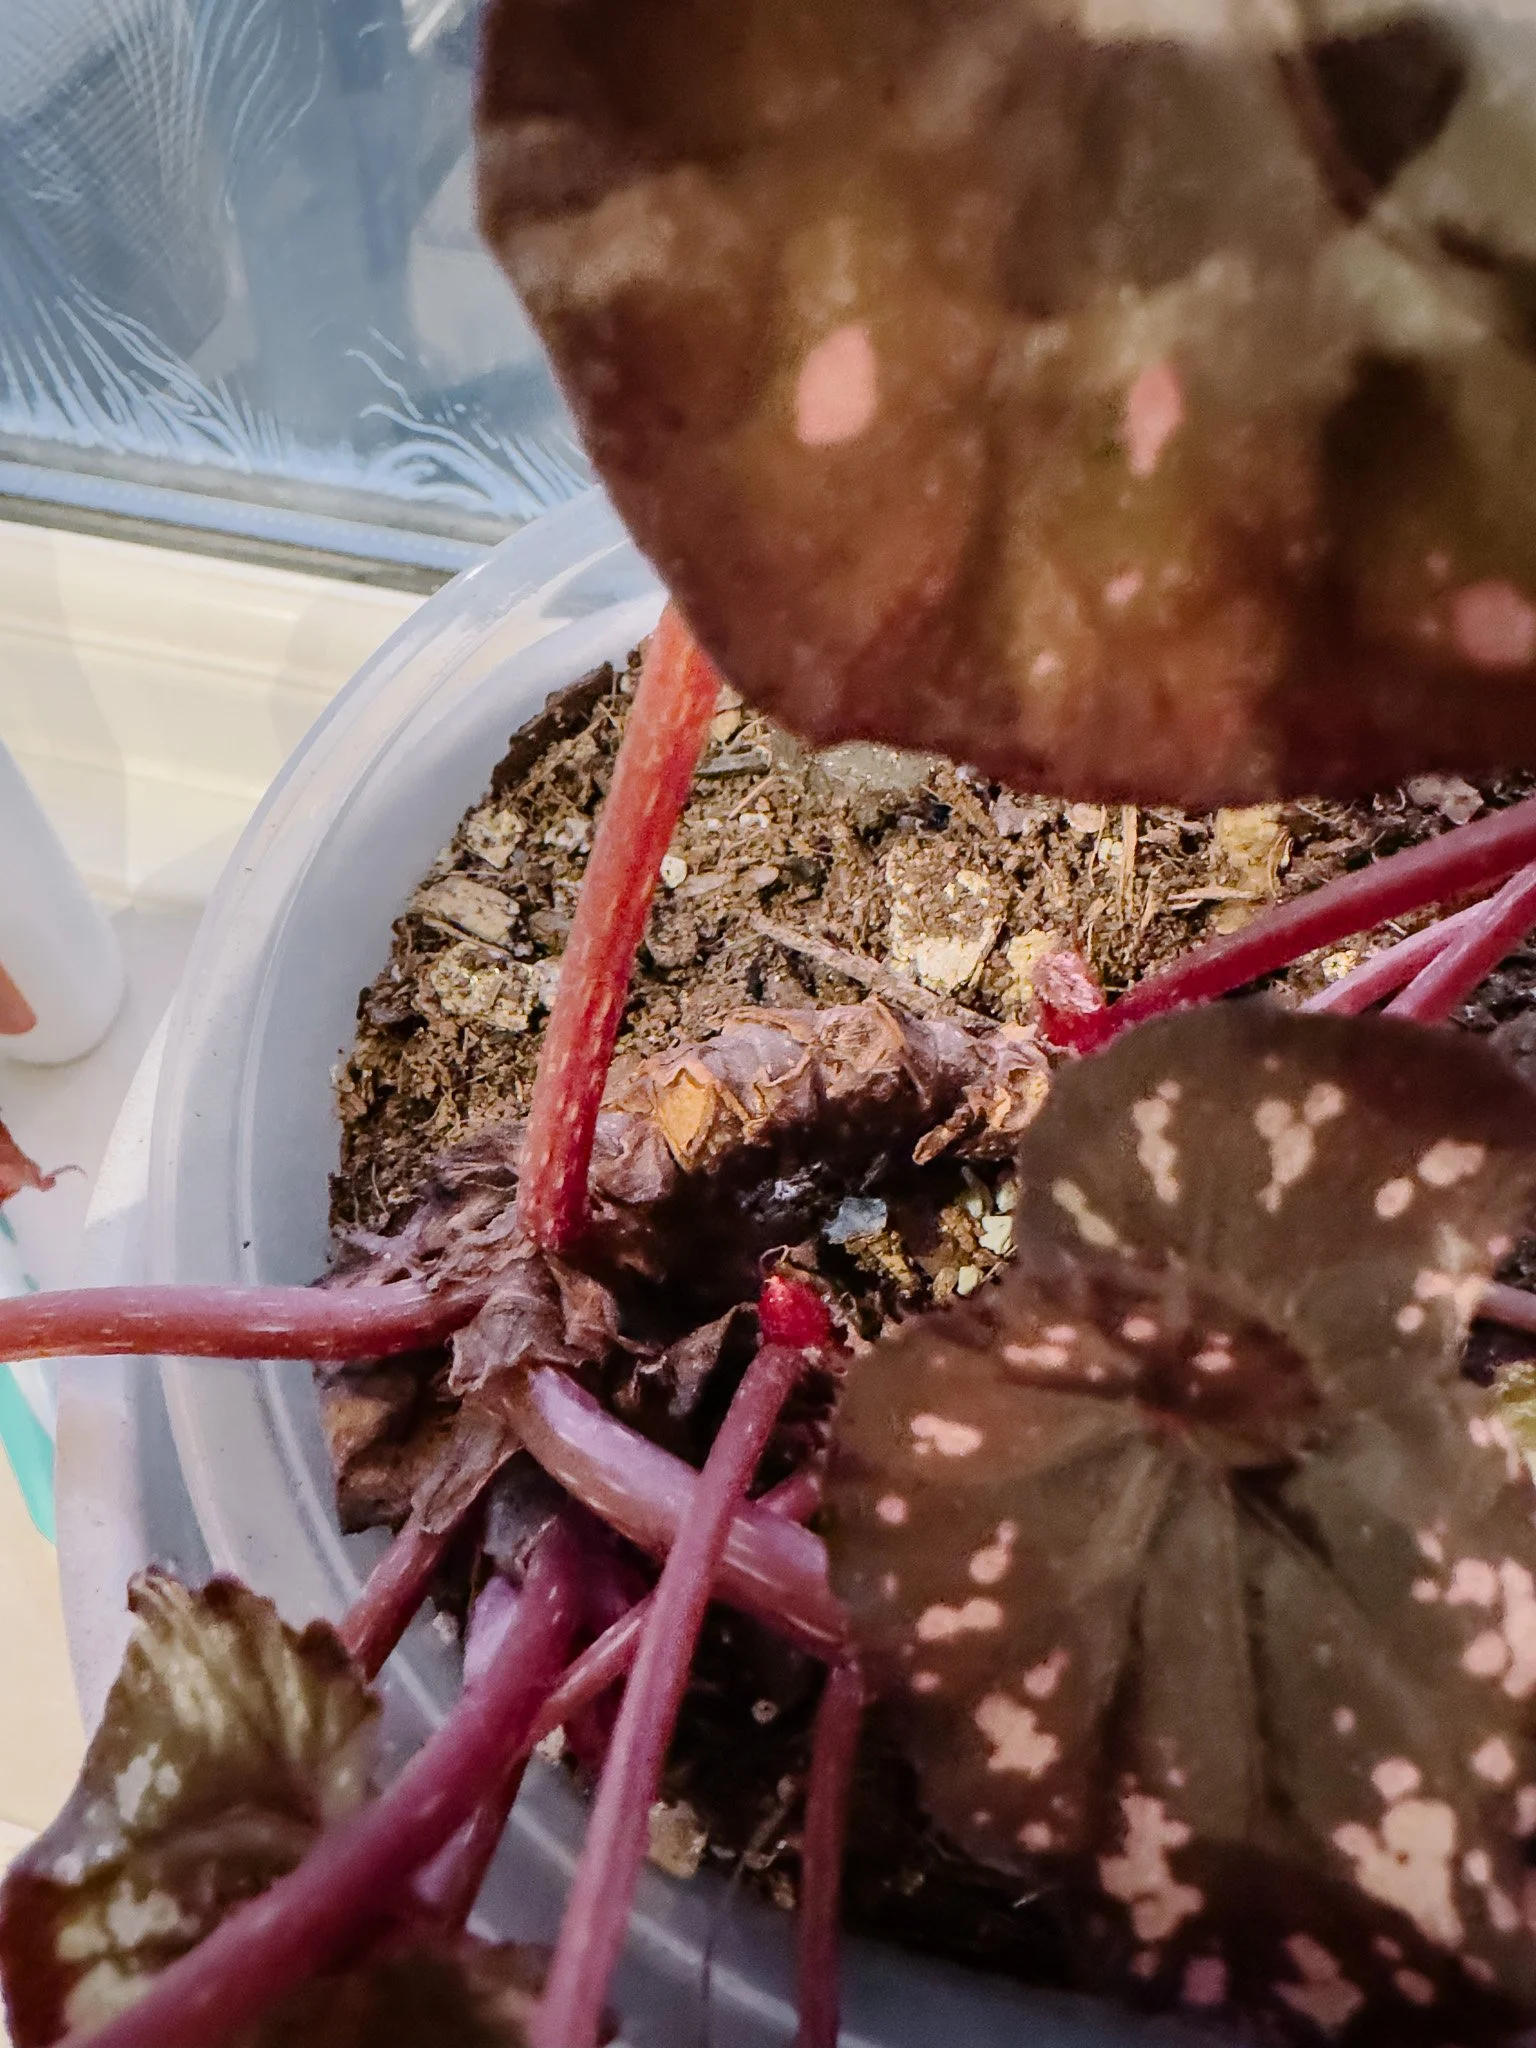
🌿 Soil profile – surface growers
Rhizomatous begonias grow differently to other types, and their soil needs reflect that.
Roots are shallow and spreading, not deep
The rhizome sits at the surface, requiring airflow
The structure should be open and airy, never compact
Moisture should be light and even, not heavy or waterlogged
In nature, they grow in:
leaf litter
decomposing organic matter
shallow layers over rock or compacted ground
This means the surface may dry slightly quicker, while still holding gentle moisture beneath.
These begonias don’t root down into the earth, they move across it.
🌿 Jungle Floor Creative – working with the forest floor
When repotting or refreshing these begonias, I like to keep everything contained and intentional.
Using a Jungle Floor Creative water-resistant repotting mat allows you to build that airy, forest-style mix without mess, keeping all those chunky materials like bark and perlite where you need them.
Paired with a soft plant cloth, it becomes much easier to handle delicate, textured leaves without damaging them, especially with varieties like Begonia masoniana or chloroneura, where the foliage is part of the magic.
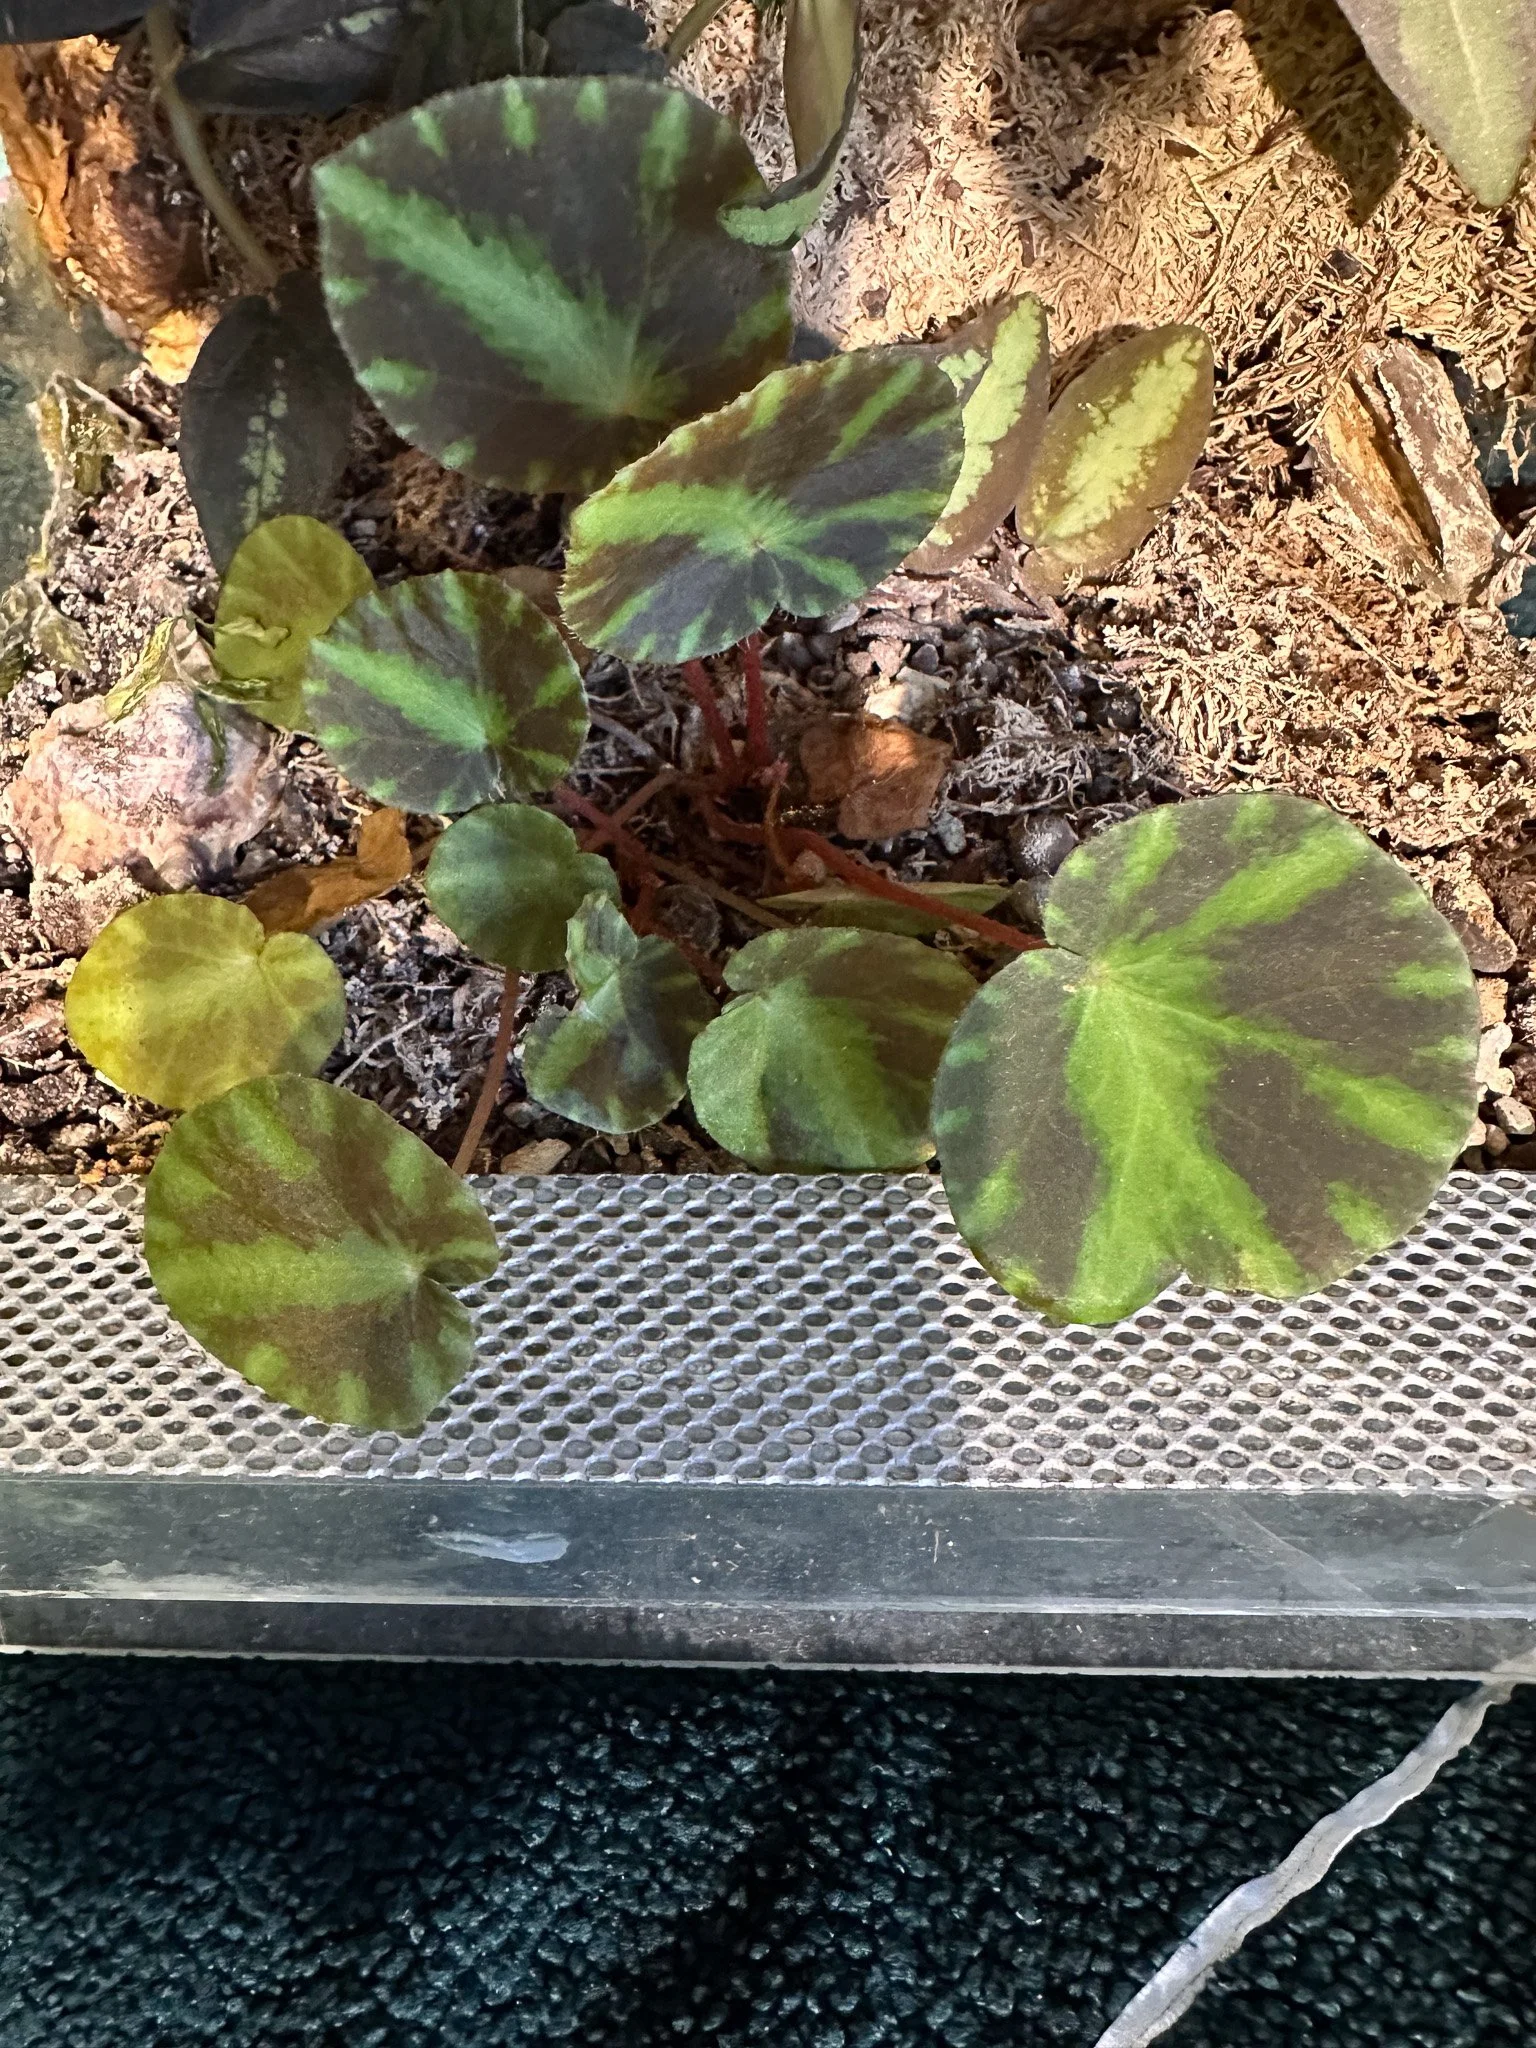
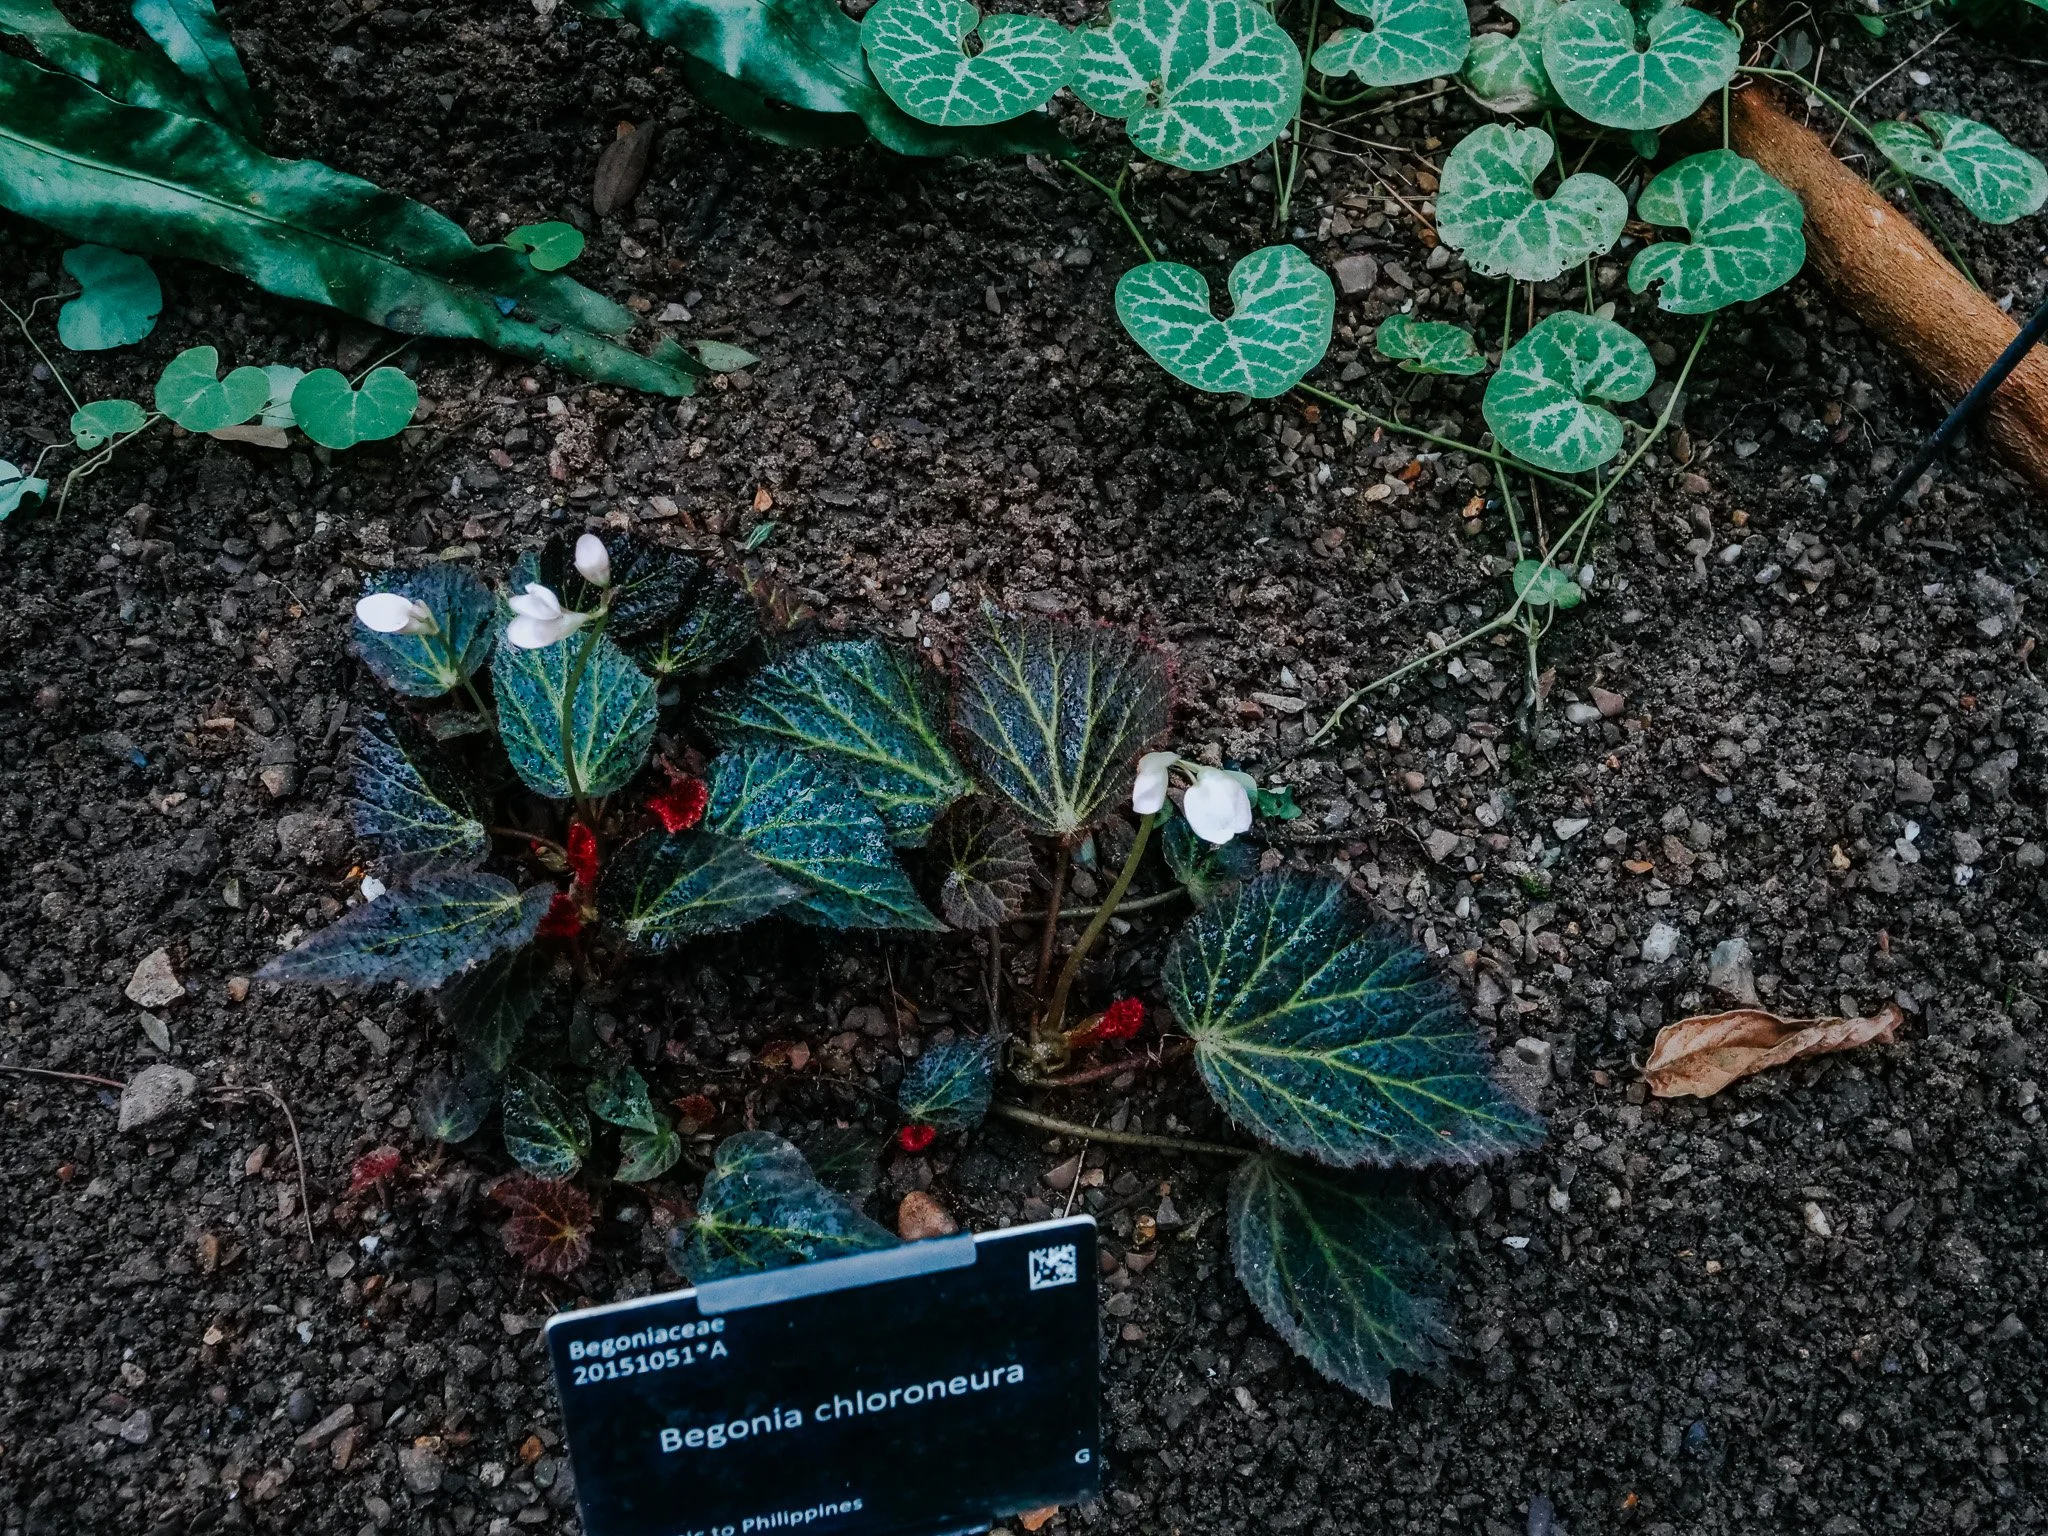
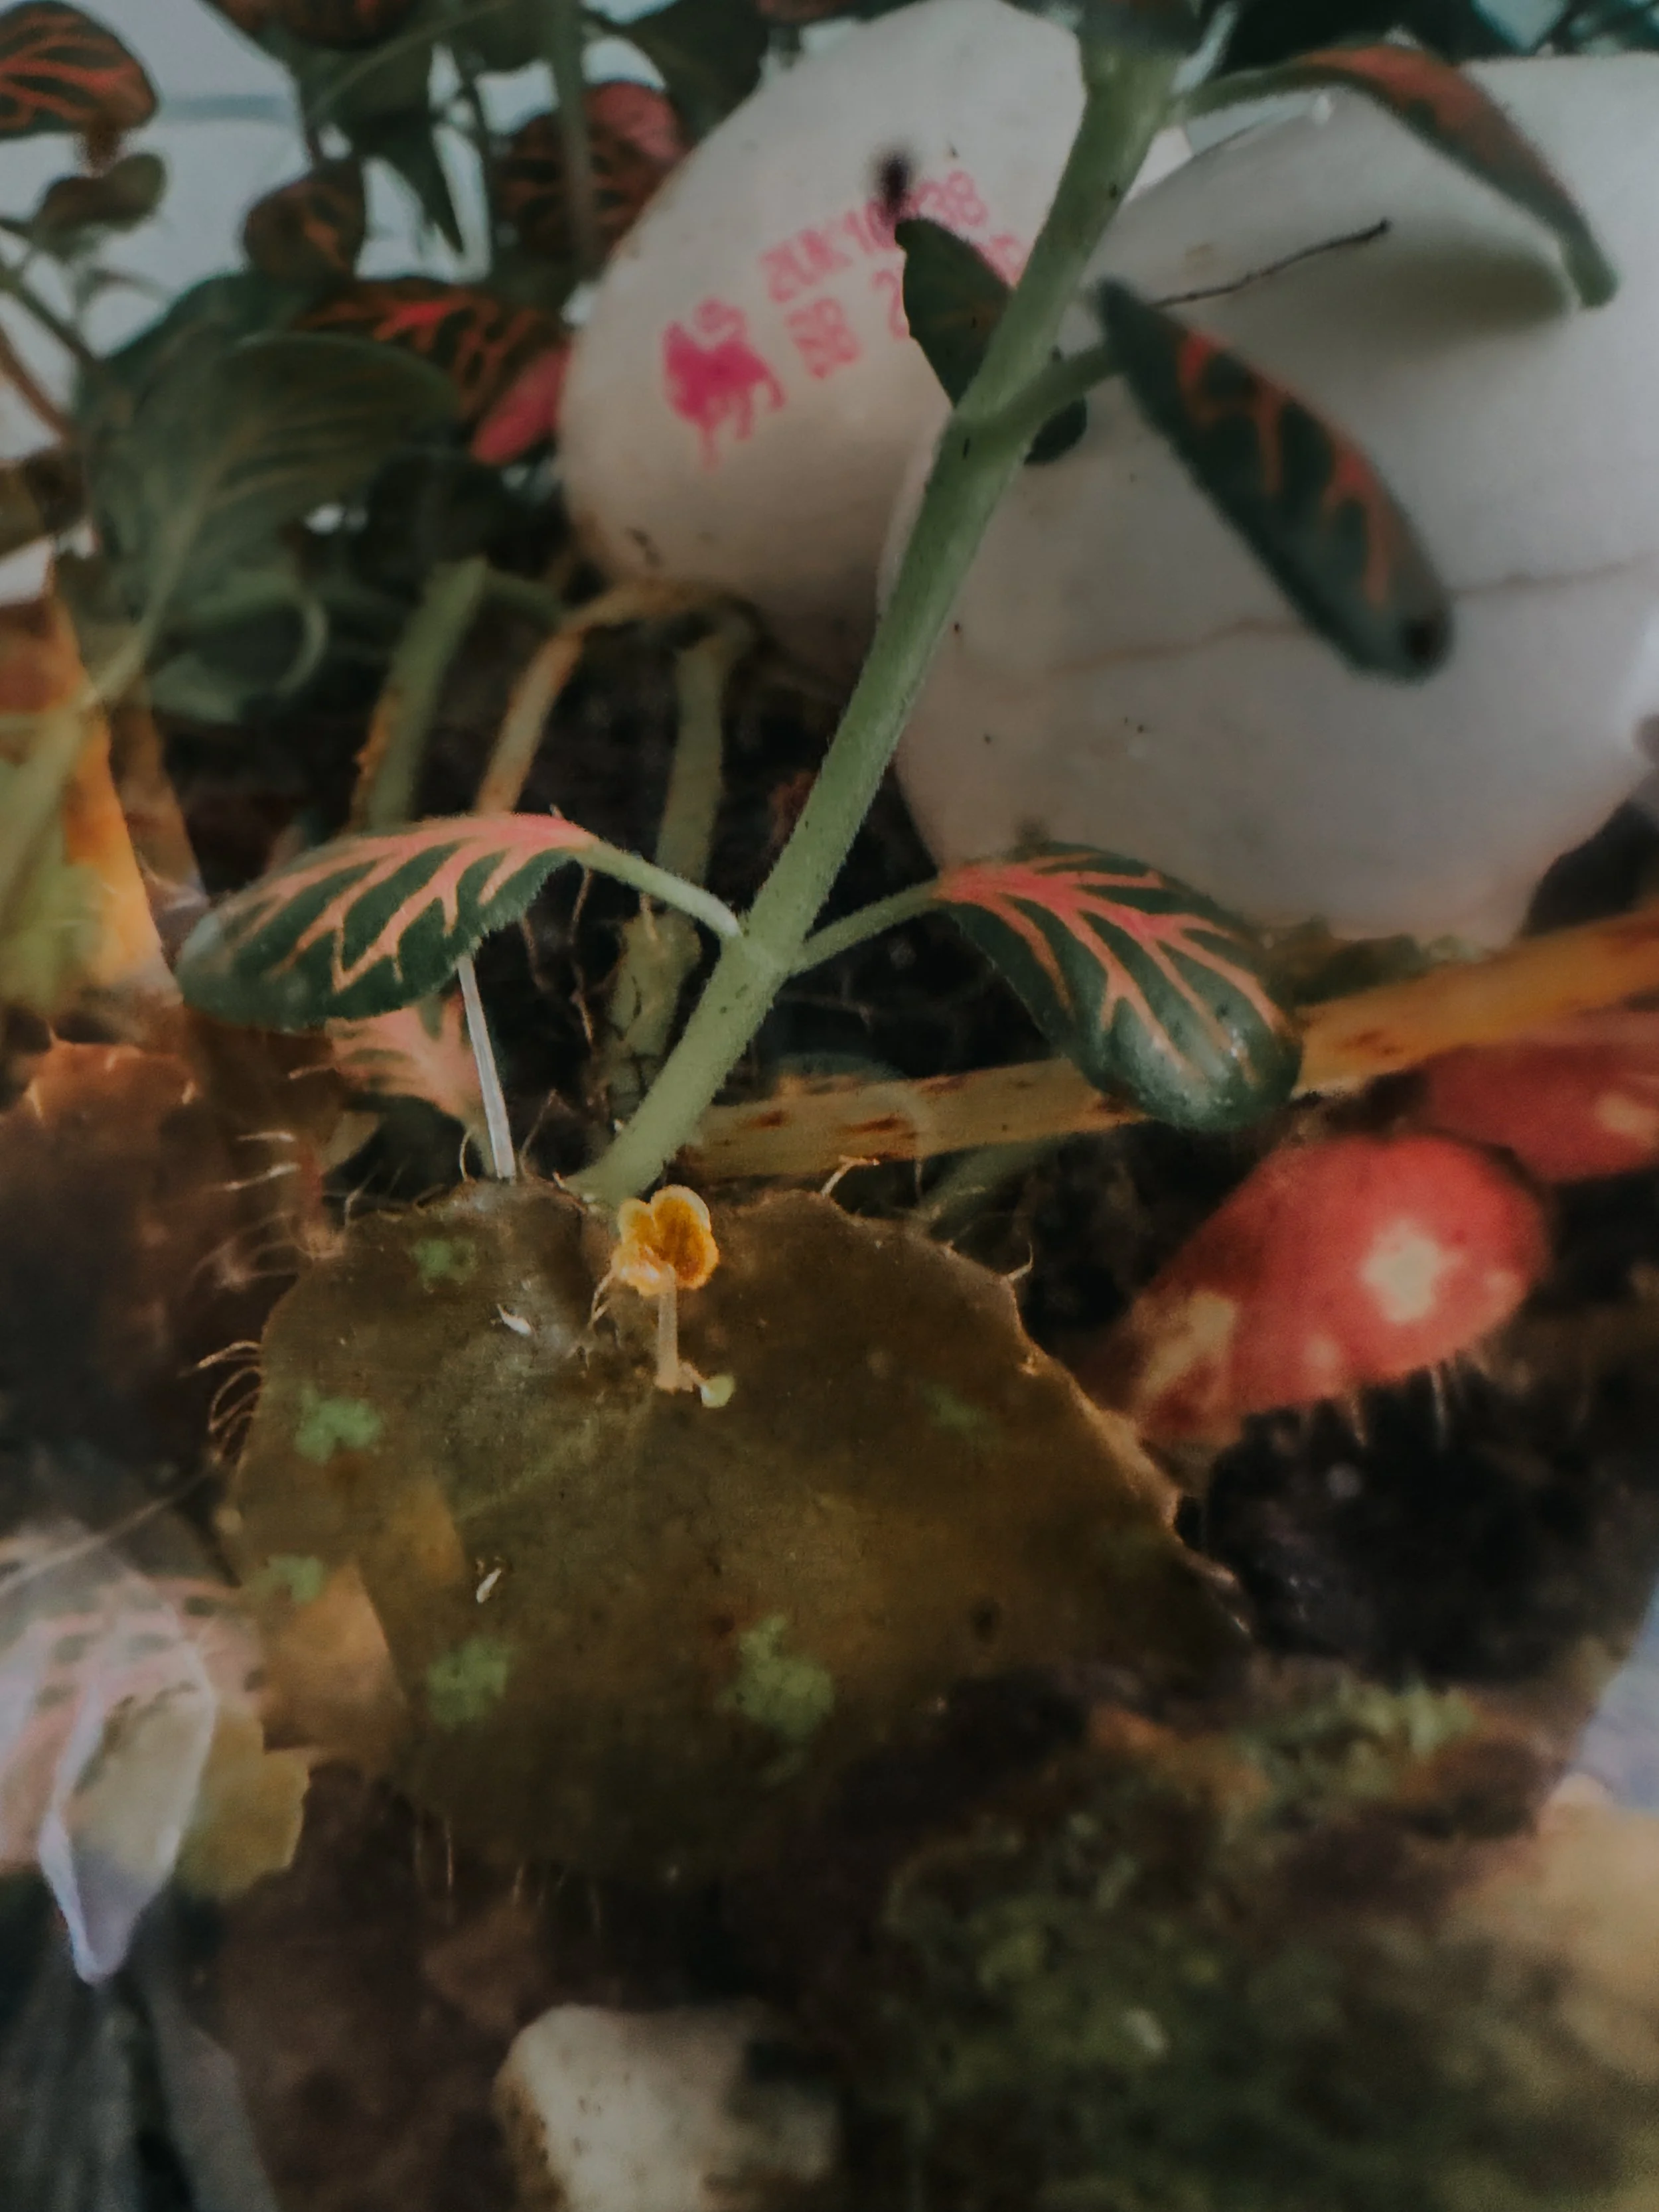
🌿 Personal observation
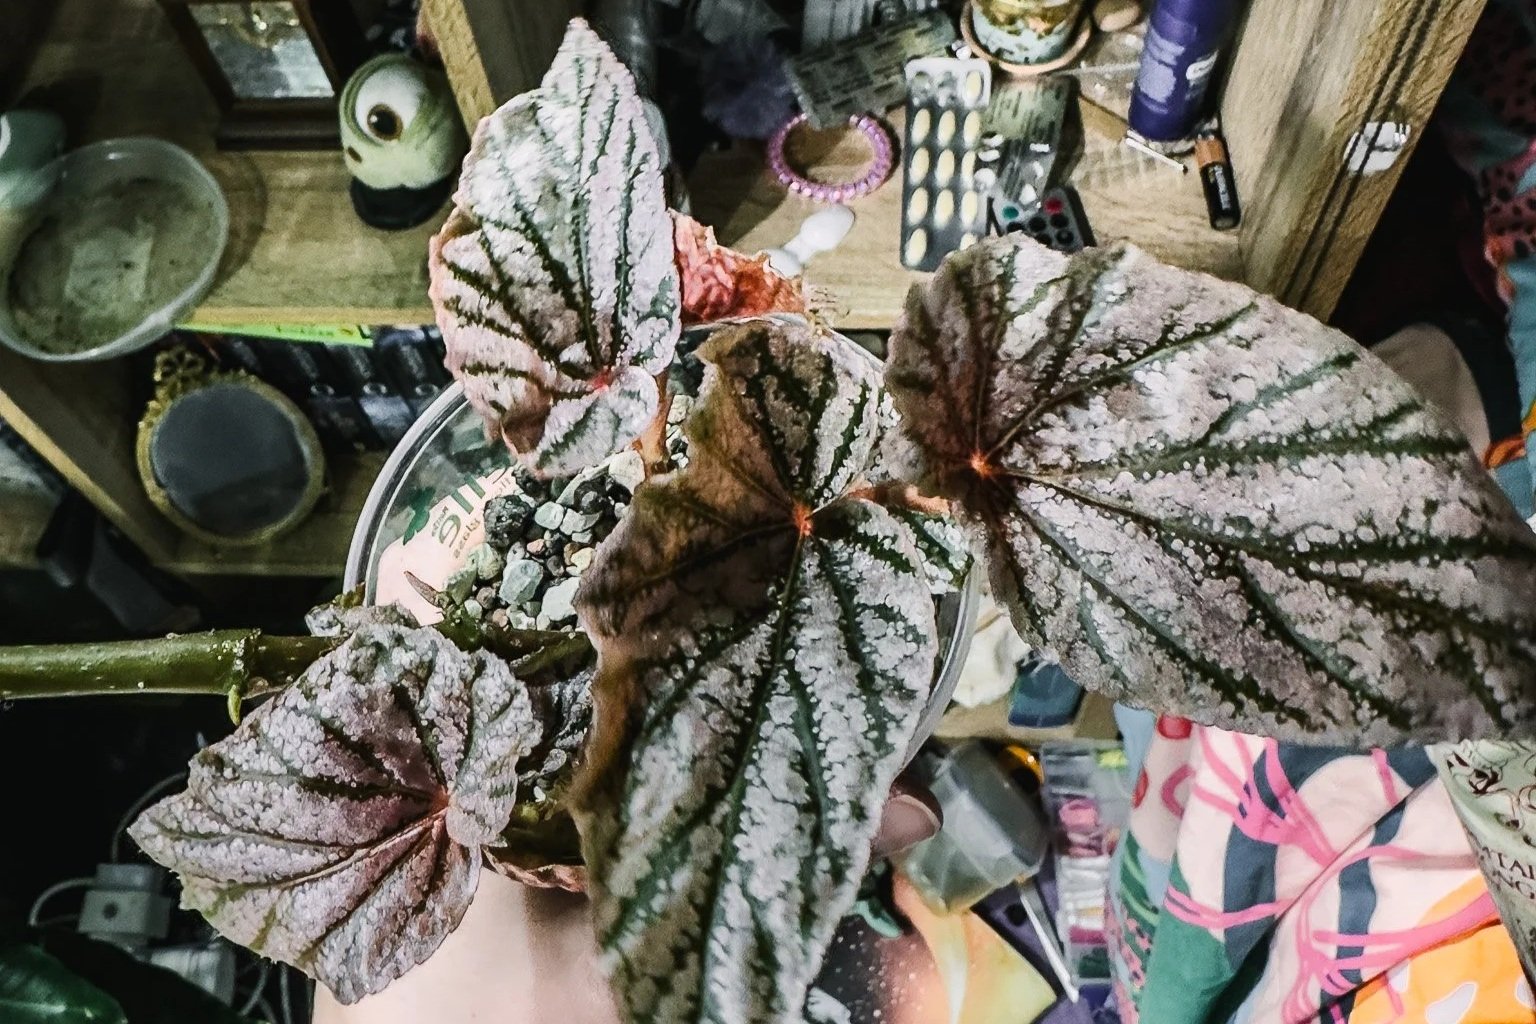
I tend to use a chunky, airy mix for my Rex begonias, something that mimics that natural forest floor structure.
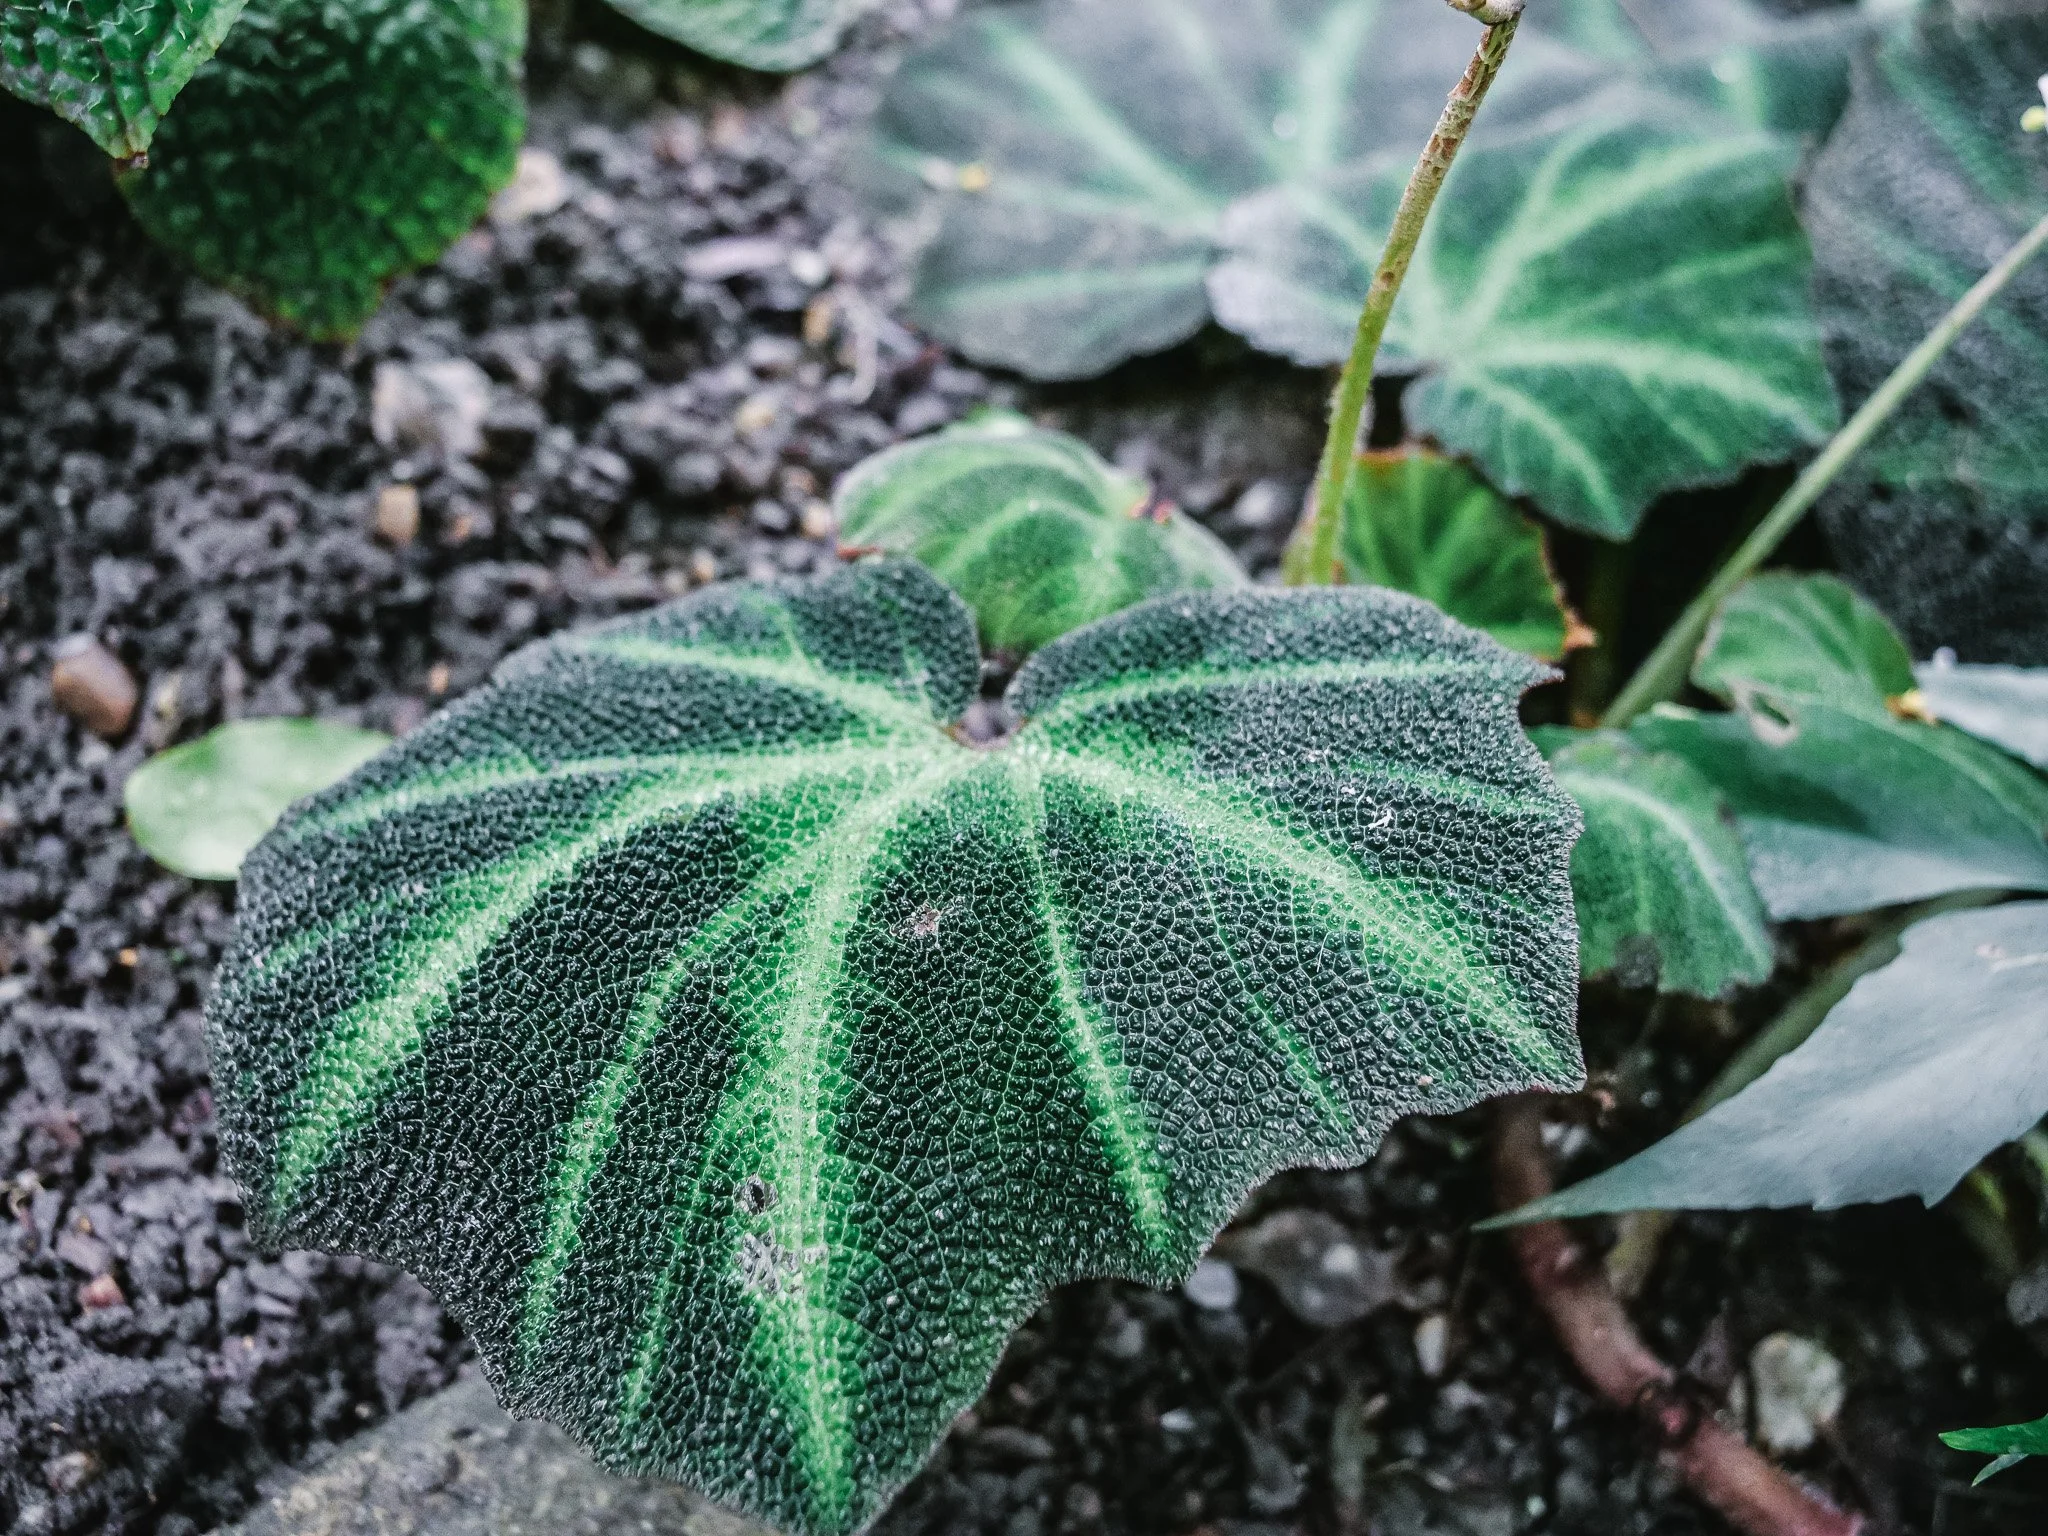
In the image I took at the Cambridge University Botanic Garden, you can see Begonia chloroneura growing in a substrate that includes gritty, stony material. Even in cultivation, it reflects that natural preference for airflow and drainage.
Rhizomatous begonias are not plants of depth, but of surface and balance.
Light is softened
Water is gentle and frequent
Soil is airy and alive
“They don’t grow into the forest floor, they grow across it, where moisture and air meet.”
🌿 Care Needs
🌱 Light
Bright, indirect light is ideal (no harsh sun). Direct sunlight can scorch the leaves, while too little light will result in slower growth and less vibrant patterns. It’s worth taking time to observe your space and adjust positioning to improve light levels where needed.
In their natural habitat, light is filtered through layers of canopy. It shifts throughout the day, never harsh or direct, instead soft and dappled, constantly moving as leaves above catch and release it.
These begonias don’t receive light all at once, they receive it in fragments.
💧 Water
Keep the soil evenly moist, but not soggy. Allow the top layer of soil to dry slightly between watering, and avoid watering directly onto the crown or rhizome, as this can lead to rot.
In nature, rainfall is regular but softened by the forest. Water filters through layers of foliage above, arriving lightly and frequently rather than all at once. Moisture settles briefly into the surface layers, then moves on.
Because of this:
roots experience consistent but gentle moisture
they are never sitting in heavy, saturated soil
It’s also worth noting that water sitting on leaves for long periods can cause damage. During photosynthesis, leaf pores are open, and prolonged moisture can increase the risk of fungal issues or marking on delicate foliage.
🌫️ Humidity
The air in their natural environment is humid and relatively still, protected by the surrounding canopy. It remains warm and stable, with moisture held in the air rather than the soil.
These begonias prefer higher humidity, but many can adapt to typical home conditions. Rather than misting (which offers only temporary humidity and can lead to issues), it’s more effective to:
improve overall room humidity
group plants together
or place them in naturally humid spaces like bathrooms
🌡️ Temperature
Ideally kept between 18–24°C.
Rhizomatous begonias are sensitive to cold and sudden drops in temperature. In winter, as light levels decrease, their growth slows naturally. During this time, it’s important to reduce watering, not because they prefer dryness, but because they are using less.
🪴 Soil
Think forest floor, not compost bag.
A light, airy, well-draining mix is essential. In the wild, these begonias grow in:
leaf litter
decomposing organic matter
shallow layers over rock or compacted ground
At home, you can recreate this with:
a base houseplant mix
bark for structure
perlite or vermiculite for airflow
a small amount of horticultural sand for drainage
The goal is simple:
👉 moisture and airflow at the same time
🌿 Bringing it together
Rhizomatous begonias don’t want extremes.
Not too wet.
Not too dry.
Not too dense.
“They don’t want to sit in water, they want to sit between moisture and air.”
🌿 Jungle Floor favourites
Over the years, I’ve grown a wide range of begonias, and getting the care right for these varieties has definitely been a learning curve.
What I’ve found, and what research supports, is that many rhizomatous begonias are more adaptable than they first appear. While they thrive in higher humidity, they can do well in normal household conditions when their soil, light, and watering balance are right.

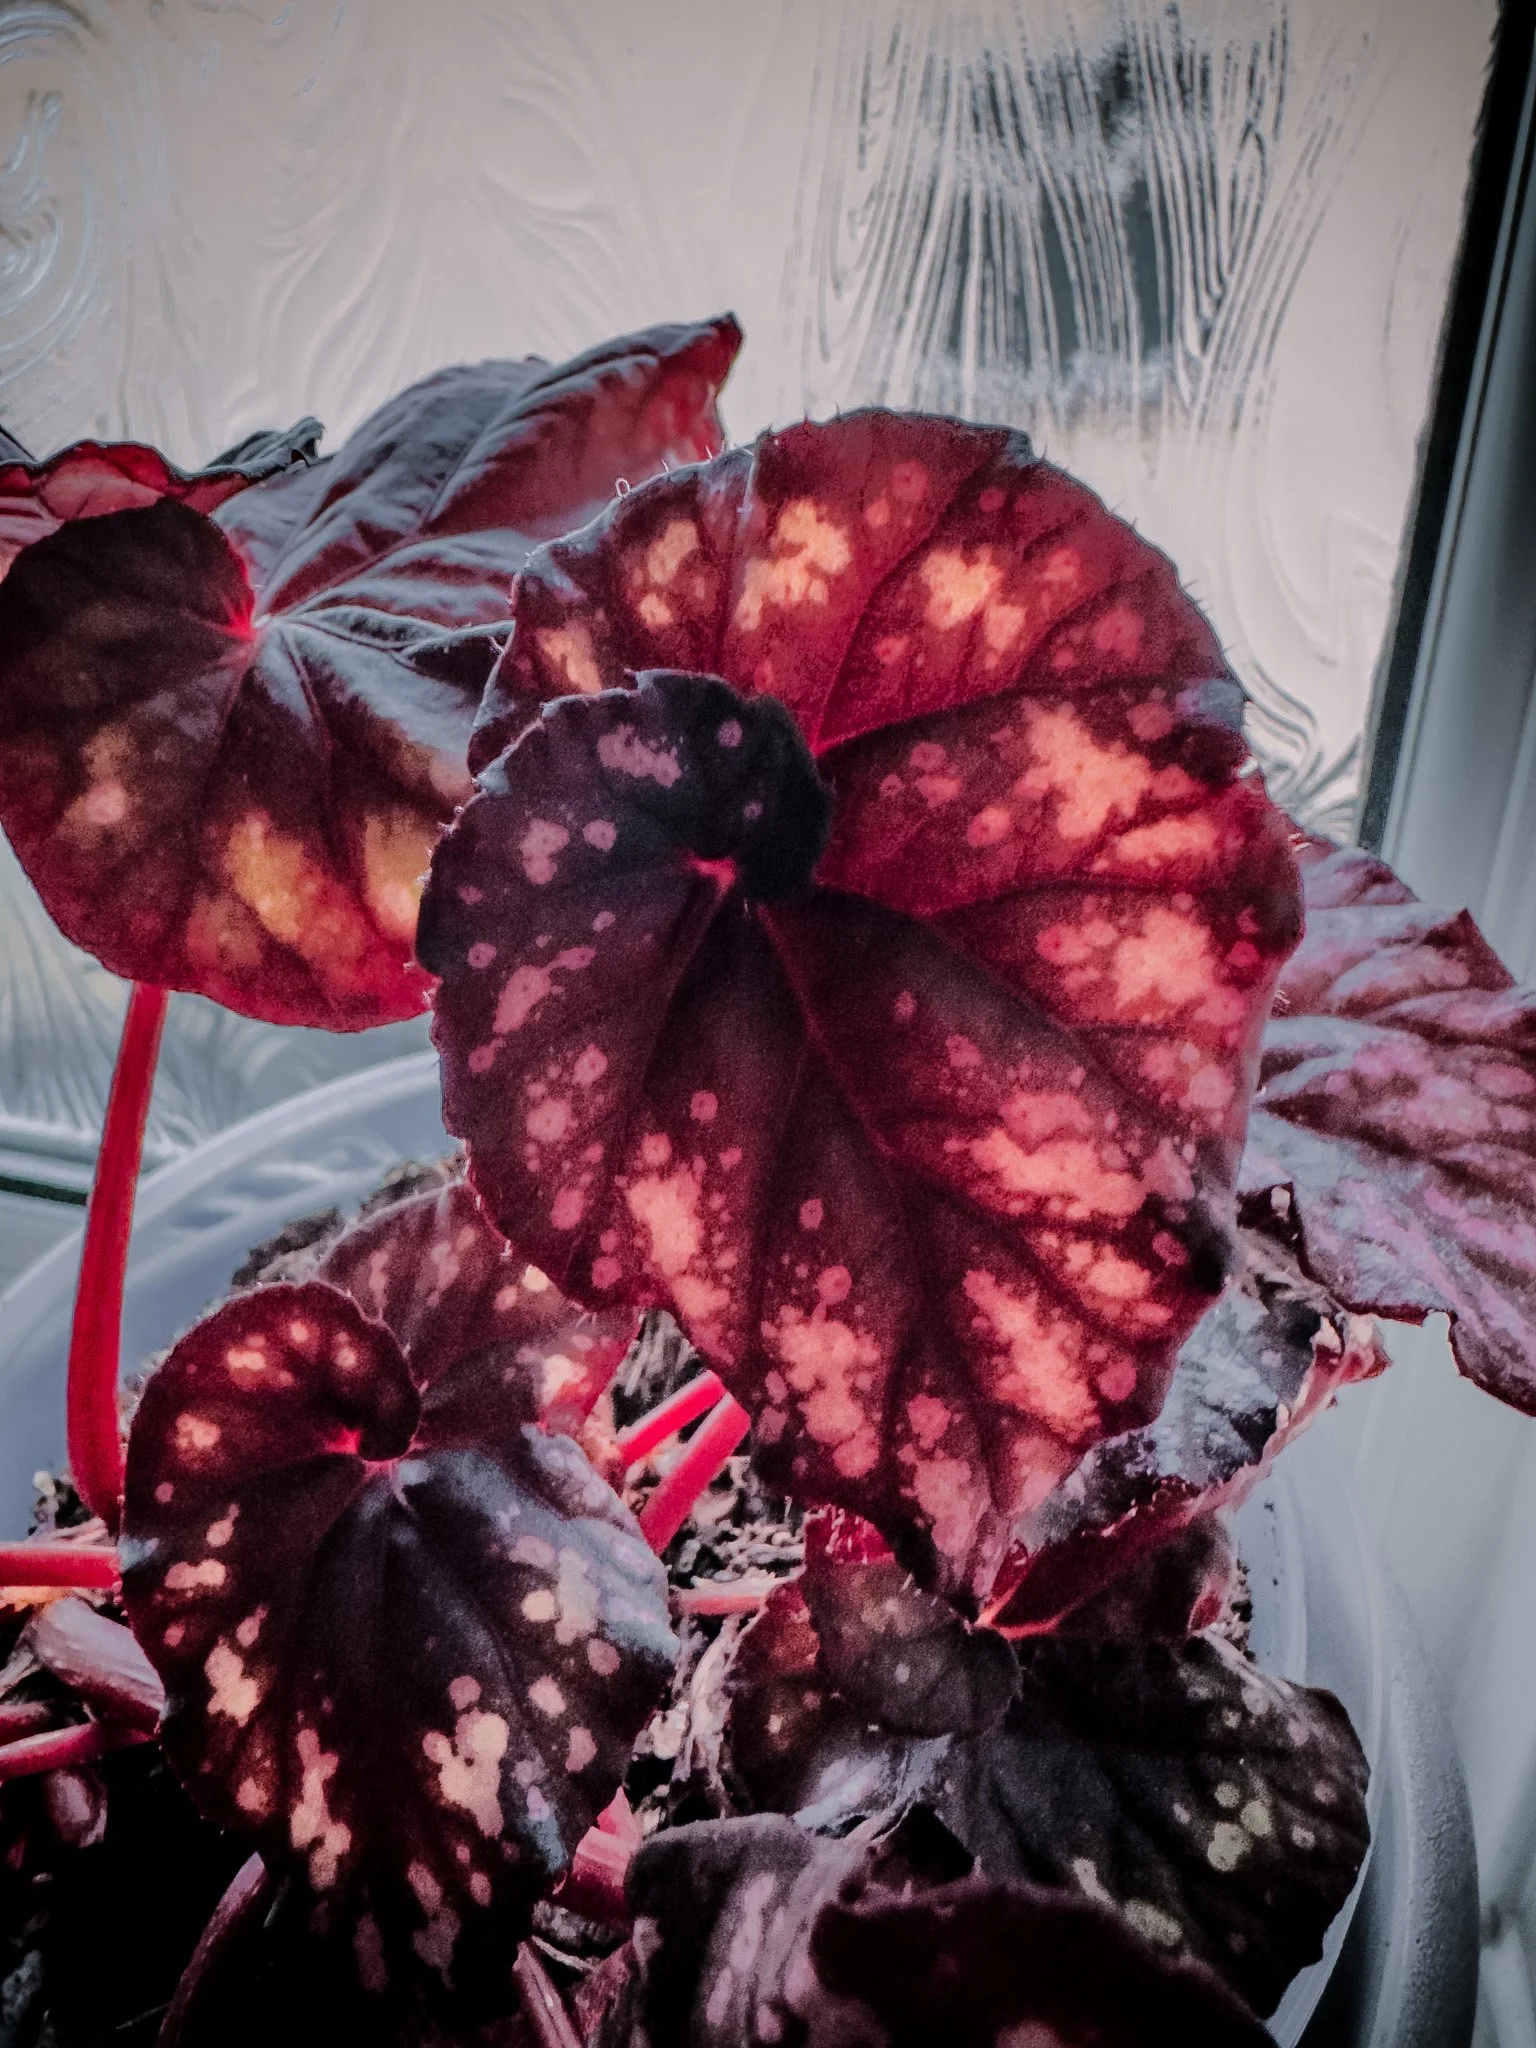
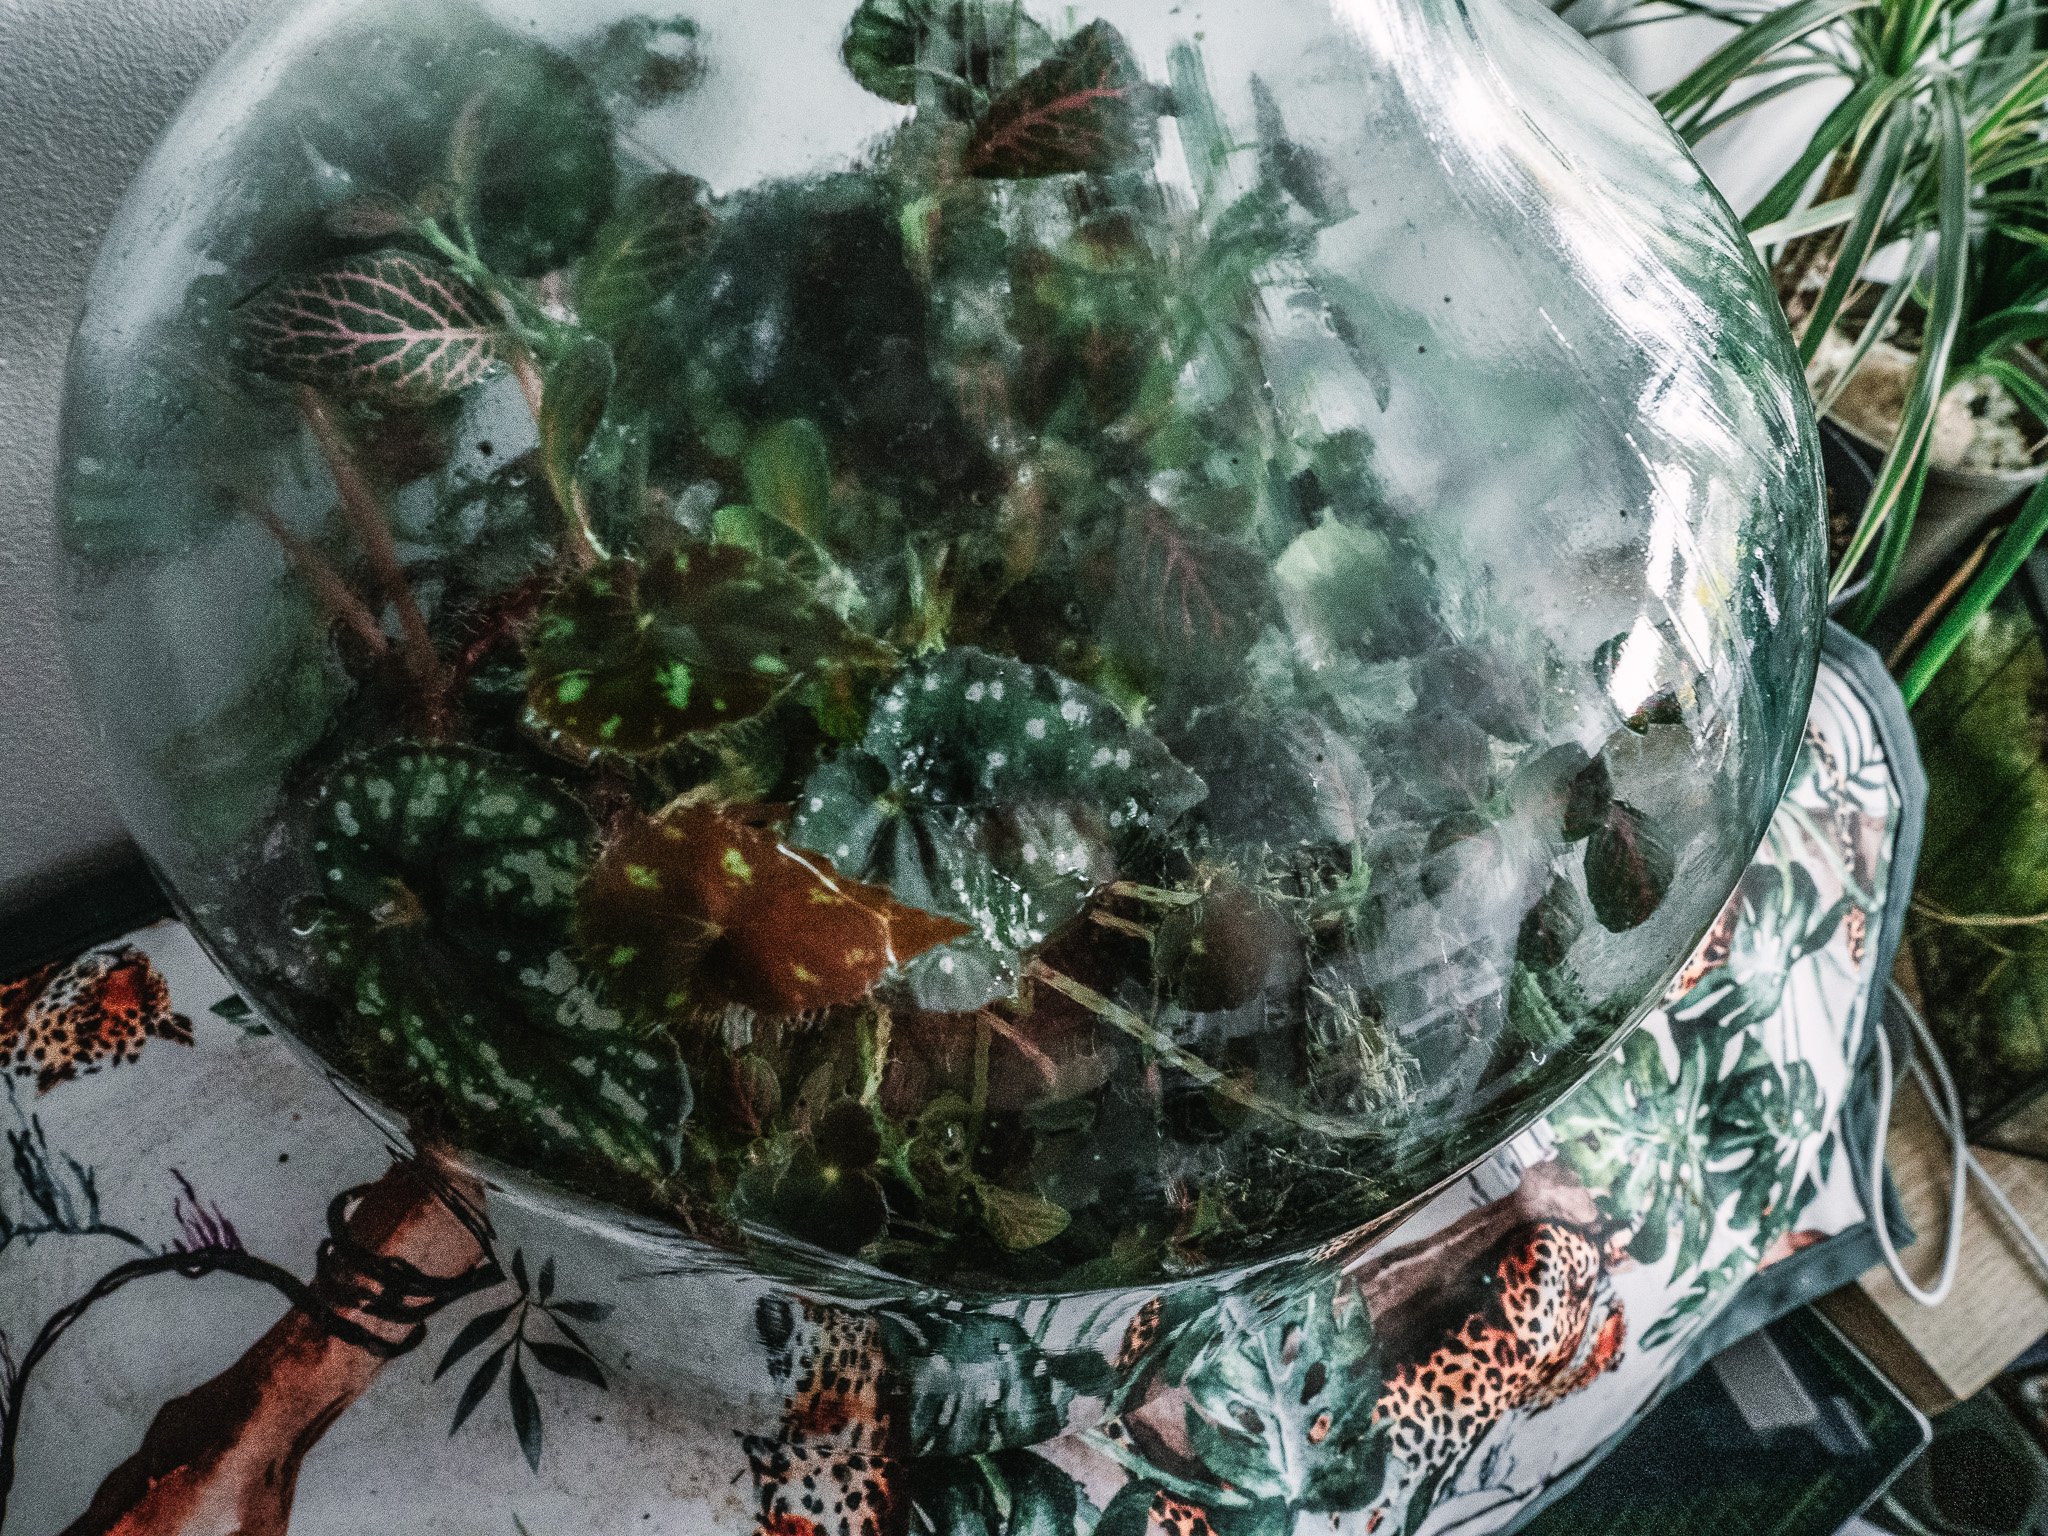
One of my favourites has to be Begonia bowerae, often nicknamed the Tiger Paws Begonia.
I’ve had great success growing this particular begonia in a large bottle terrarium. Because the opening is very small, it holds onto humidity and moisture, creating a stable environment that I rarely need to interfere with.
I’ve also grown it successfully in my plant room, where humidity tends to sit between 59–75%, sometimes even higher. This really reflects what the research suggests, while these begonias appreciate higher humidity, they can still adapt well when the overall environment is balanced.
🌿 Vertical understory (cane)
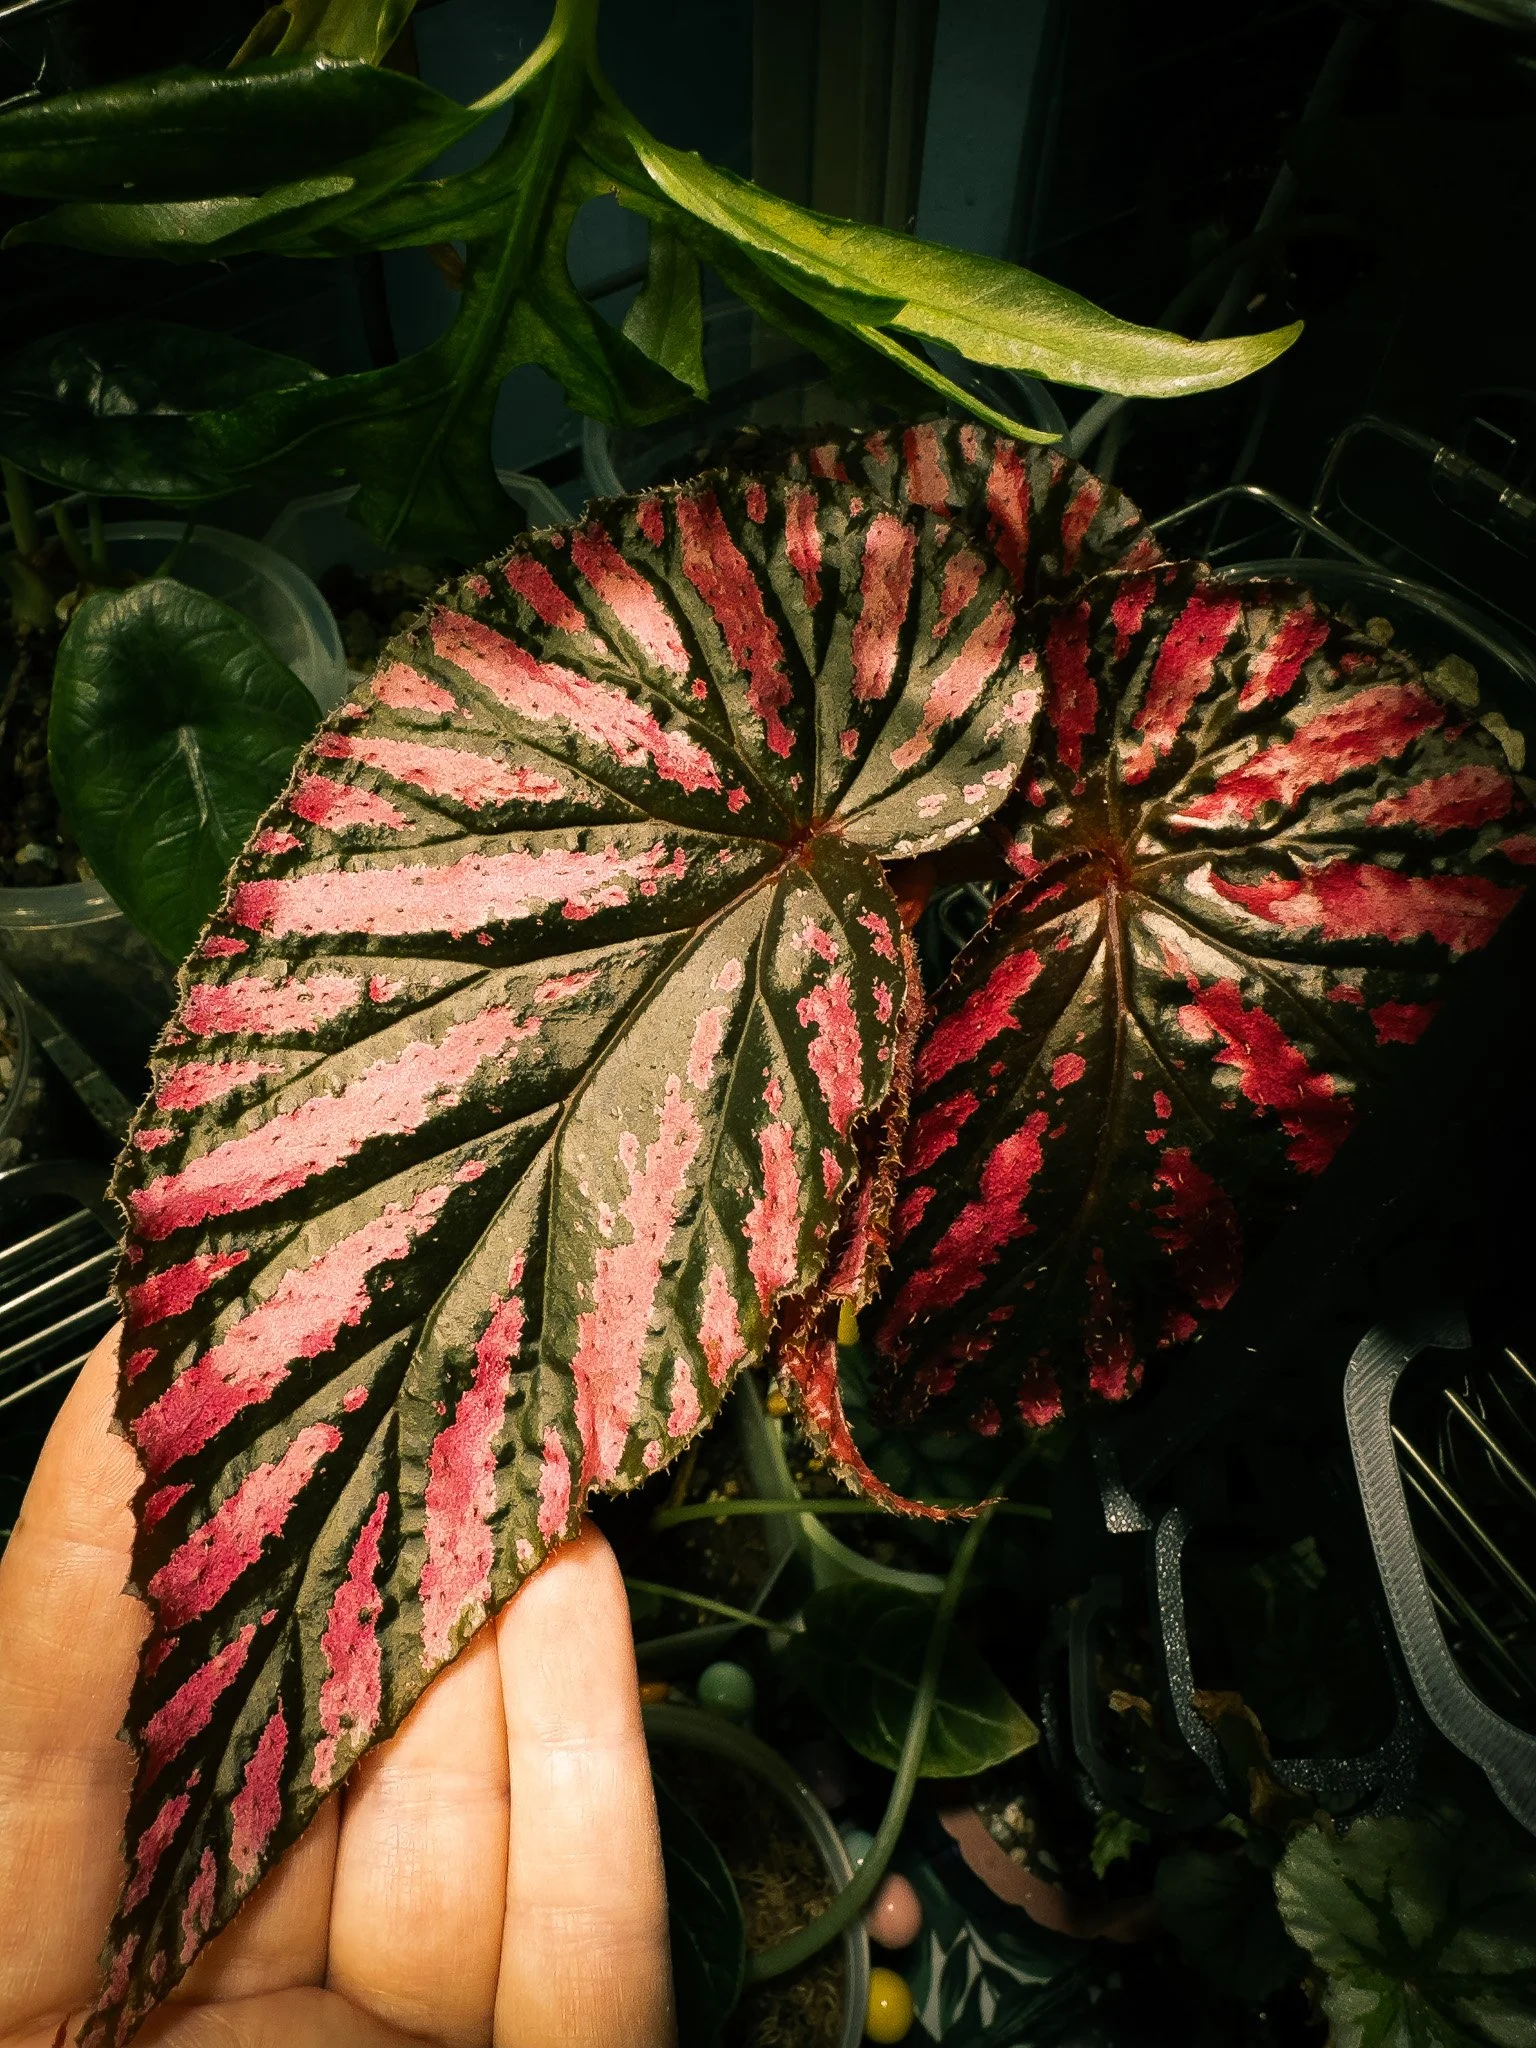
Cane begonias, often known as angel wing begonias, are among the most recognisable types grown as houseplants. They are named for their upright, bamboo-like stems, which allow them to grow taller than many other begonias, creating a more architectural shape.
Cane begonias grow in the middle layers of the forest, rising above the ground but still sheltered beneath the canopy. They are shaped by a world that is layered, competitive, and constantly shifting, where light moves, moisture lingers, and space is shared.
They don’t cling to the ground like rhizomatous types, and they don’t fight for survival in rock. Instead, they position themselves, growing upward into pockets of opportunity.
🌿 Natural environment
These begonias originate from humid tropical forest understories, particularly across Central and South America, as well as parts of Asia and Africa. Although they come from different regions, the environments they grow in are remarkably similar.
In the wild, they grow beneath tree canopies where light is filtered and soft, surrounded by warm air and consistent humidity.
The soil they grow in is very different from what we think of as typical compost. It is:
springy and organic-rich
full of air pockets
constantly being broken down by insects and microorganisms
It’s not just soil, it’s a living system.
Plants grow close together, gently competing for light, while the air remains warm and humid. Rainfall is frequent, but because of the loose, organic structure of the soil, water drains through rather than sitting around the roots.
🌿 Forest understory soil profile
In their natural environment, cane begonias grow in a soil system that is alive, layered, and constantly changing.
Leaf litter (decomposing leaves, twigs, and organic debris)
Loose, crumbly topsoil
High organic matter
Naturally aerated with tiny air pockets throughout
It is soft, but never suffocating.
Rather than growing in deep, compacted soil, their roots move through shallow layers of leaf litter and decaying organic matter, sometimes over underlying rock or compacted ground. This creates a growing medium that is airy, rich, and moisture-retentive without becoming waterlogged.
🌿 What that feels like in nature
Warm, still air.
Gentle, dappled light.
A forest that is always moving, but never harsh.
Light filters through layers of leaves above, shifting throughout the day. It’s not constant or direct, but broken into soft, changing pockets. Bright spots appear and disappear as the canopy moves, and plants grow upward and outward to find them.
Rainfall is frequent in these tropical environments, but it doesn’t arrive all at once. Water passes through layers of foliage before reaching the plant, becoming diffused and softened along the way.
Leaves and stems catch droplets
Water reaches the soil gradually
Excess drains downward through the organic layers
The soil remains consistently moist, but never stagnant. Roots are surrounded by moisture, but always with access to air.
🌫️ Atmosphere
The understory holds humidity like a quiet blanket.
Air is warm and consistently moist
Protected from strong winds
Surrounded by other plants releasing moisture
This creates a buffered environment, where conditions don’t change dramatically.
Even when the air feels still, there is always gentle movement between layers of the forest, allowing for subtle airflow and exchange.
This is not just soil, it’s a system.
A place where:
moisture is steady but never trapped
light is soft but always shifting
air is still, but never stagnant
“Soft underfoot, rich with life, and always breathing.”
🌱 What this means for care
🔆 Light
Bright, indirect light is ideal. Cane begonias can tolerate filtered light and even a little gentle sun, but harsh direct sunlight should be avoided as it can scorch the leaves.
These begonias come from environments where light is consistent but softened, so they respond well to stable lighting conditions. Grow lights can be a great way to supplement natural light, especially in darker months. Tools like the Photone app can help you measure and understand your light levels more accurately.
They generally prefer similar light levels to plants like Alocasia. While some may survive in lower light, they won’t truly thrive, often showing slower growth and reduced patterning.
💦 Water
Keep the soil evenly moist, allowing the top layer to dry slightly between watering.
Cane begonias are used to regular moisture, but they do not tolerate being saturated. Their roots grow deeper than rhizomatous types, so they can handle slightly more water, but they still need air within the soil.
Using a transparent pot can be helpful, as you can visually gauge when the substrate is drying out. As it dries, the soil will appear lighter, giving you a clearer signal of when to water.
During cooler months or periods of lower light, growth slows down. At this time, reduce watering accordingly, as the plant will use less moisture.
🌫️ Humidity
Cane begonias enjoy higher humidity, but they are generally more forgiving than delicate rhizomatous or terrarium species.
They can adapt to typical home environments, but will thrive when humidity is higher and the air is not too dry. Consistency is more important than extremes.
🪴 Soil
Think forest floor, not compost bag.
In their natural habitat, roots grow into loose, organic-rich soil, mixed with leaf litter and decomposing debris. This creates a medium that is both moisture-retentive and breathable.
At home, aim for a mix that is:
Light and airy
Well-draining
Still capable of holding gentle moisture
A good mix might include:
Bark
Coir or compost
Perlite (or similar for airflow)
If the soil is too dense, it will restrict airflow. If it’s too dry and open, it won’t support consistent growth. The balance is key.
🌬️ Airflow
In the forest understory, air is never completely still.
Cane begonias benefit from gentle airflow, which helps prevent issues such as mildew and supports overall plant health. This becomes especially important in more humid indoor environments, where stagnant air can quickly lead to problems.
🌿 Cane begonia varieties
Some beautiful examples of cane begonias include:
‘Maurice Amey’
‘Black Forest’
Begonia brevirimosa
Begonia hatacoa ‘Silver’
“Cane begonias don’t need perfect conditions, just the right balance, light to grow toward, moisture to move through, and air to breathe.”
🌱 What this means for care
🔆 Light
Bright, indirect light is ideal. Cane begonias can tolerate filtered light and even a little gentle sun, but harsh direct sunlight should be avoided as it can scorch the leaves.
These begonias come from environments where light is consistent but softened, so they respond well to stable lighting conditions. Grow lights can be a great way to supplement natural light, especially in darker months. Tools like the Photone app can help you measure and understand your light levels more accurately.
They generally prefer similar light levels to plants like Alocasia. While some may survive in lower light, they won’t truly thrive.
💦 Water
Keep the soil evenly moist, allowing the top layer to dry slightly between watering.
Cane begonias are used to regular moisture, but they do not tolerate being saturated. Their roots grow deeper than rhizomatous types, so they can handle slightly more water, but they still need air within the soil.
Using a transparent pot can help you understand your watering rhythm, as the substrate becomes visibly lighter as it dries.
During cooler months or lower light periods, growth slows, and watering should be reduced accordingly.
🌫️ Humidity
Cane begonias enjoy higher humidity, but they are generally more forgiving than more delicate types.
They can adapt to typical home conditions, but will thrive in environments where the air isn’t too dry. Consistency matters more than chasing high numbers.
🪴 Soil
Think forest floor, not compost bag.
In their natural habitat, roots grow into loose, organic-rich soil, layered with leaf litter and decomposing material. To recreate this at home, use a mix that is:
Light and airy
Well-draining
Still able to hold gentle moisture
A combination of bark, coir or compost, and perlite works well. The aim is to create a structure where water can move through, but never sit still.
When repotting, I like to keep this process contained and intentional. Using a water-resistant repotting mat helps recreate that “contained forest floor” feeling, keeping everything together while you build your mix. Pairing this with a soft plant cloth makes it easier to handle leaves gently, especially when working with larger or more delicate foliage.
🌬️ Airflow
In the forest understory, air is never completely still.
Cane begonias benefit from gentle airflow, which helps prevent issues like mildew and supports overall plant health. This becomes especially important in more humid indoor environments.
🌿 Cane begonia varieties
Some beautiful examples of cane begonias include:
‘Maurice Amey’
‘Black Forest’
Begonia brevirimosa
Begonia hatacoa ‘Silver’
“Cane begonias don’t need perfect conditions, just the right balance, light to grow toward, moisture to move through, and air to breathe.”
🌿 Why cane begonias work so well as houseplants
Cane begonias strike a beautiful balance. They carry that tropical softness, but with a little more resilience than many other begonia types.
Their upright, architectural growth makes them perfect for adding height and structure to indoor plant spaces, almost like bringing a small piece of the forest’s vertical layers into your home.
They are generally considered some of the easier begonias to care for indoors, though certain varieties, such as Begonia brevirimosa, can be more challenging and benefit from more stable conditions.
🌿 Jungle Floor Creative – vertical understory favourites
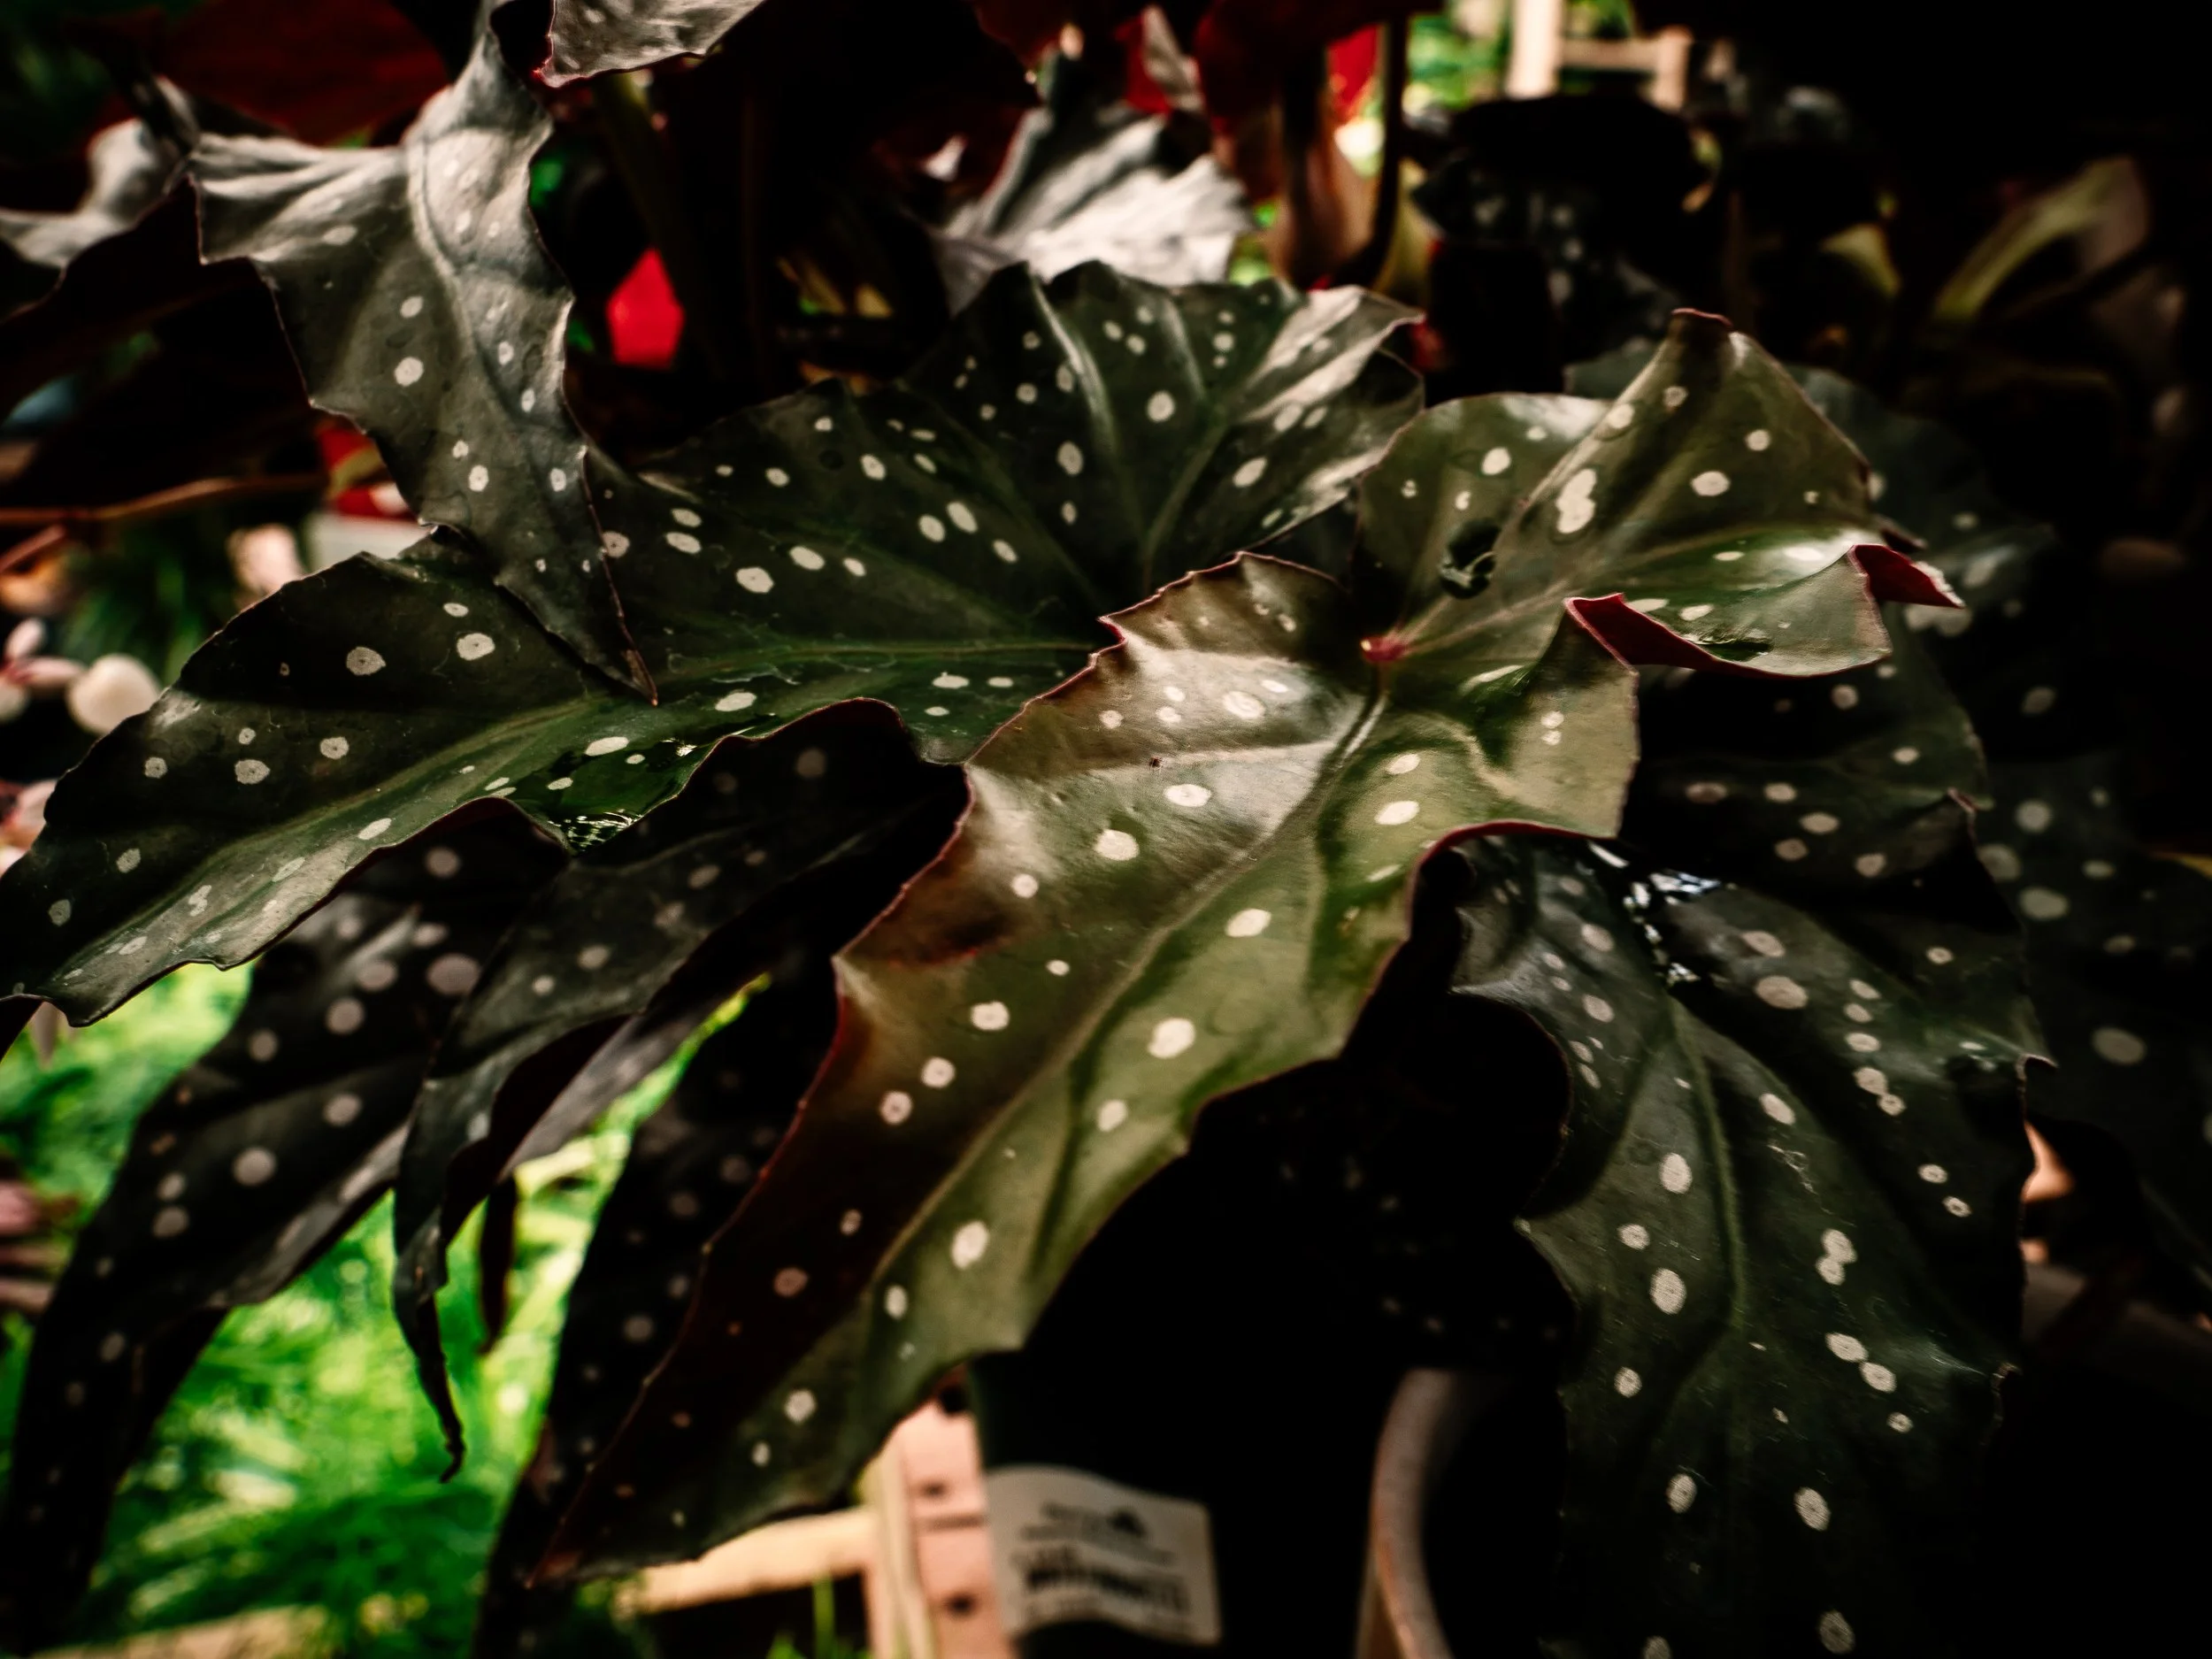
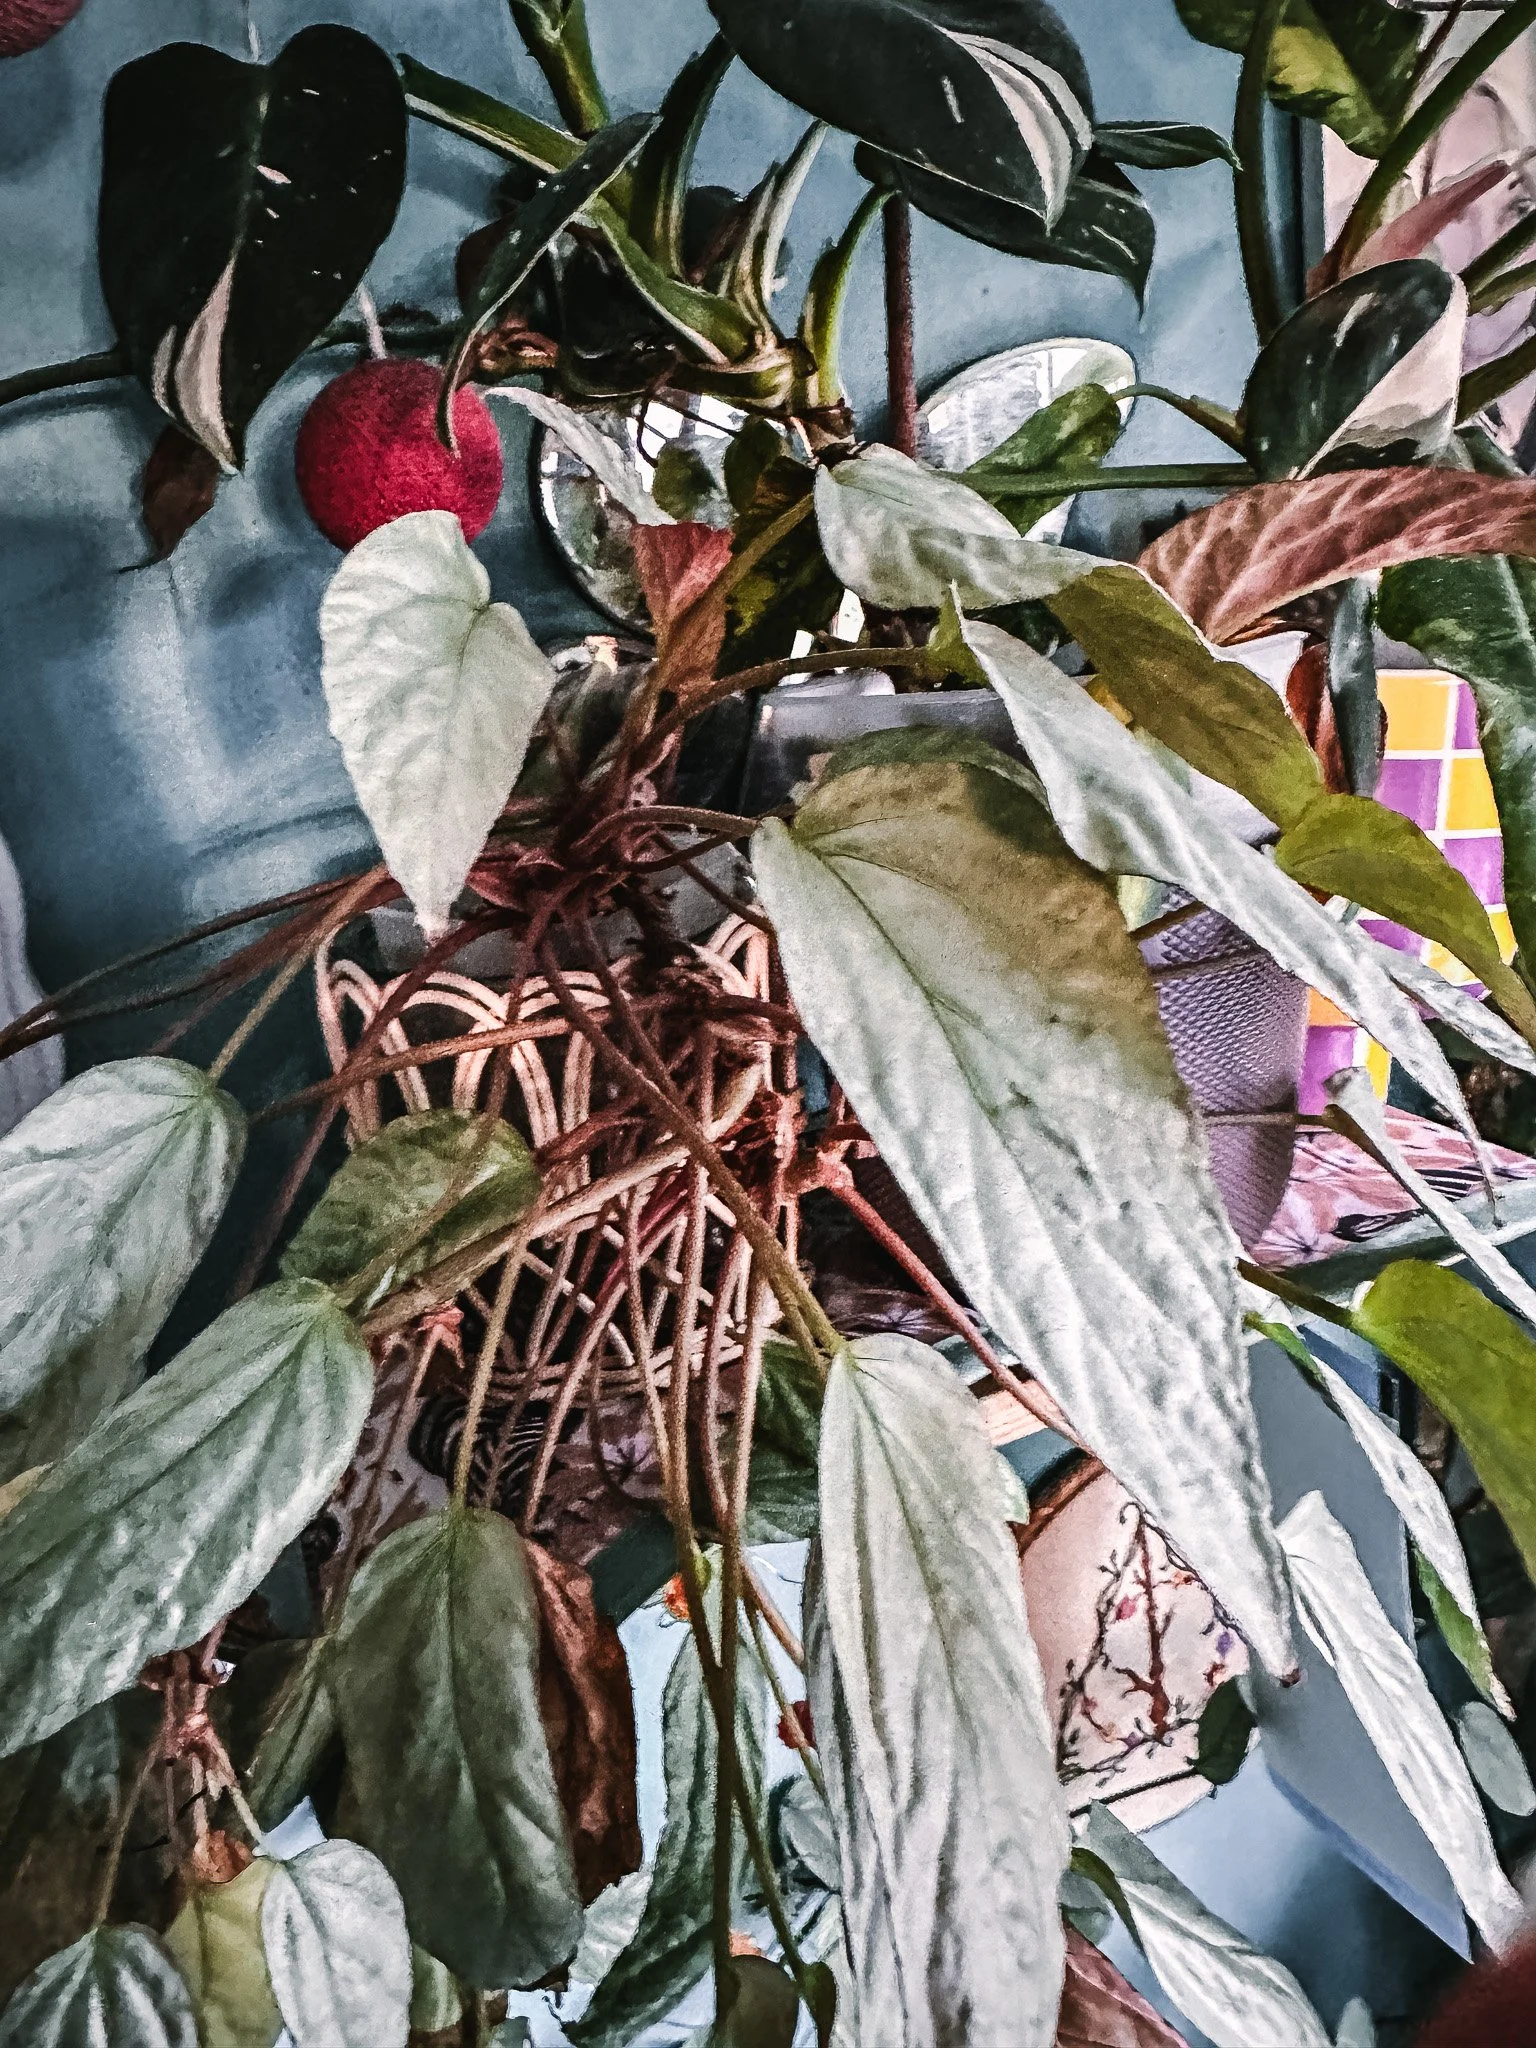
Some of my favourite cane begonias reflect both structure and story:
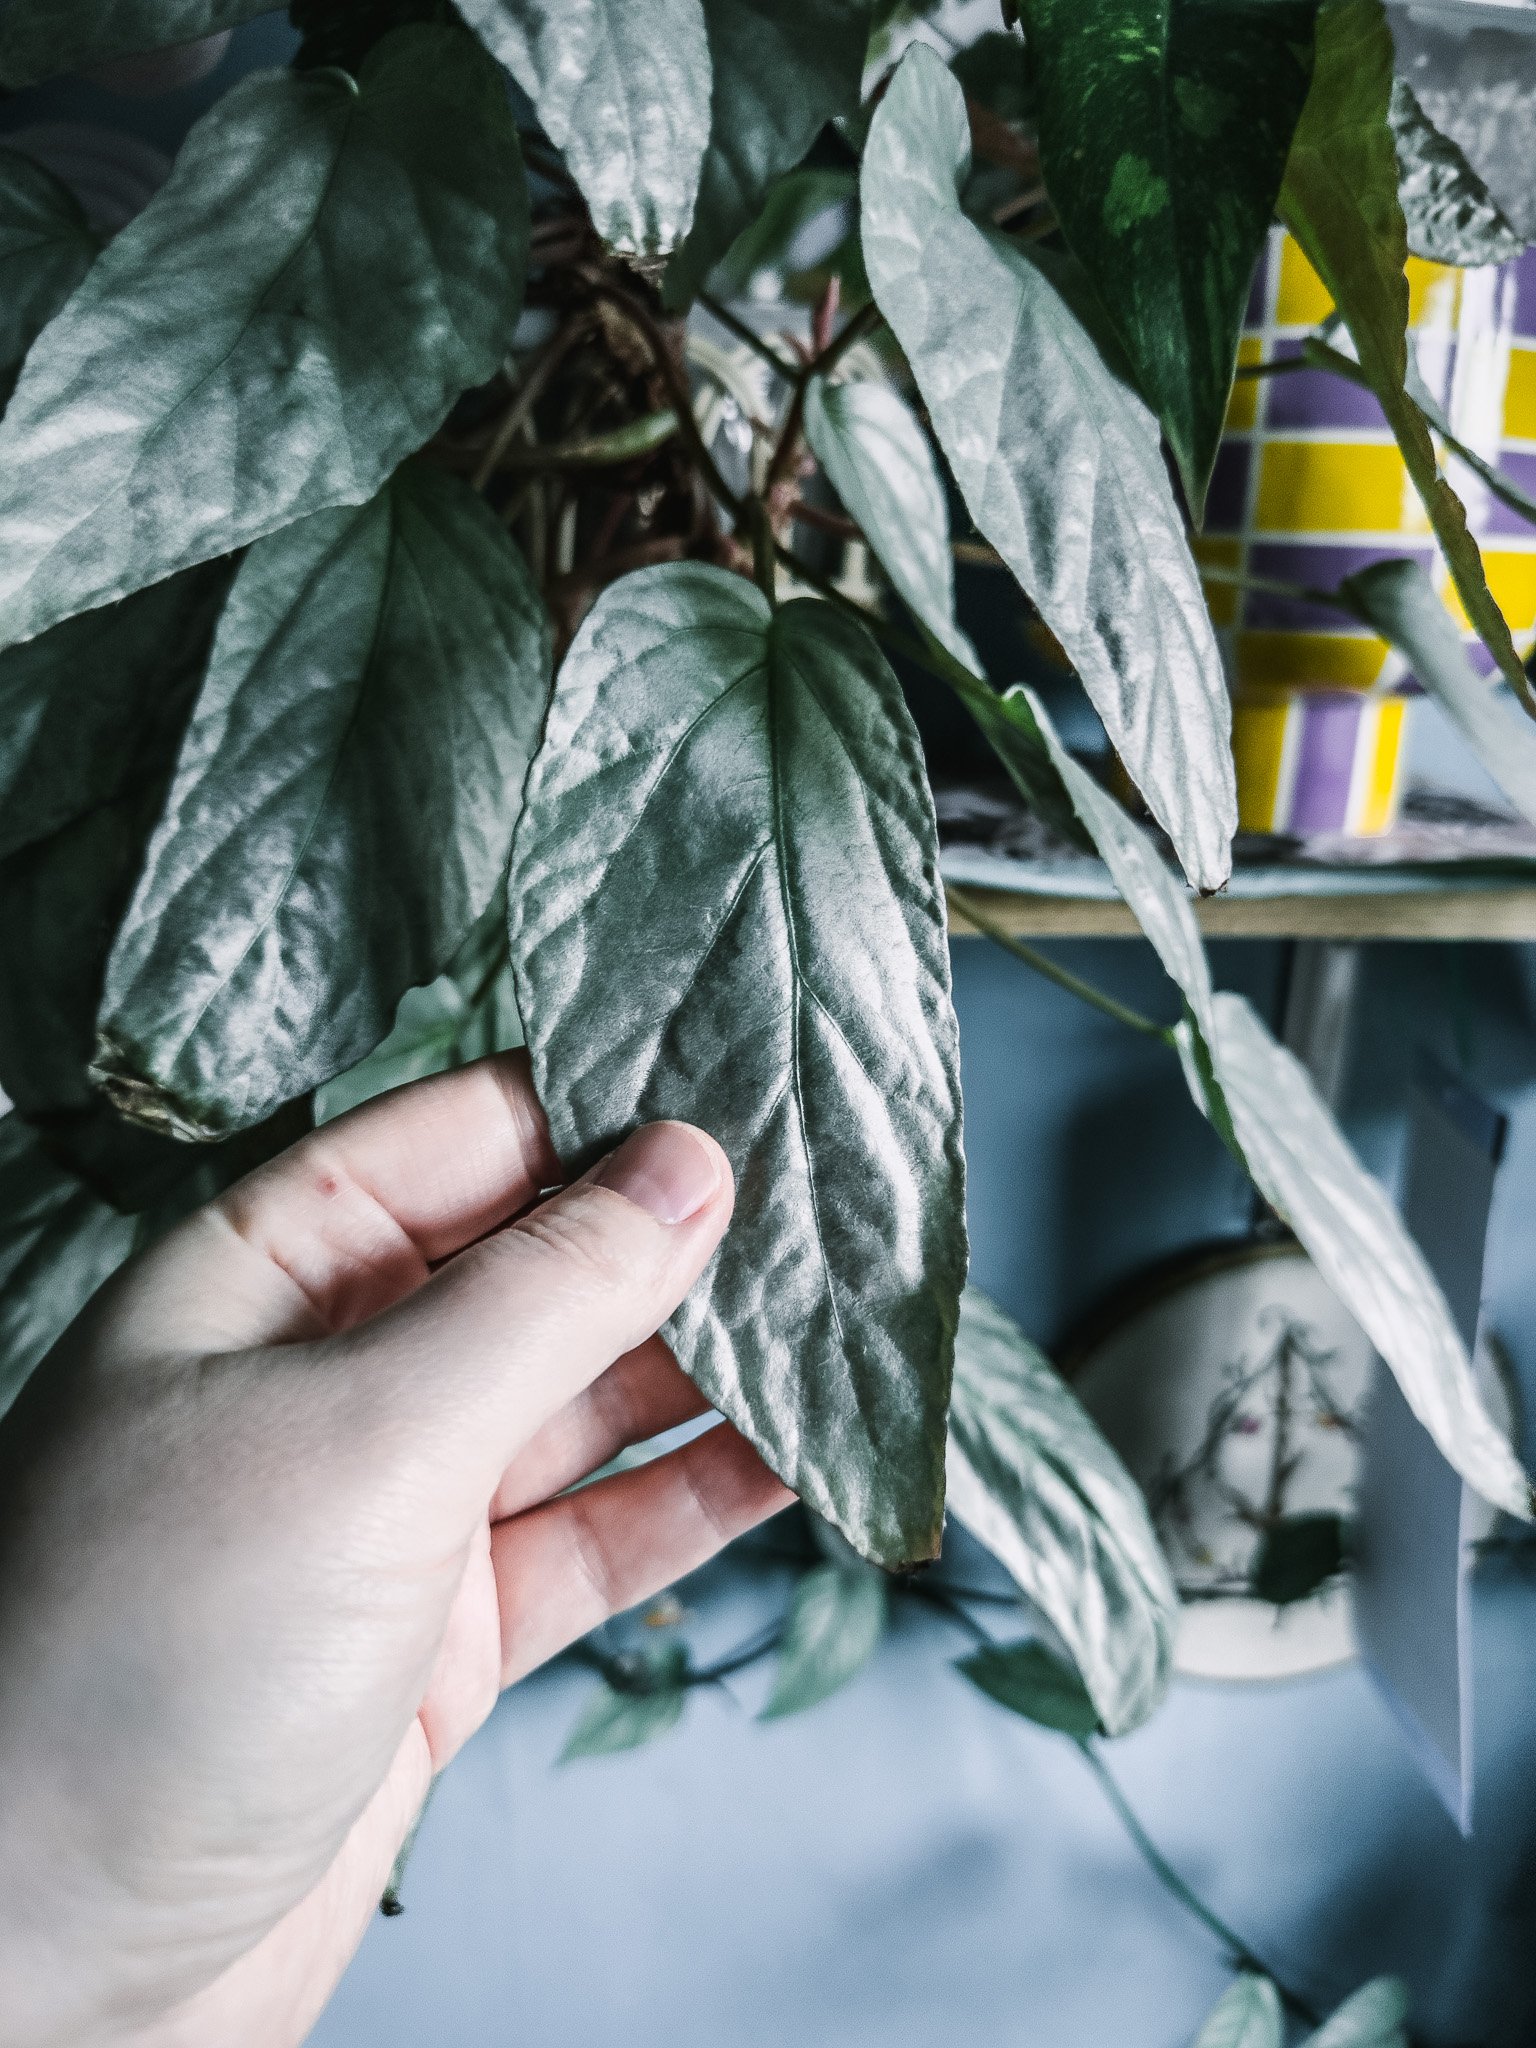
Begonia maculata — the iconic polka-dot begonia, with a kind of vintage charm that feels like it belongs somewhere between the 1920s and 1950s
Begonia hatacoa ‘Silver’ — less common, with a softer, more refined presence
Begonia brevirimosa — more rare, with incredible colour but a little more demanding
‘Maurice Amey’ and ‘Sinbad’ — beautiful examples of cane structure and pattern
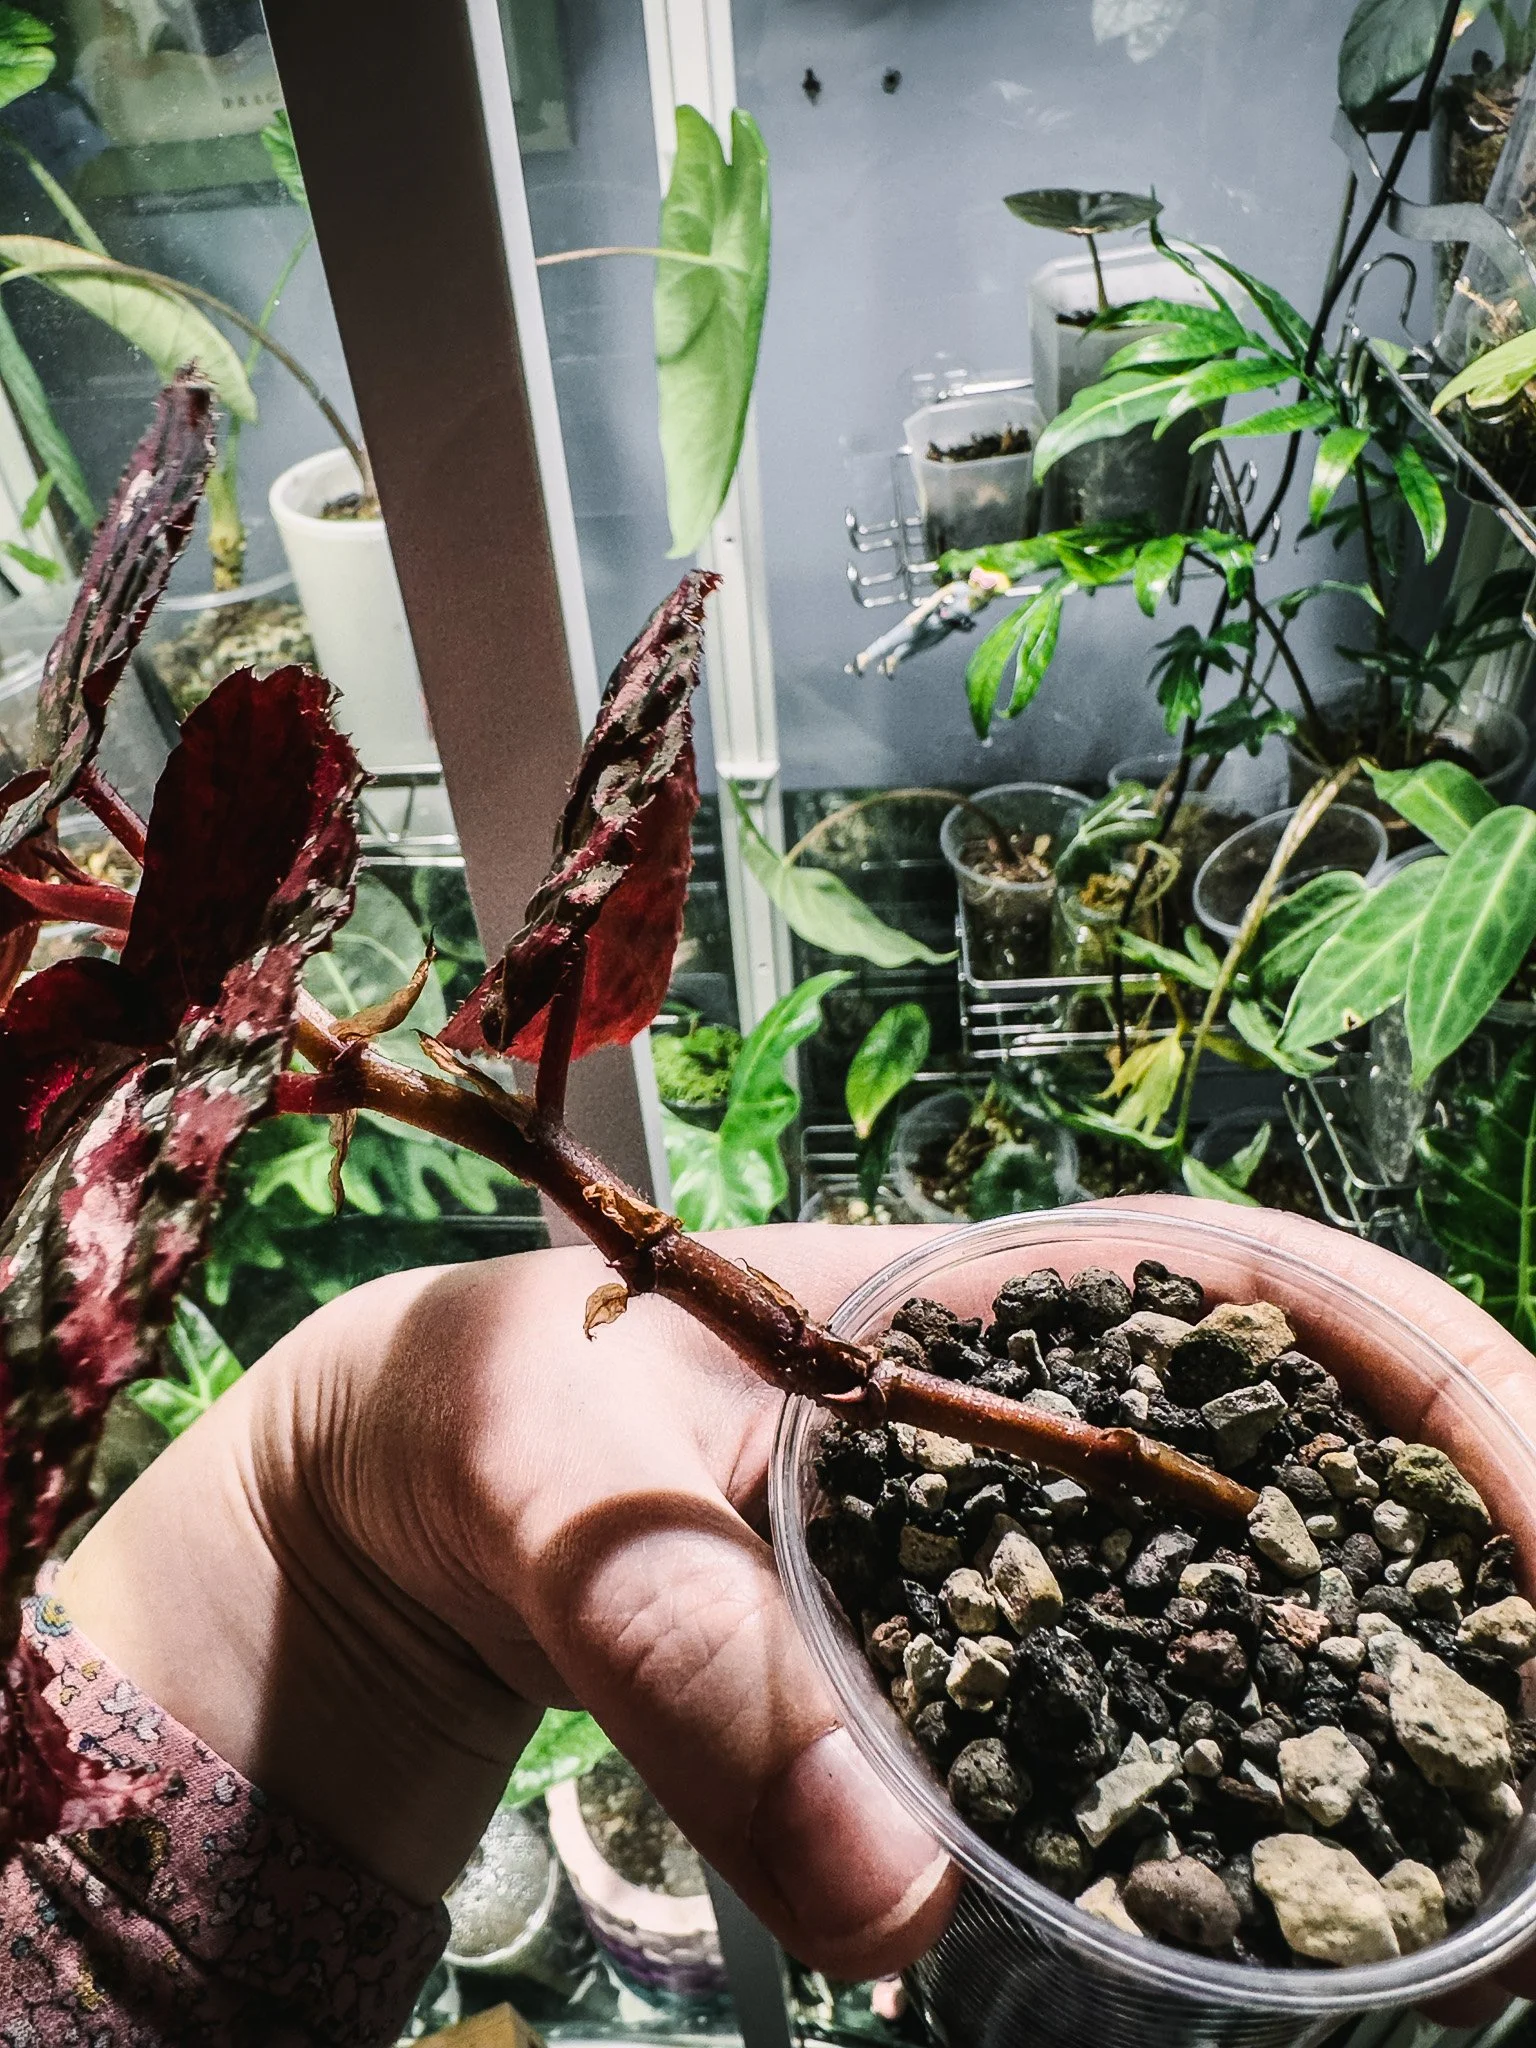
For me, care has been relatively consistent across these varieties. I grow many of mine using a semi-hydro setup, in self-watering pots or clear cups, which helps maintain that balance of moisture and airflow that cane begonias naturally prefer.
When working with these plants, especially during repotting or transitioning into semi-hydro, I always reach for my Jungle Floor Creative water-resistant repotting mat. It keeps everything contained while building your substrate and reflects that same idea of creating a controlled, intentional growing environment.
Paired with a soft plant cloth, it becomes easier to handle larger leaves gently, keeping foliage clean and undamaged while you work.
🪨 Extreme habitats – limestone and rocky begonias
Some begonias come from environments that feel almost otherworldly, limestone cliffs, cave entrances, and jagged rocky slopes, where soil is scarce and conditions shift quickly.
These species are often found across southern China, Vietnam, and Southeast Asia, growing in karst landscapes. Here, rain arrives in bursts, flowing over rock surfaces and draining away just as quickly, leaving behind only thin pockets of moisture and organic debris.
Instead of spreading through soil, these begonias anchor themselves into crevices and cracks, where their roots experience a cycle of quick saturation followed by airflow and drying.
🌿 What that feels like in nature
Cool stone under constant humidity.
Water trickling, then disappearing.
Roots wedged into narrow spaces, never sitting still in heavy soil.
🌿 Environment of these species
🌱 Light
Light is limited and uneven:
Filtered by rock or surrounding vegetation
Often dim, especially deeper in cave-like environments
Occasionally interrupted by brief shafts of brighter light
These begonias are adapted to low, inconsistent light, not exposure.
🪴 Soil profile
Soil is minimal and fragmented:
Thin layers of organic debris caught in crevices
Mixed with mineral particles from rock
Extremely free-draining and shallow
Roots don’t grow downward, they:
Spread into cracks and gaps
Anchor into structure rather than soil
👉 These plants aren’t rooted in soil, but in opportunity
🌫️ Atmosphere
This is where the balance shifts:
Air is cooler, shaded, and very humid
Moisture exists more in the air than in the soil
This creates a contrast:
Roots dry quickly
Surroundings remain consistently humid
🌬️ Airflow
Even in enclosed environments, air is always moving:
Through cave openings
Across rock surfaces
Between crevices
This gentle airflow prevents stagnation and supports survival.
🌱 What this means for care
With these begonias, you’re not recreating soil, you’re recreating conditions.
🪴 Soil
Use a very open, structured mix:
Bark
Perlite
A small amount of organic material
It should feel:
Loose
Chunky
Fast-draining
👉 Water should pass through, never linger
💧 Water
Water lightly, but consistently:
Allow water to move through the substrate
Never let the plant sit wet
Avoid heavy soaking
Think:
👉 frequent refresh, not saturation
🌫️ Humidity
Humidity is essential.
These begonias rely more on moist air than wet soil, especially delicate species.
🌬️ Airflow
Balance humidity with airflow:
Prevents rot
Keeps conditions fresh
Mimics natural environments
🌿 Begonias from these environments
Begonia ferox — dramatic, spiked foliage like living armour
Begonia pavonina — iridescent blue leaves in low light
Begonia amphioxus — narrow leaves with striking red markings
🌿my Final Rambles
I’ll be honest, I don’t have as much hands-on experience with these types yet. Their extreme habitats make them more challenging to replicate indoors.
But after researching them more deeply, I feel like I understand their needs in a completely different way, and I’m definitely tempted to explore them again.
If you’ve grown any of these begonias, I’d love to hear your experience.
Feel free to share in the comments or get in touch, it’s always fascinating to see how these plants behave in different homes and environments.

5 Lovely Gift Ideas for Plant Lovers This Valentine’s & Galentine’s Day
Five lovely Valentine’s and Galentine’s Day gift ideas for plant lovers, featuring practical plant care accessories and botanical inspiration.
Whether you’re celebrating romantic love or your favourite plant-loving friends, these thoughtful gift ideas are perfect for Valentine’s and Galentine’s Day.
Propagation Stations for Plant Cuttings
Propagation stations are a lovely gift for plant lovers who enjoy growing and sharing cuttings. They look beautiful on a windowsill and pair perfectly with a calm, considered plant care setup.
Reusable Potting Mats for Repotting Plants
A reusable, water-resistant potting mat makes repotting houseplants cleaner and more enjoyable. Jungle Floor potting mats are designed to be both practical and beautiful, ideal for plant lovers who appreciate thoughtful tools.
Botanical Home Decor & Plant-Inspired Gifts
Plant-inspired decor, photography, and jungle-themed accessories bring leafy charm to a home without adding another plant to care for. Perfect for Galentine’s gifting when you want something a little different.
Plant Pots, Tools & Care Accessories
Small plant accessories like pots, tools, Soft plant cloths, Soil Scoops and everyday care essentials make easy and thoughtful gifts. They’re the kind of items plant lovers always need and rarely treat themselves to.
A Jungle Floor Gift Voucher
A Jungle Floor gift voucher is a lovely option if you’re unsure what to choose. It lets them pick exactly what they need for their indoor jungle, from plant care tools to botanical accessories. Gift Voucher
💡 Plant lover tip: Heart-shaped houseplants like String of Hearts or Heart-leaf Hoya make a popular Valentine’s or Galentine’s gift and pair beautifully with practical plant care accessories.
House plant Trends 2025, Seen Through a Plant Lover’s Lens
2025 felt like wandering through a living rainforest — full of light, leaves, and hidden corners of wonder. It was a year shaped by plant challenges, creative growth, and quiet lessons, both in my home jungle and beyond. From exploring Cambridge University Botanic Garden with my besties at the start of the year, to diving deeper into houseplants, botanical creativity, and sharing personal plant recommendations, this year became a journey of steady growth and discovery.
🌿 2025: A Year of Growth, Green Magic, and Creative Adventures.
2025 felt like wandering through a living rainforest — full of light, leaves, and hidden corners of wonder. It was a year shaped by plant challenges, creative growth, and quiet lessons, both in my home jungle and beyond. From exploring Cambridge University Botanic Garden with my besties at the start of the year, to diving deeper into houseplants, botanical creativity, and sharing personal plant recommendations, this year became a journey of steady growth and discovery.
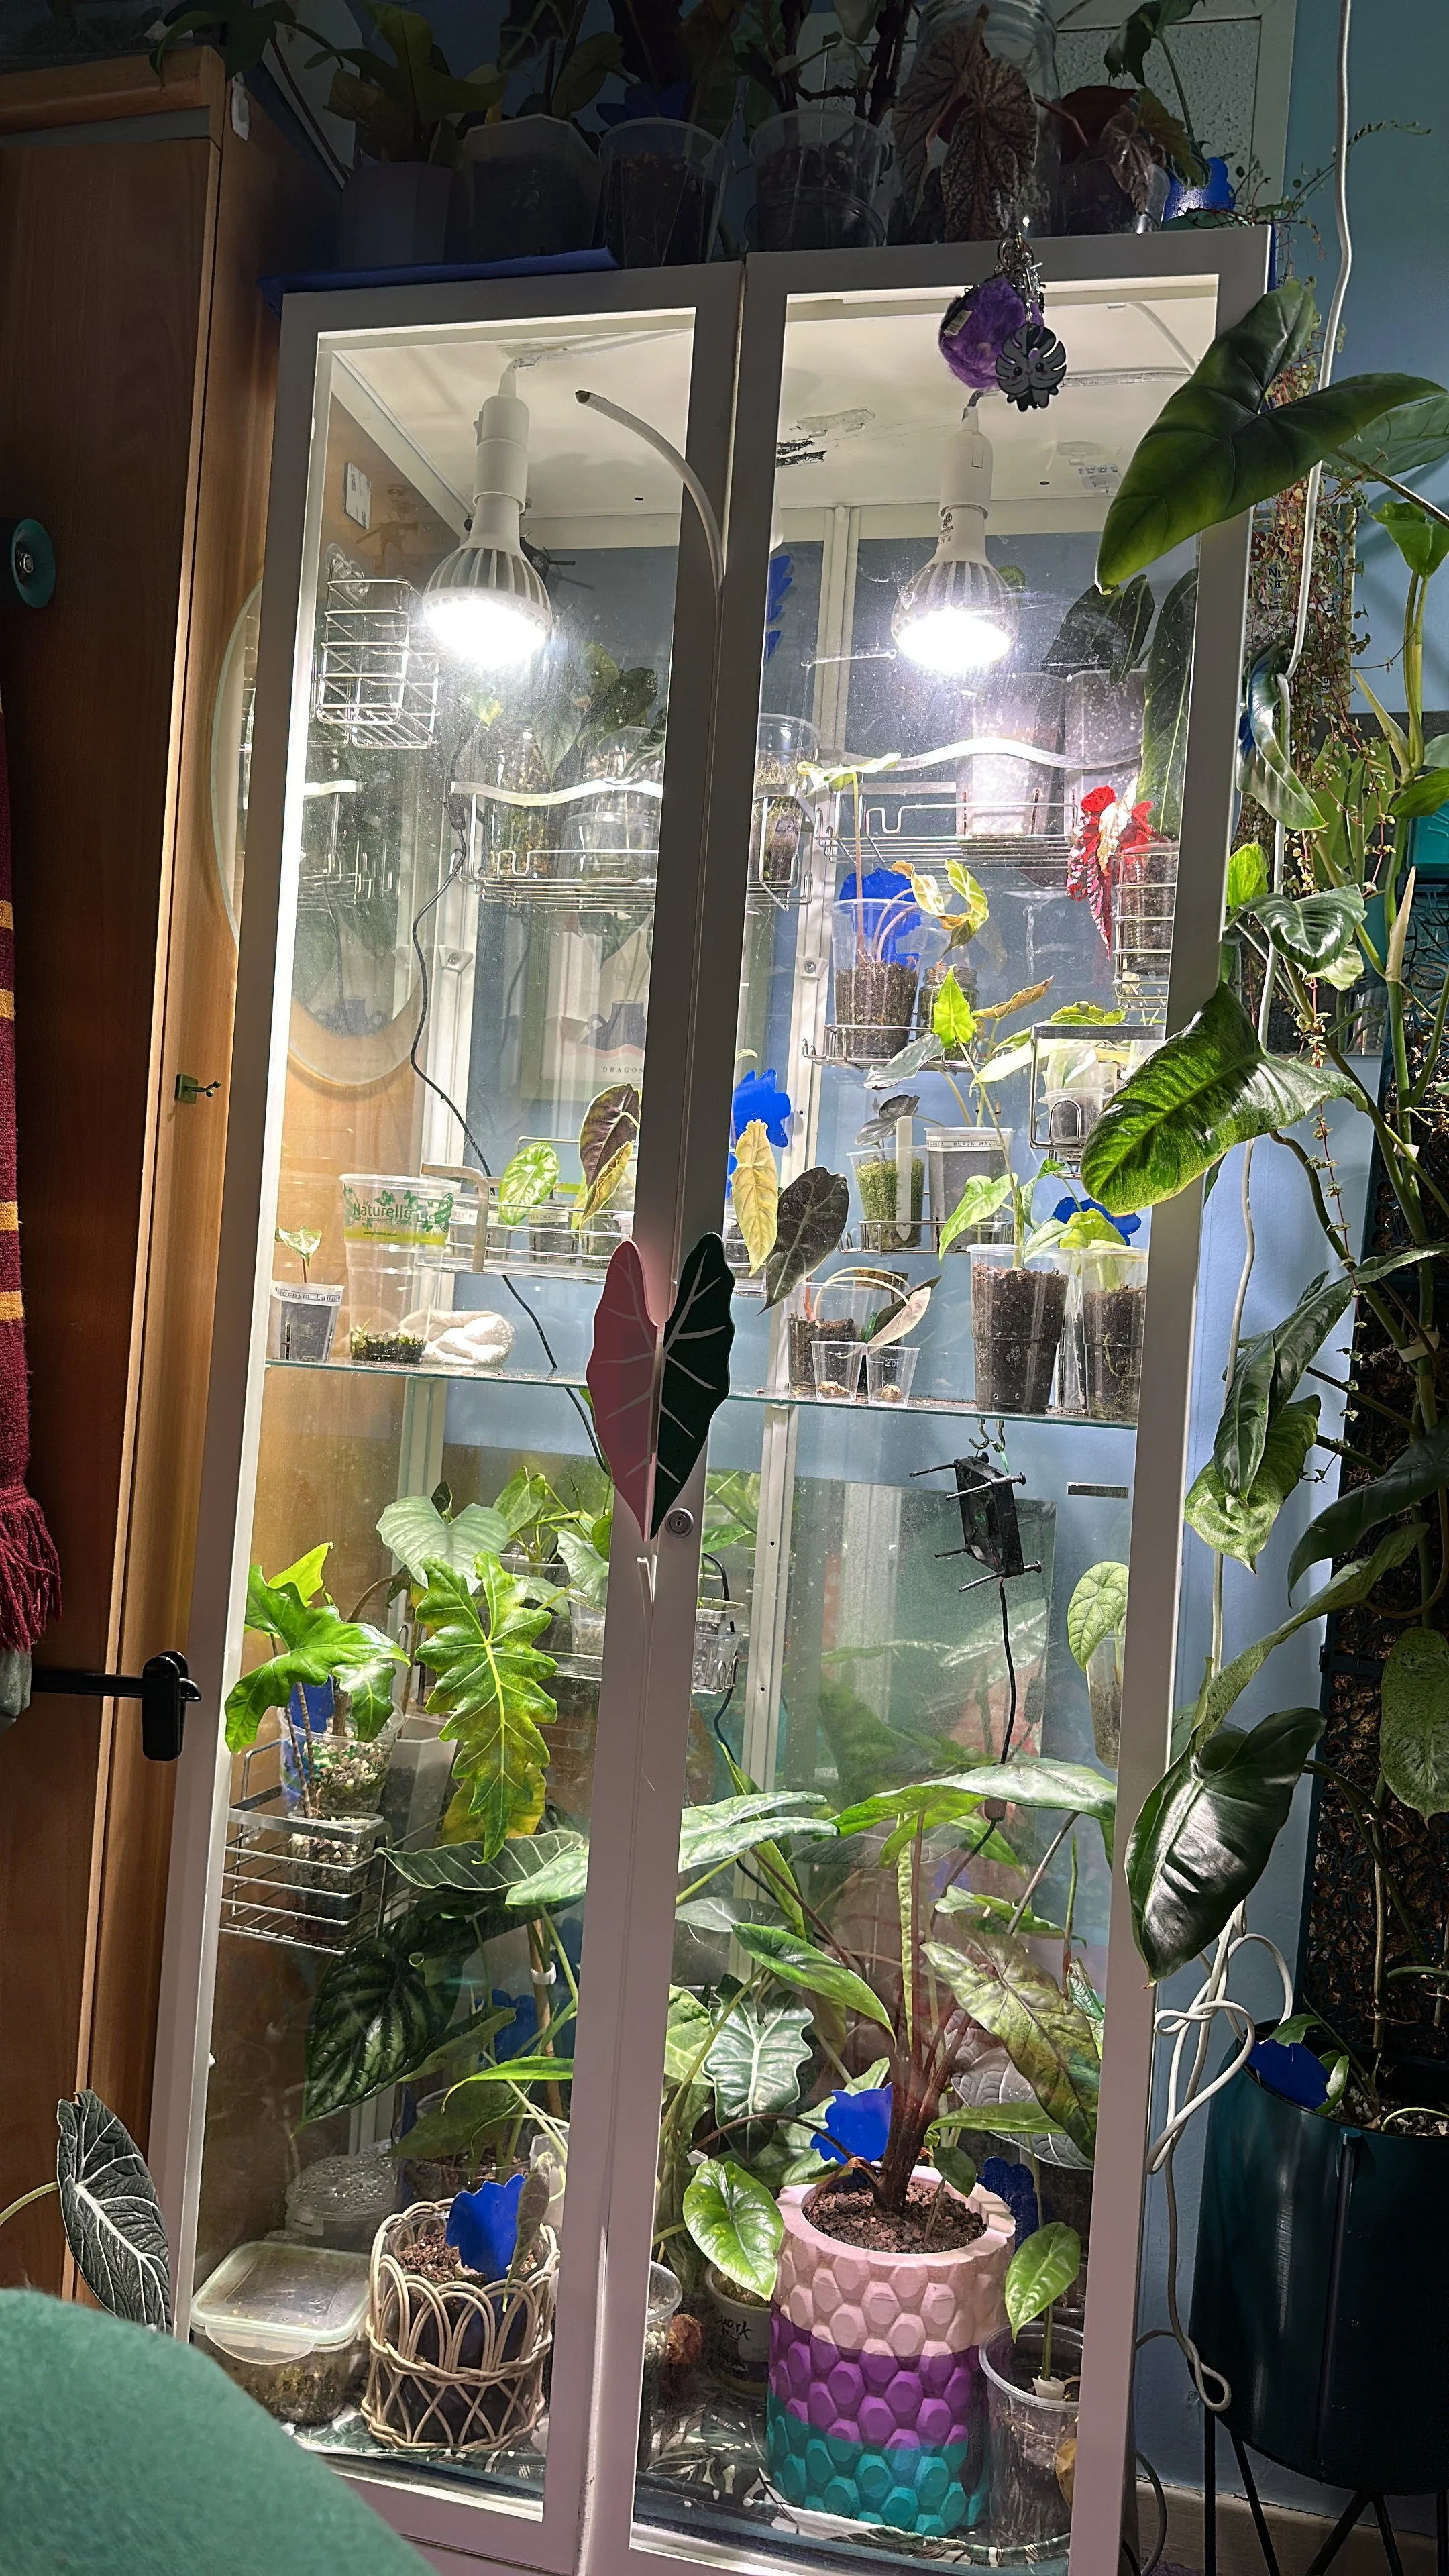
As a plant lover, 2025 brought new obsessions and milestones. I fell in love with anthuriums, welcomed a new IKEA Milsbo into my growing plant collection, and made more Jungle Floor potting mats than ever before. Seeing these botanical creations find homes with fellow plant lovers was one of the highlights of my 2025 year in review, reminding me how meaningful slow, intentional making can be.
Creatively, opening Jungle Floor Creative allowed me to develop my photography skills, experiment with light and texture, and explore how plants, shadows, and reflections tell stories. Photography became another way of observing growth — much like plant care — noticing subtle changes over time rather than chasing instant results.
Not every part of 2025 was filled with light and leaves. This year also asked me to learn how to cope with ASD, process grief and loss, and find softness during moments of frustration and overwhelm. Like many houseplant challenges, growth didn’t always look neat or predictable — but it was happening beneath the surface all the same.
Alongside the challenges came deep joy: becoming an auntie, spending time with my besties, and experiencing the quiet magic of nature through my camera lens. These moments grounded me and reminded me why I’m drawn to plants, photography, and creative work in the first place.
As I reflect on 2025, I see it as a year of rooting — a season of learning, patience, and gentle expansion. I’m carrying these lessons forward into 2026 with intention, curiosity, and trust in slow growth.
Thank you for walking the Jungle Floor with me this year — through the growth, the grief, the creative sparks, and the leafy adventures. Every leaf, every moment, every photo mattered.

botanical photography
🌿 Plant Challenges in 2025
Like any growing season, 2025 came with its own set of houseplant challenges. Each plant tested my patience, observation skills, and ability to trust slow growth. These challenges became some of my most valuable plant care lessons of 2025.
🌿 Alocasia micholitziana Care Challenges
A true test of vigilance. Spider mites lurked quietly, requiring close observation and consistent care. This plant reminded me that early signs matter — and that staying attentive can make all the difference when caring for sensitive houseplants like Alocasia.
🌿Monstera dubia Growth & Support
Fast-growing climbers always reaching for more. These plants thrived when given proper support, proving that ambition — whether in plants or people — needs structure to grow well. One of my clearest reminders that support systems are essential for healthy plant growth.
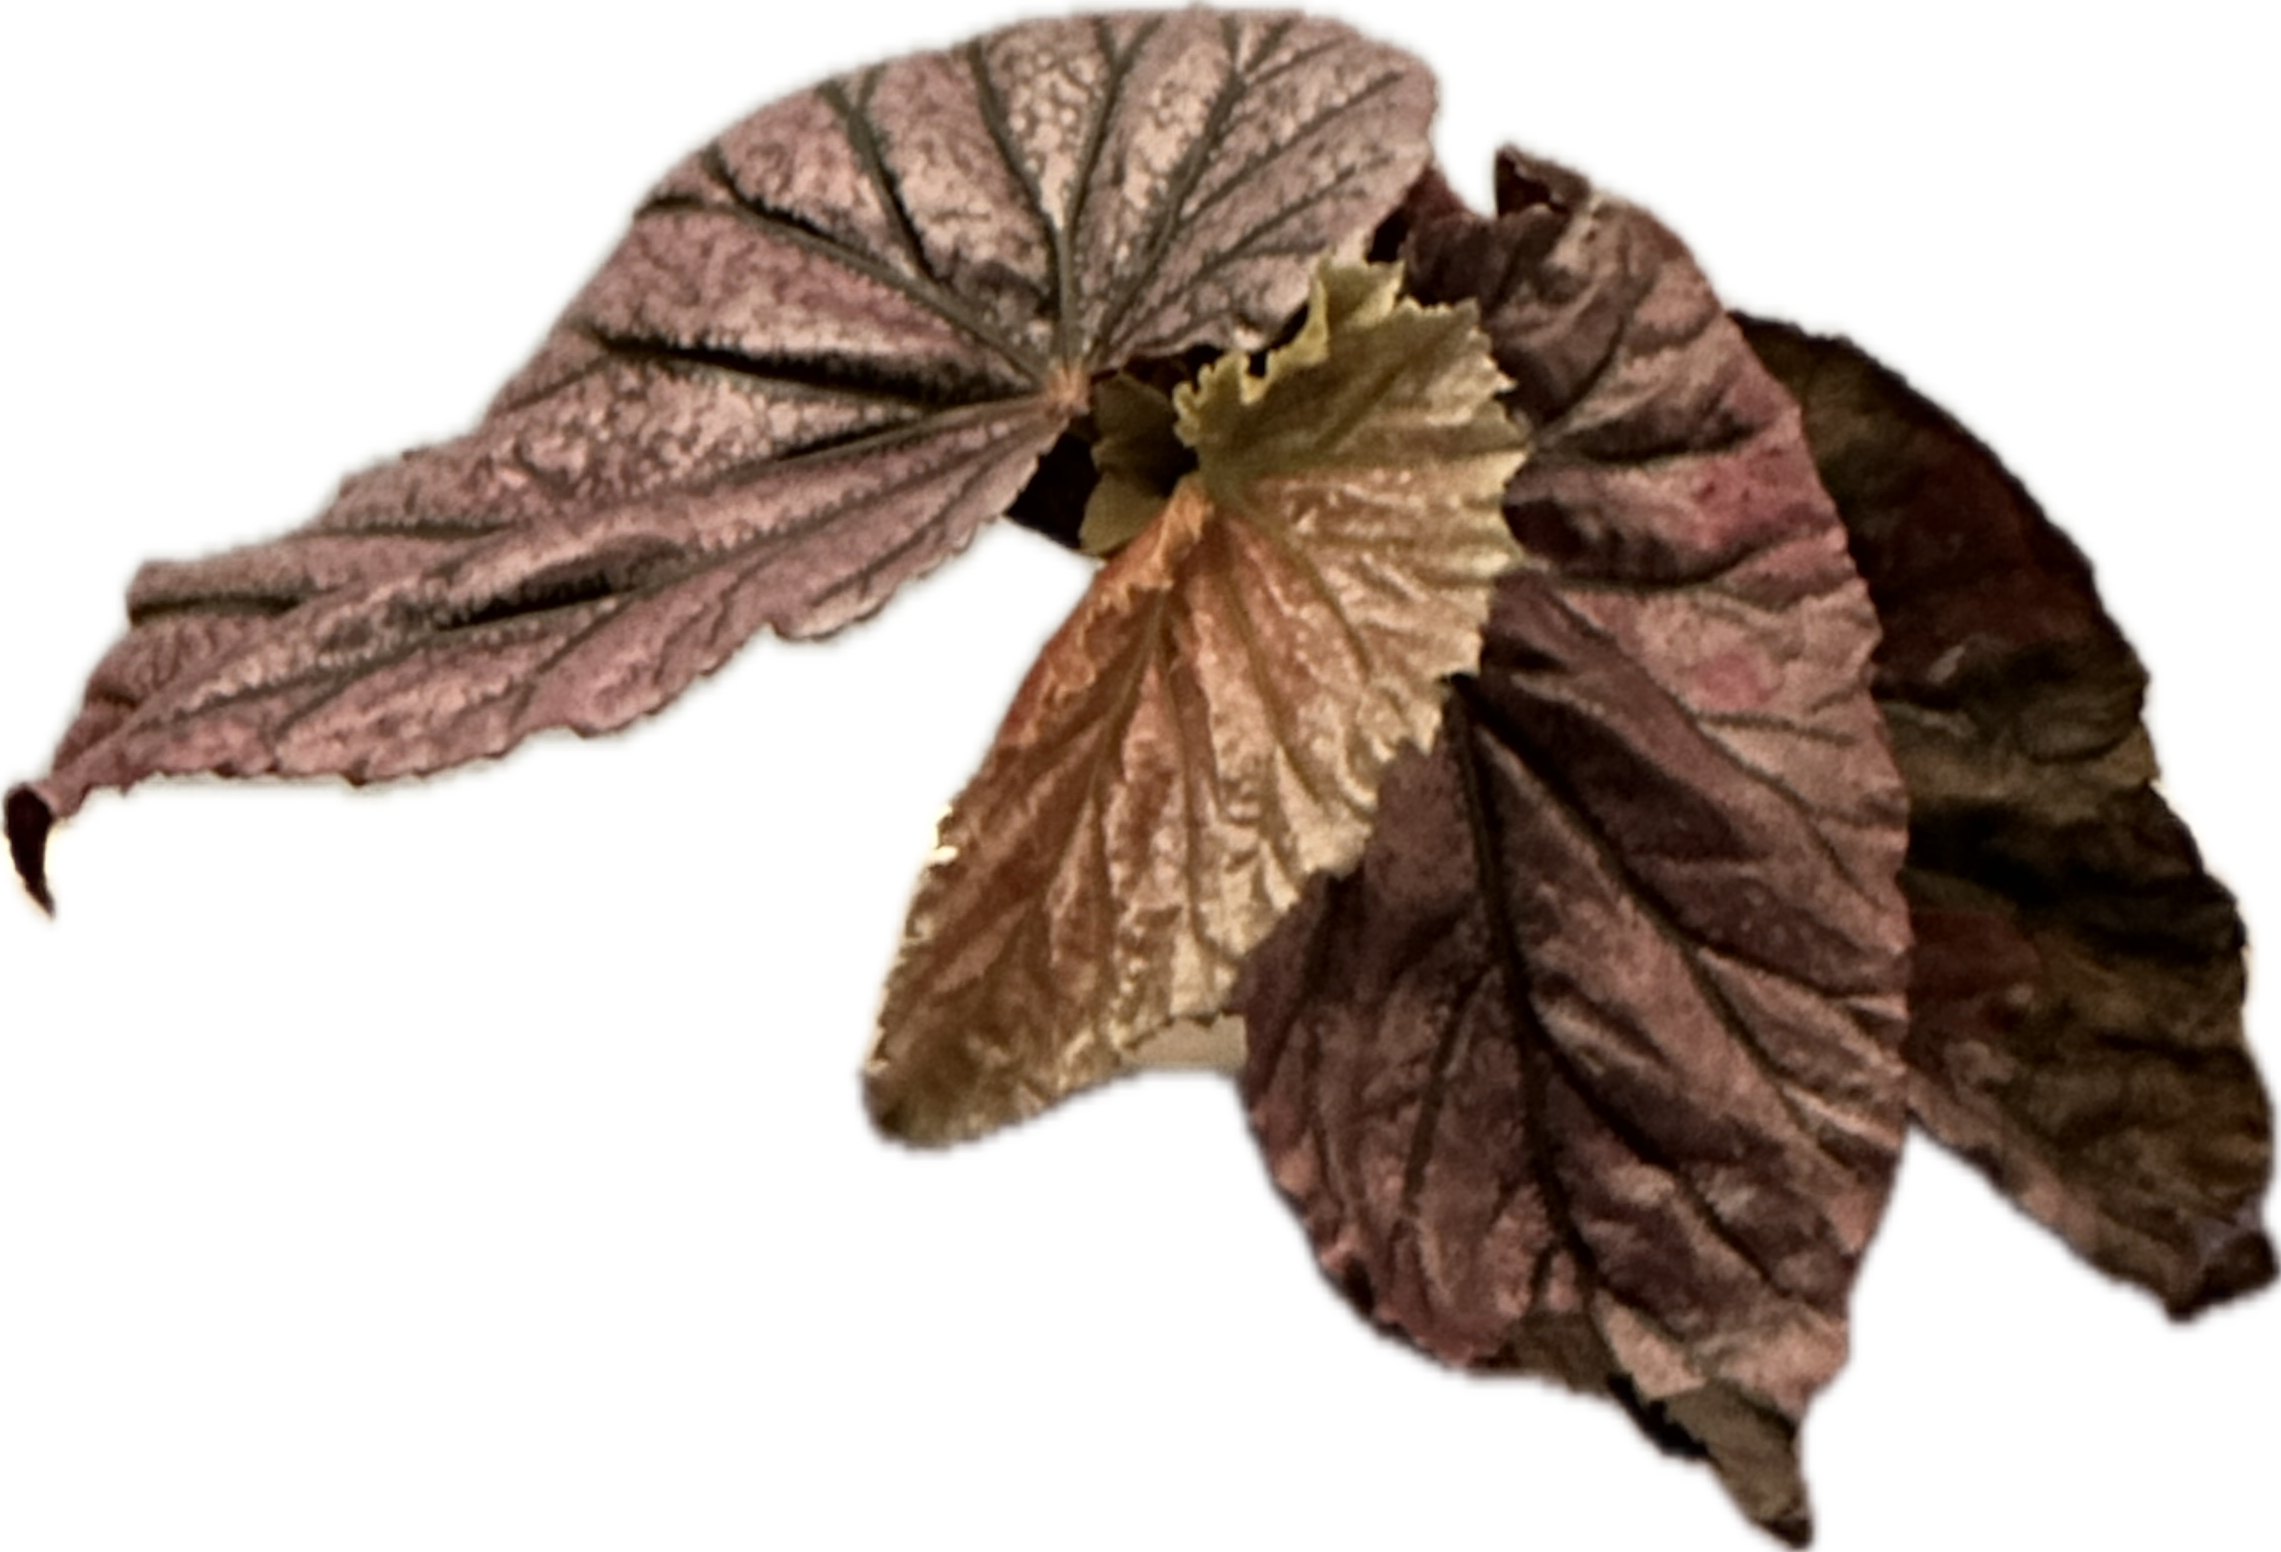
🌿Begonia ‘Maurice Amey’ Recovery
Cut back to nothing at the beginning of the year, this begonia taught me a powerful lesson in rest and regrowth. Sometimes plant care means stepping back completely and trusting that new growth will return in its own time.
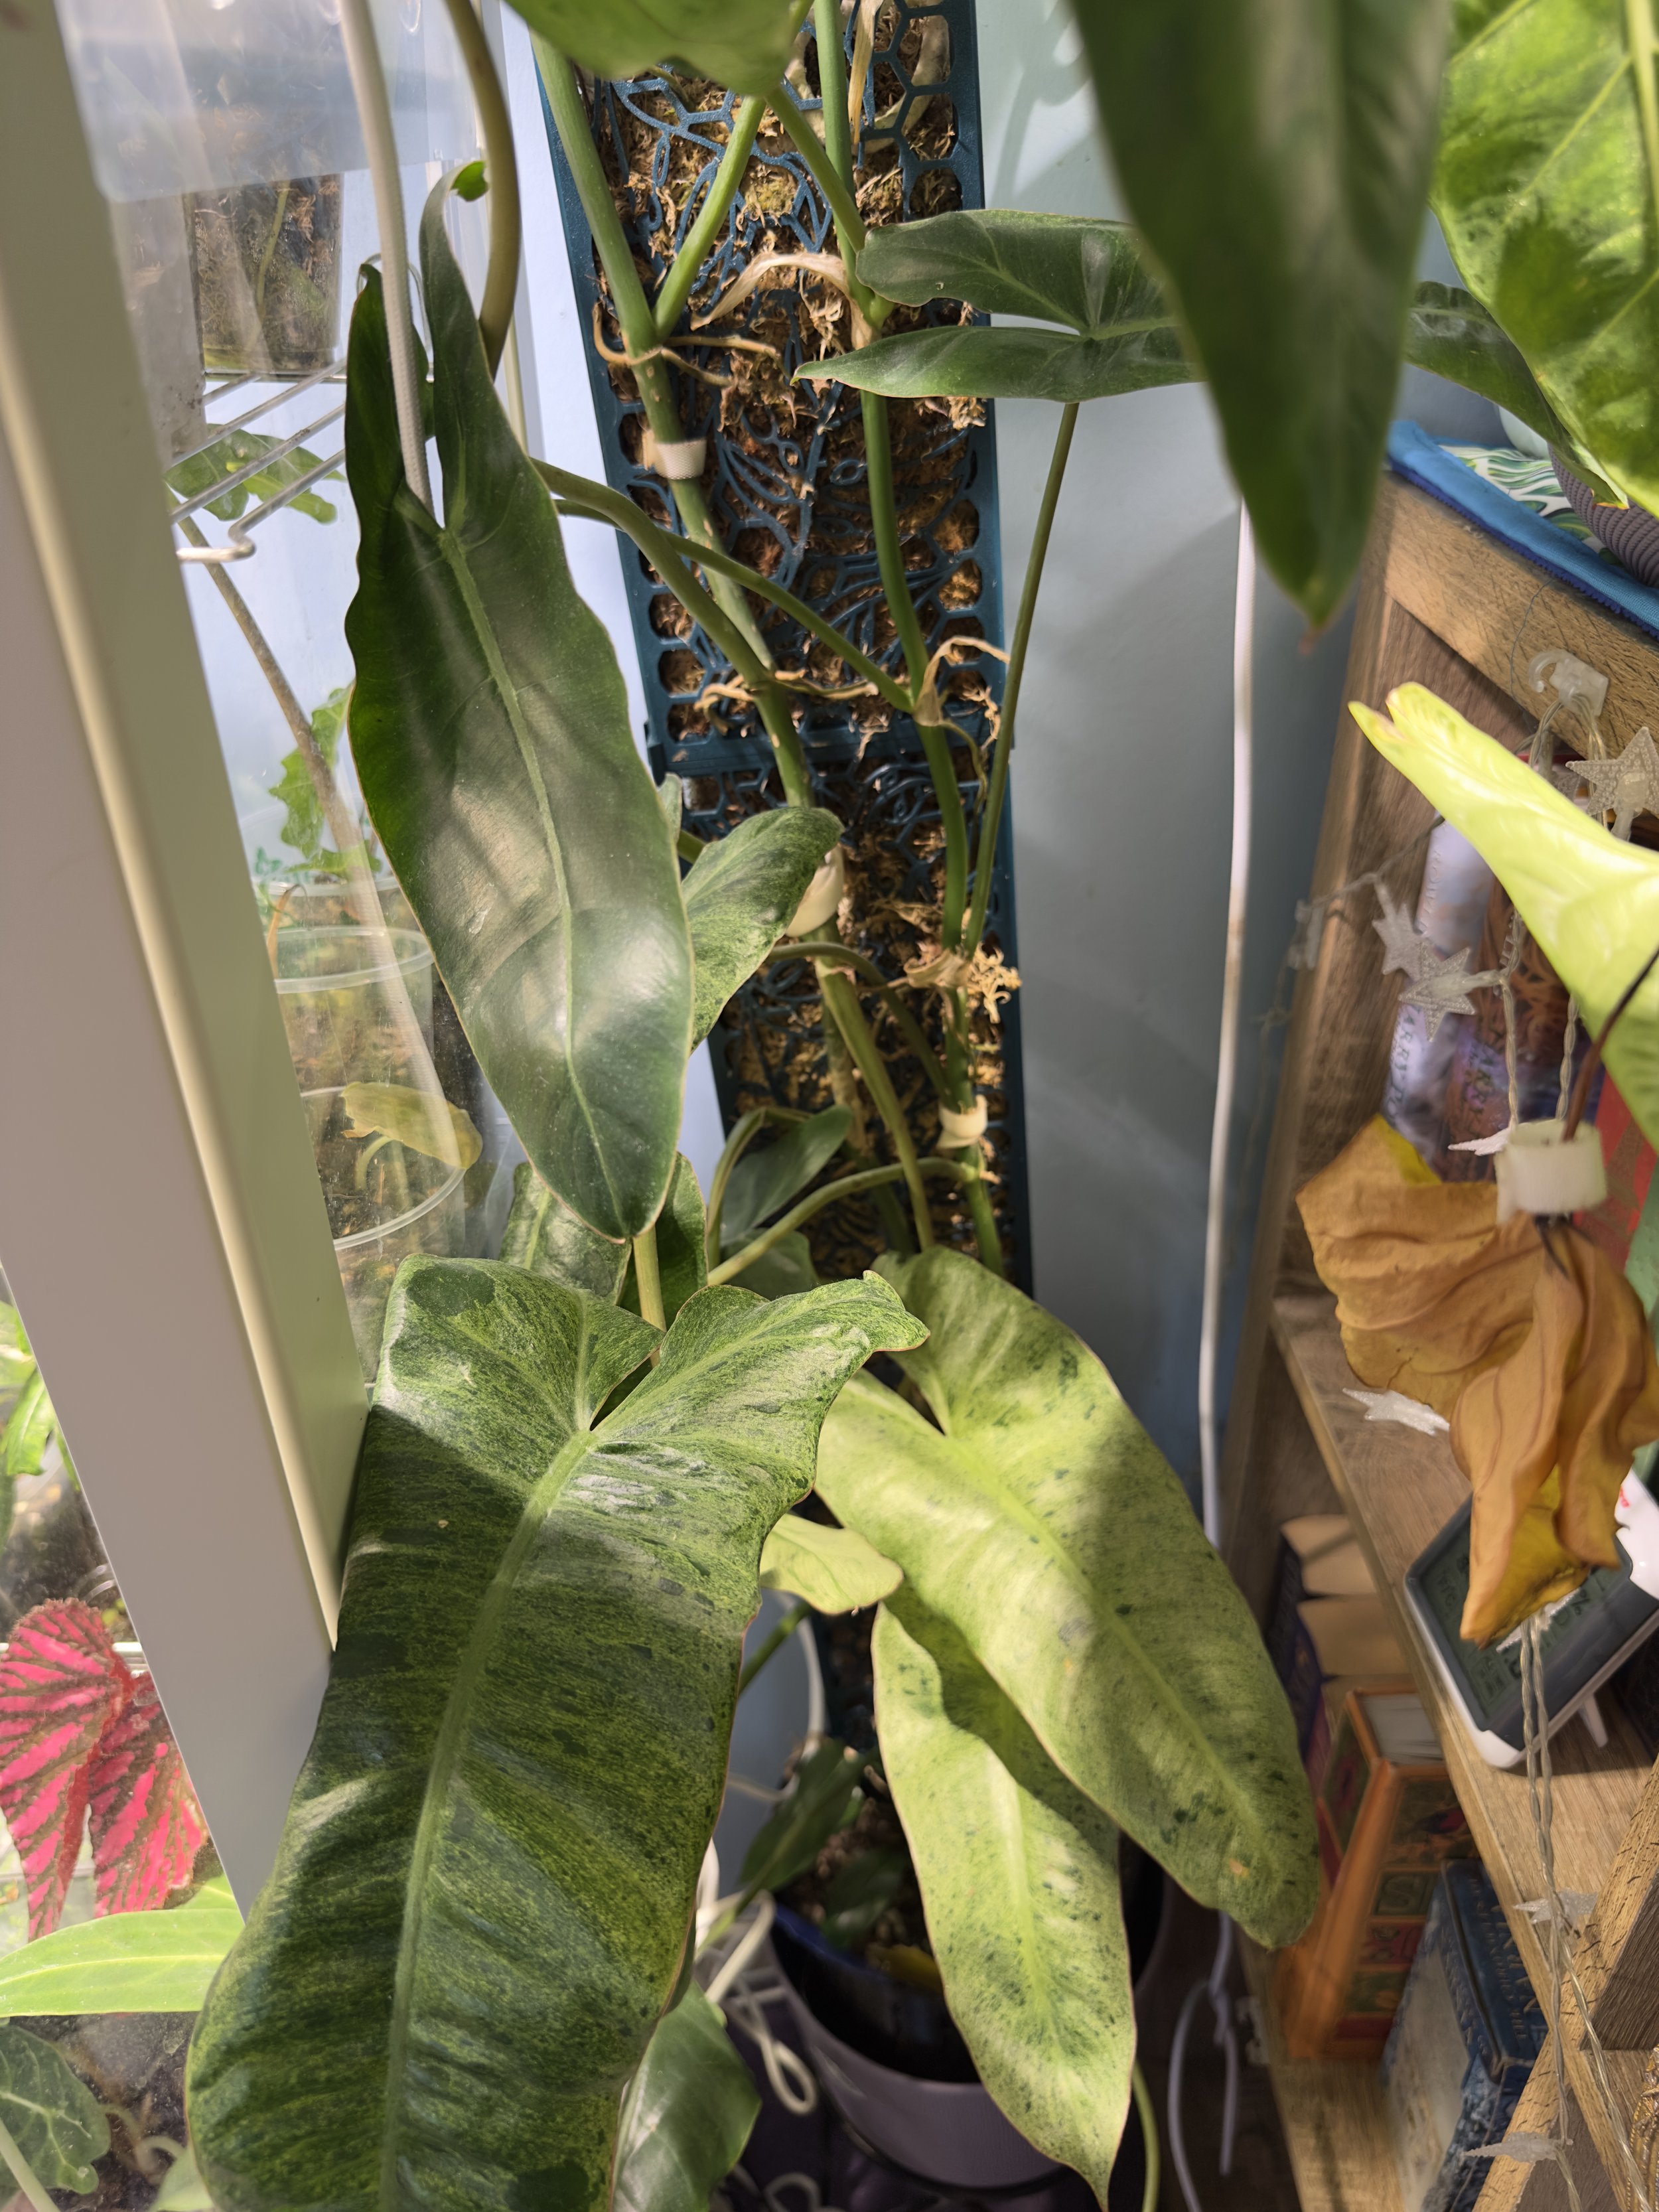
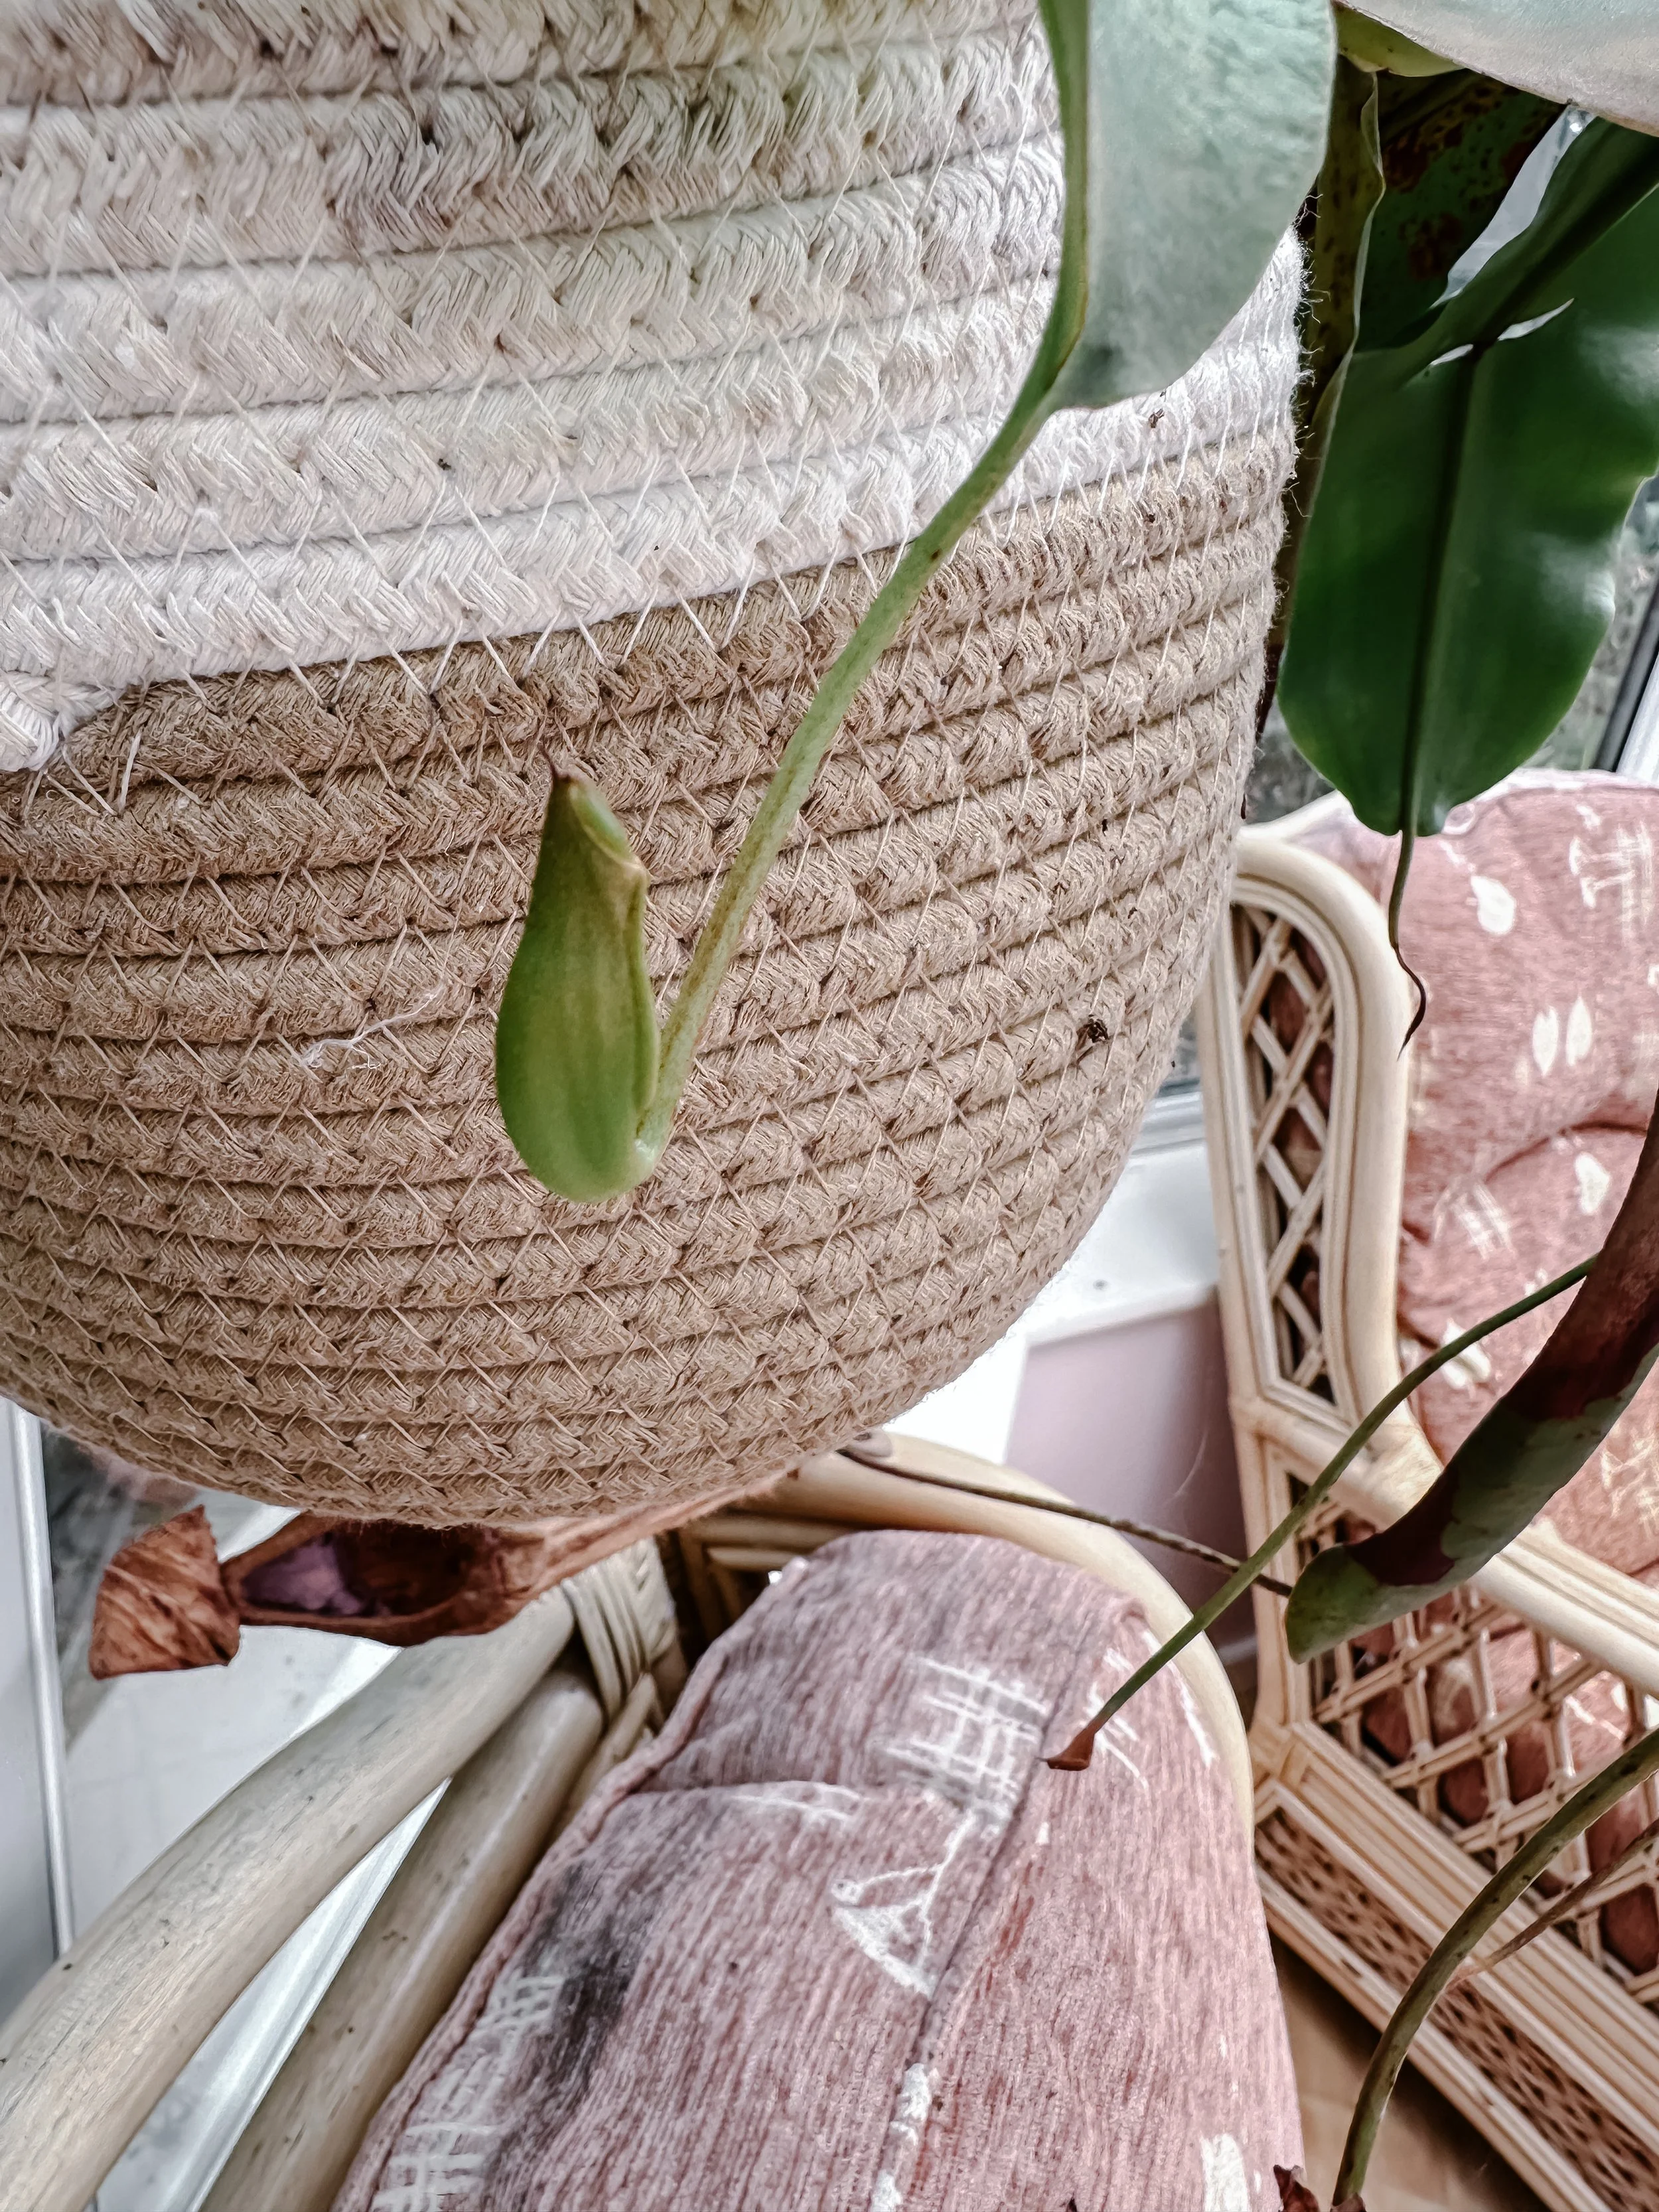
🌿 Philodendron ‘Paraiso Verde’ Variegation
Once beautifully variegated, now quietly green. This plant became a lesson in patience — waiting for warmth, light, and the right conditions for its hidden magic to re-emerge. A reminder that variegation, like creativity, isn’t always constant.
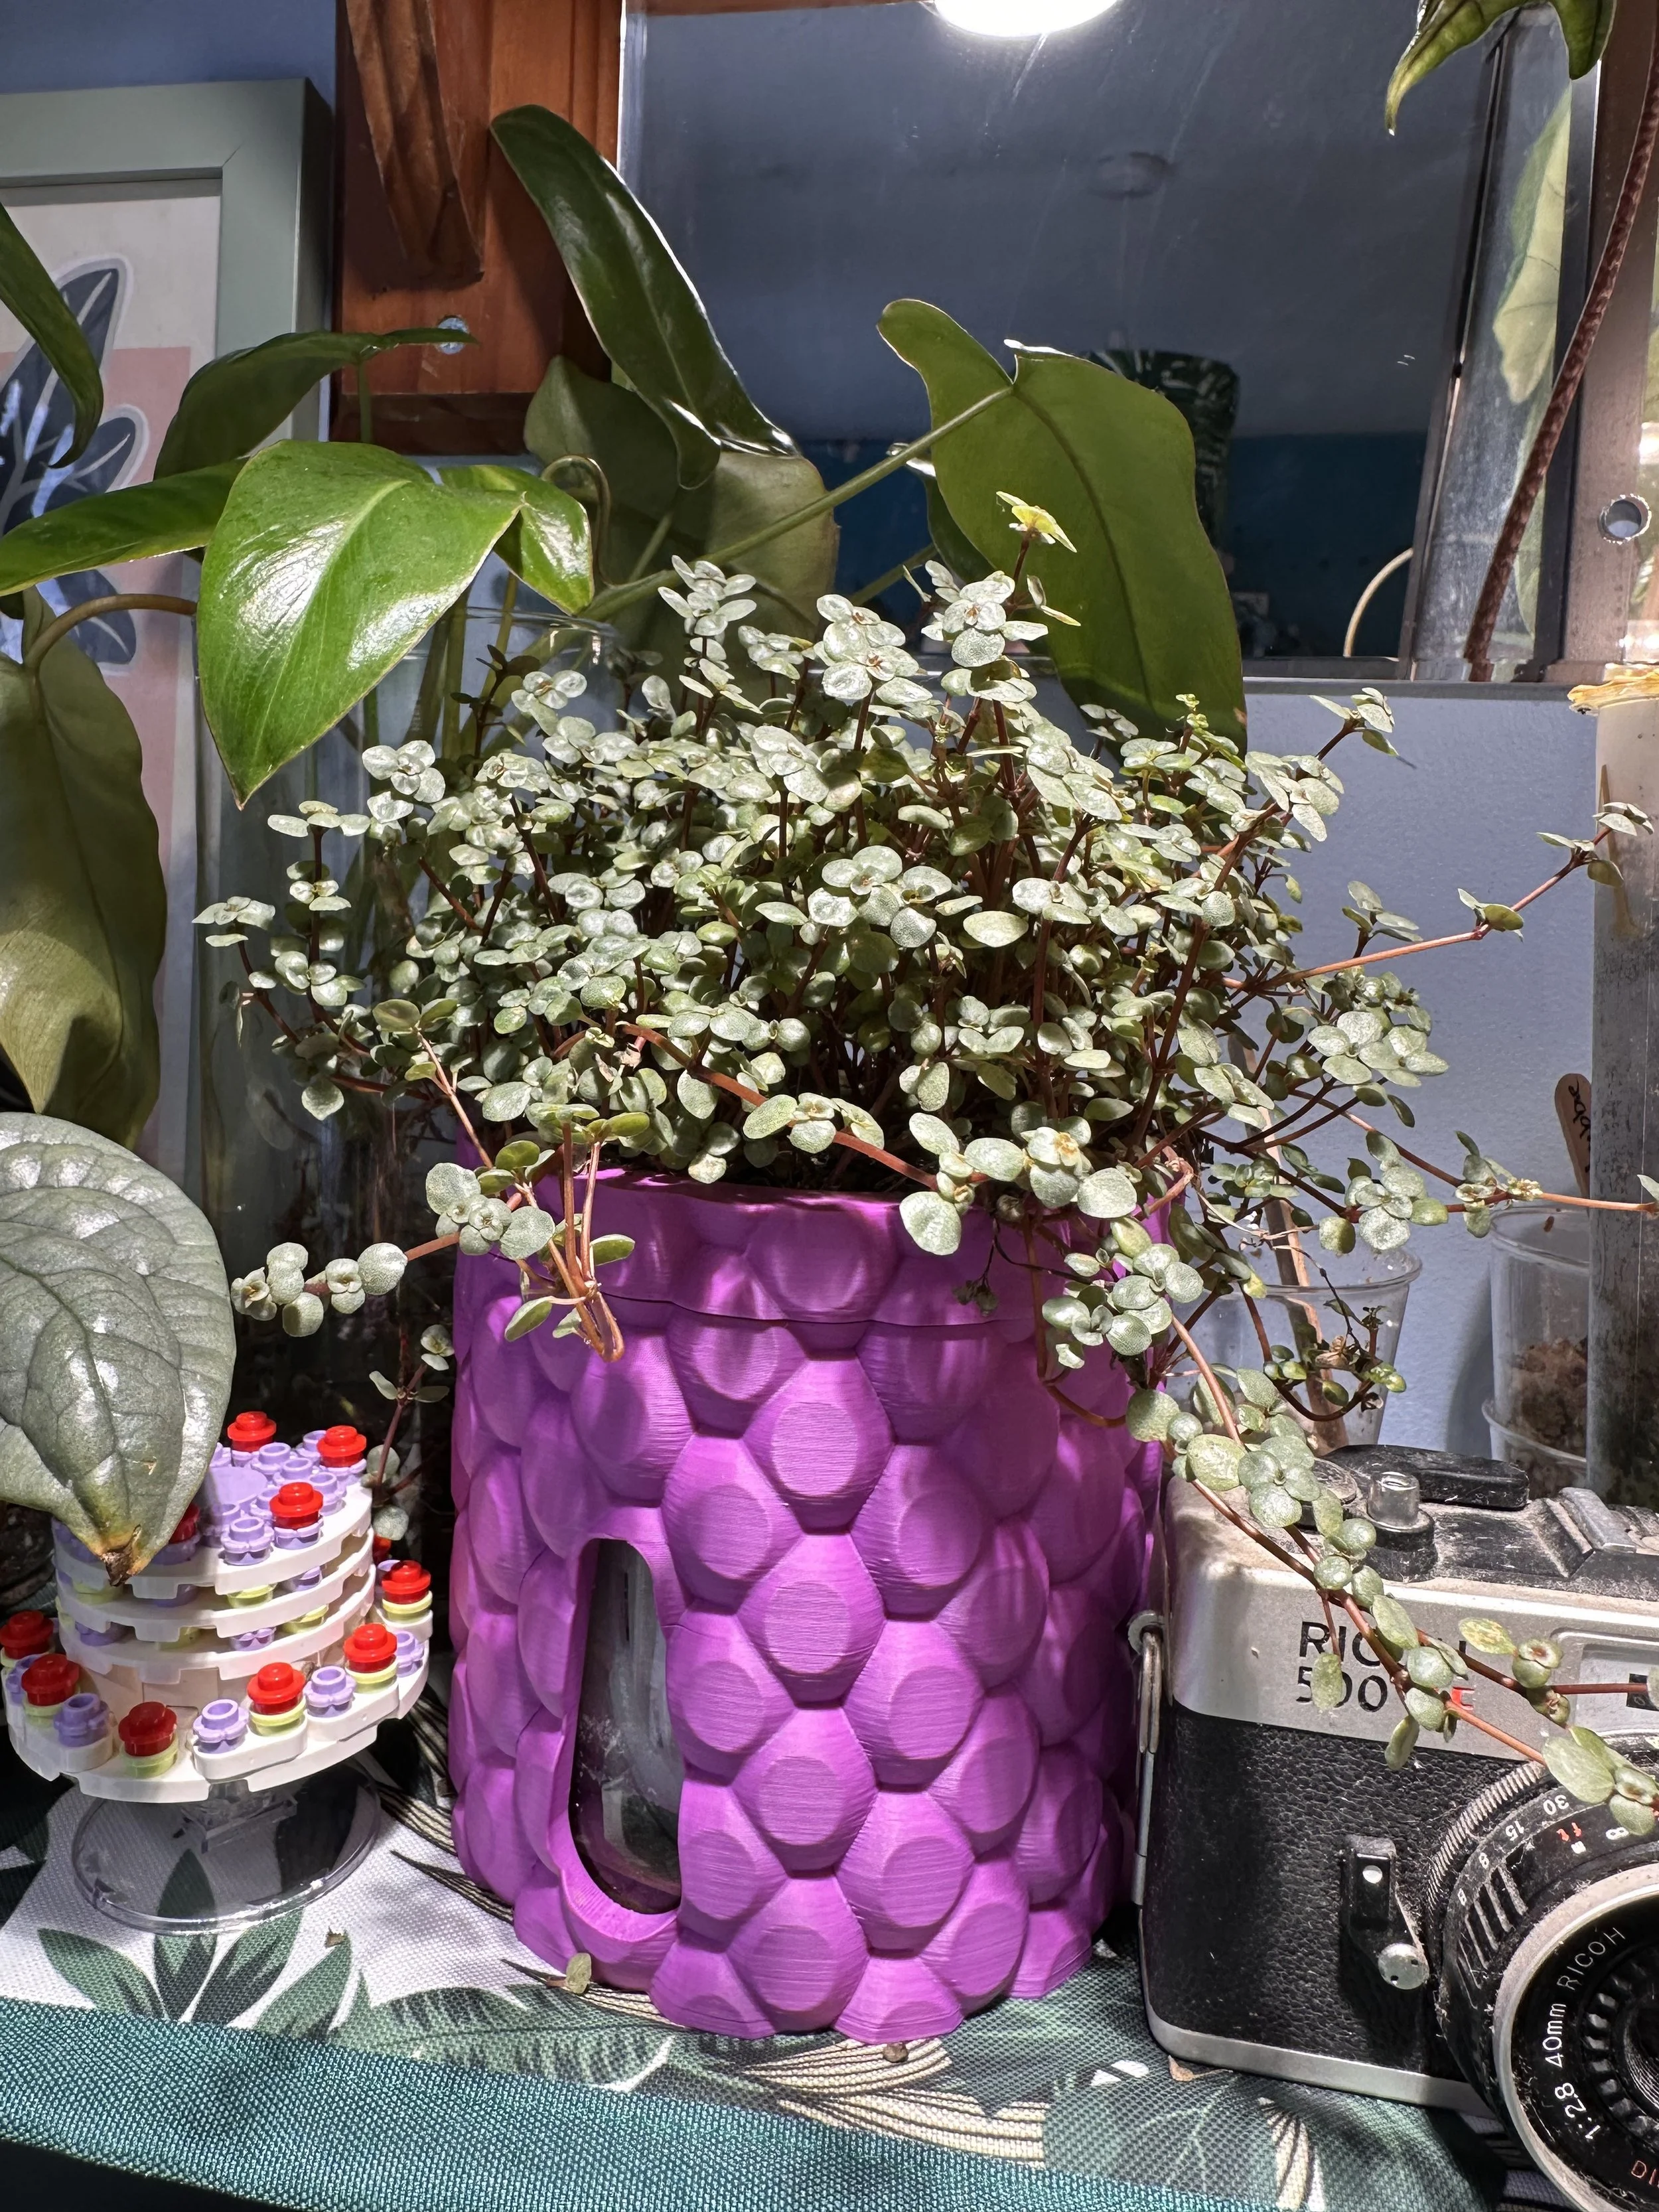
🌿 Pilea ‘Greyzy’ Semi-Hydro Transition
Post chop-and-prop and currently bald, this Pilea entered a period of transition in 2025. Moving into semi-hydro required trust in the process — especially after watching its sibling thrive. A gentle lesson in comparison, resilience, and letting plants adjust at their own pace.
🌿 Plants Thriving in 2025
Not all of 2025 was about challenges. Some plants have been, surprising me, and quietly flourished — reminders that when conditions are right, growth can feel almost effortless. These new plants became bright points in my 2025 plant journey.
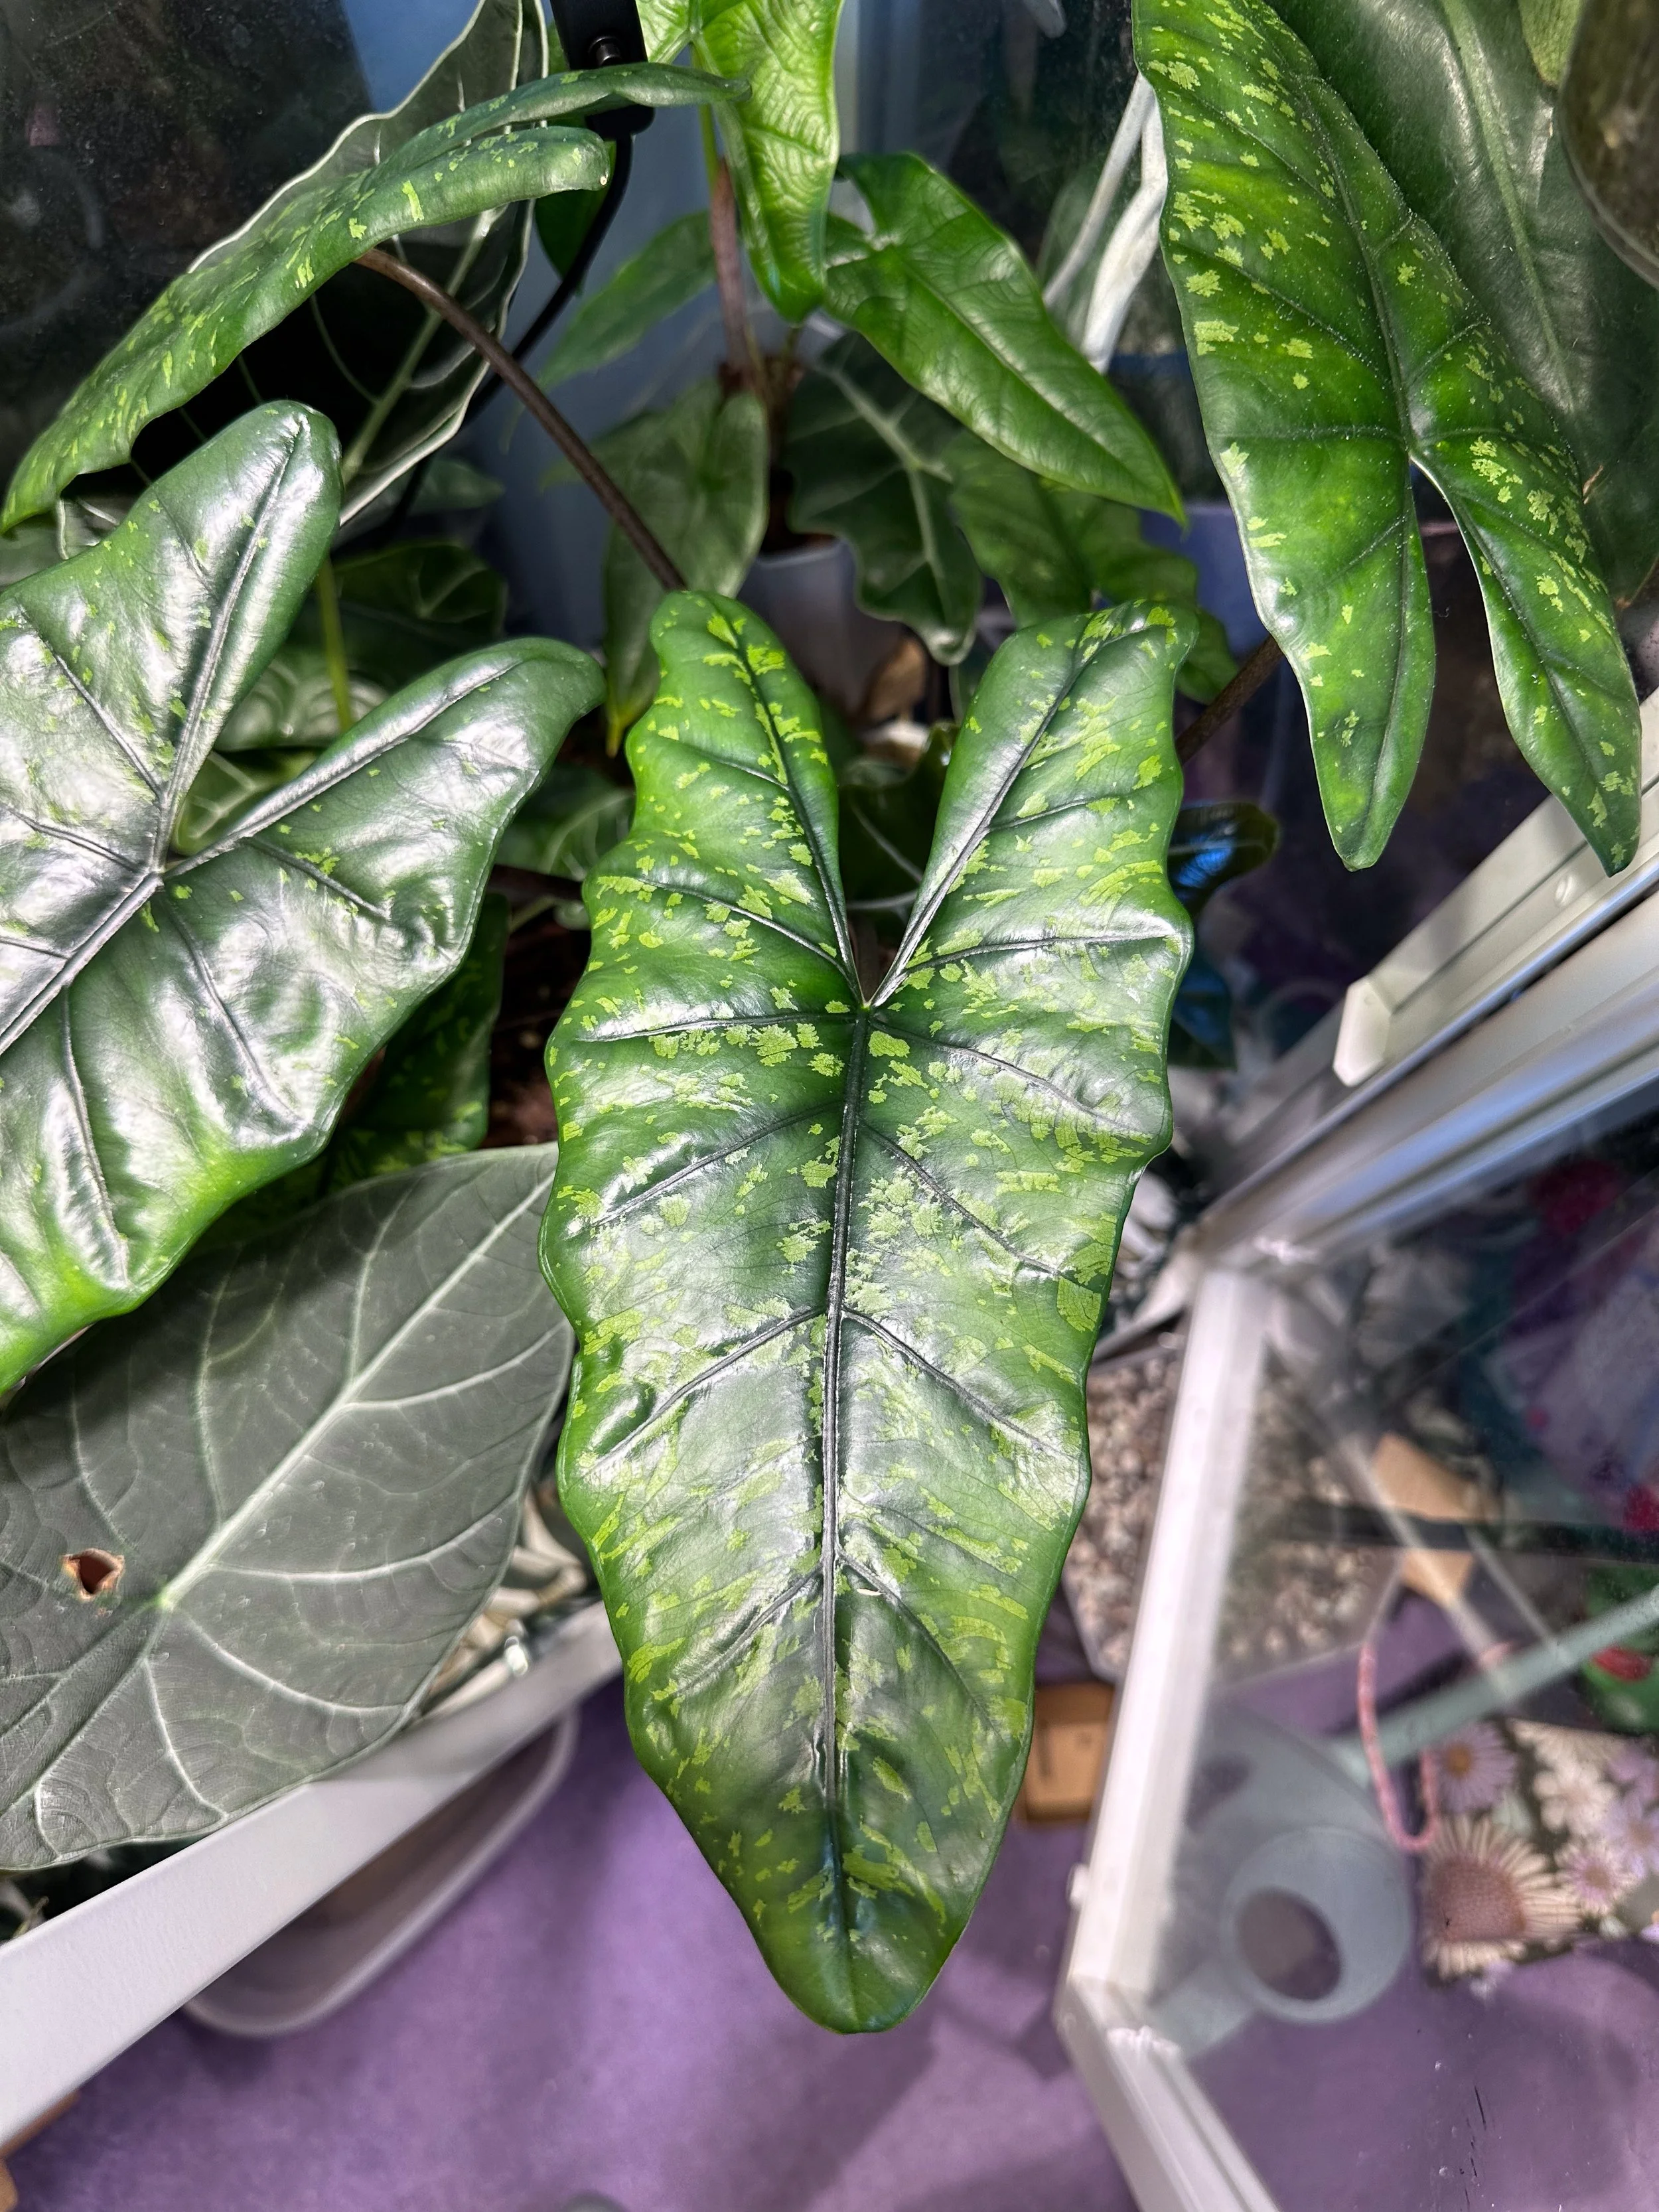
🌿 Shattered Glass BOYCEANA Alocasia
A fast favourite. This plant produced loads of new leaves throughout the year, rewarding consistent care and stable conditions. Watching its patterned foliage unfurl felt like visible proof that patience pays off.
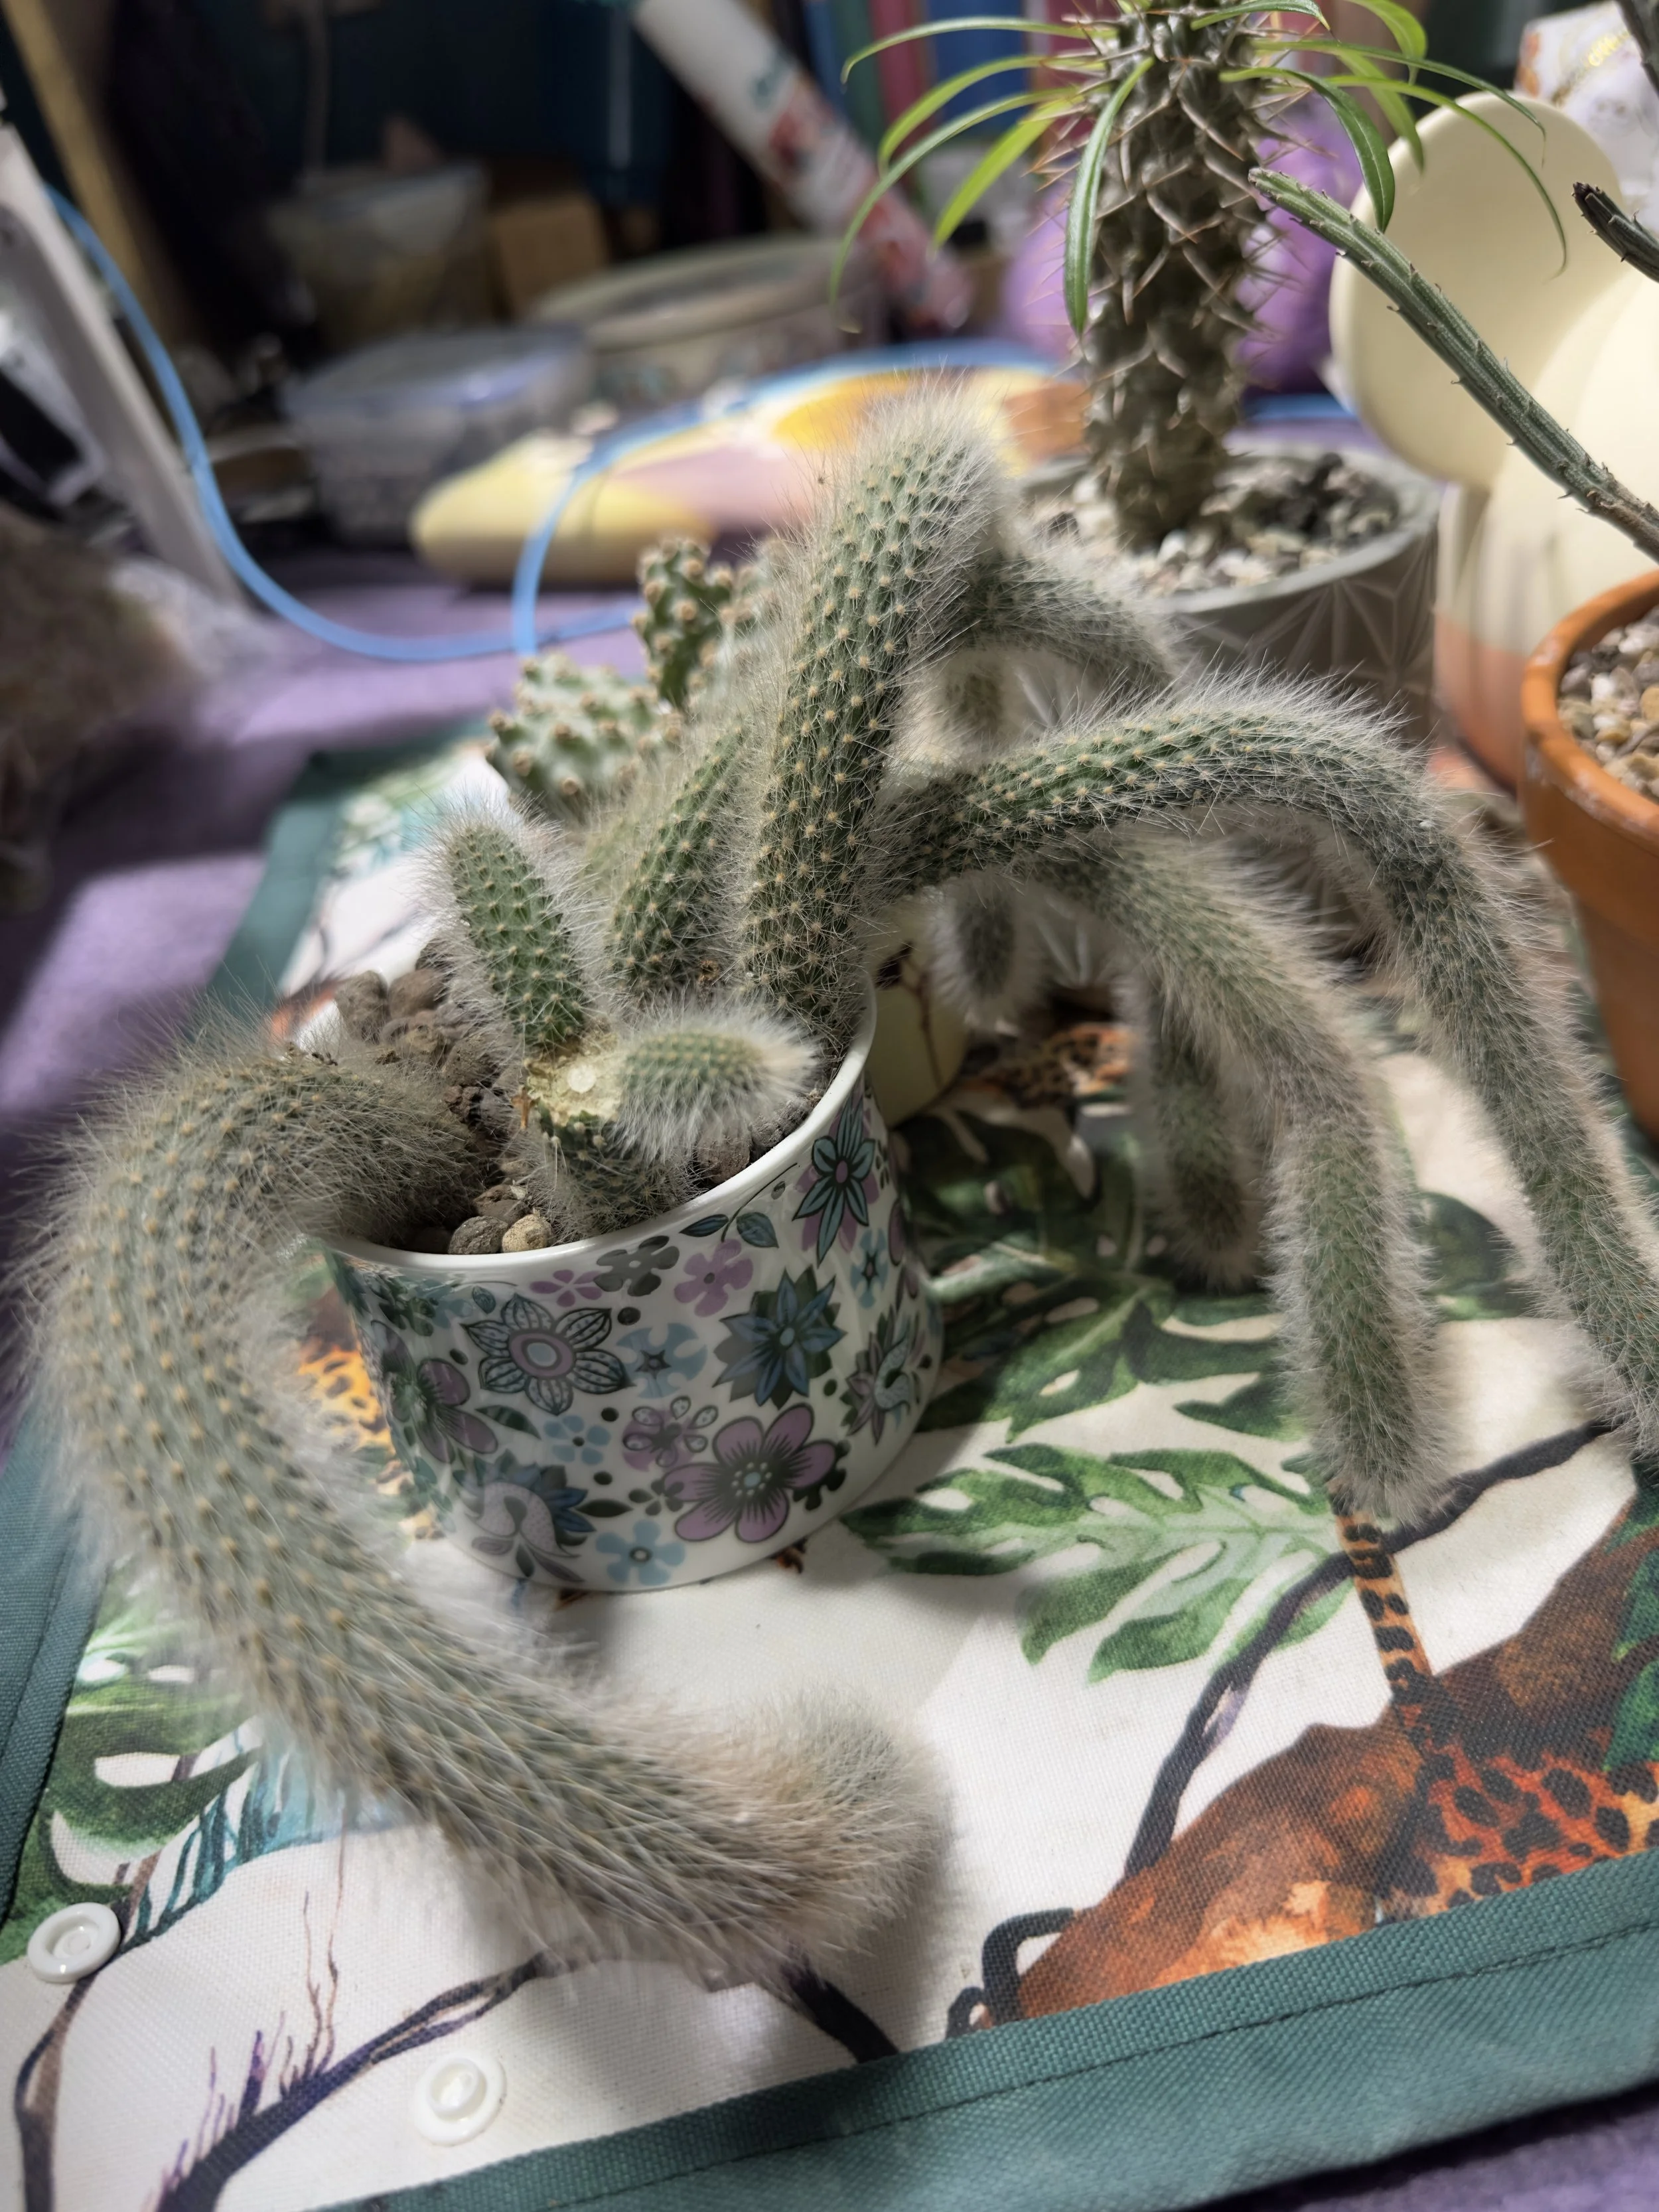
🌿 Monkey Tail Cactus Growth & Recovery.
A moment of drama — part of the plant fell off — followed by unexpected magic. Like a hydra, two new heads emerged in its place. A perfect example of resilience in plant growth and how damage doesn’t always mean decline.
🌿 Alocasia zebrina in Semi-Hydro
One of my strongest growers this year. Transitioning into semi-hydro helped support steady growth and healthier roots. This plant reinforced how experimenting with different care methods can completely change outcomes.
👉 I shared more about this process in my post on Alocasia in Semi-Hydro.
🌿 Monkey Jug (Nepenthes)
After struggling in the cold, this plant made a satisfying bounce back once temperatures improved. New growth and renewed energy made it a reminder that some plants simply need time — and warmth — to recover.
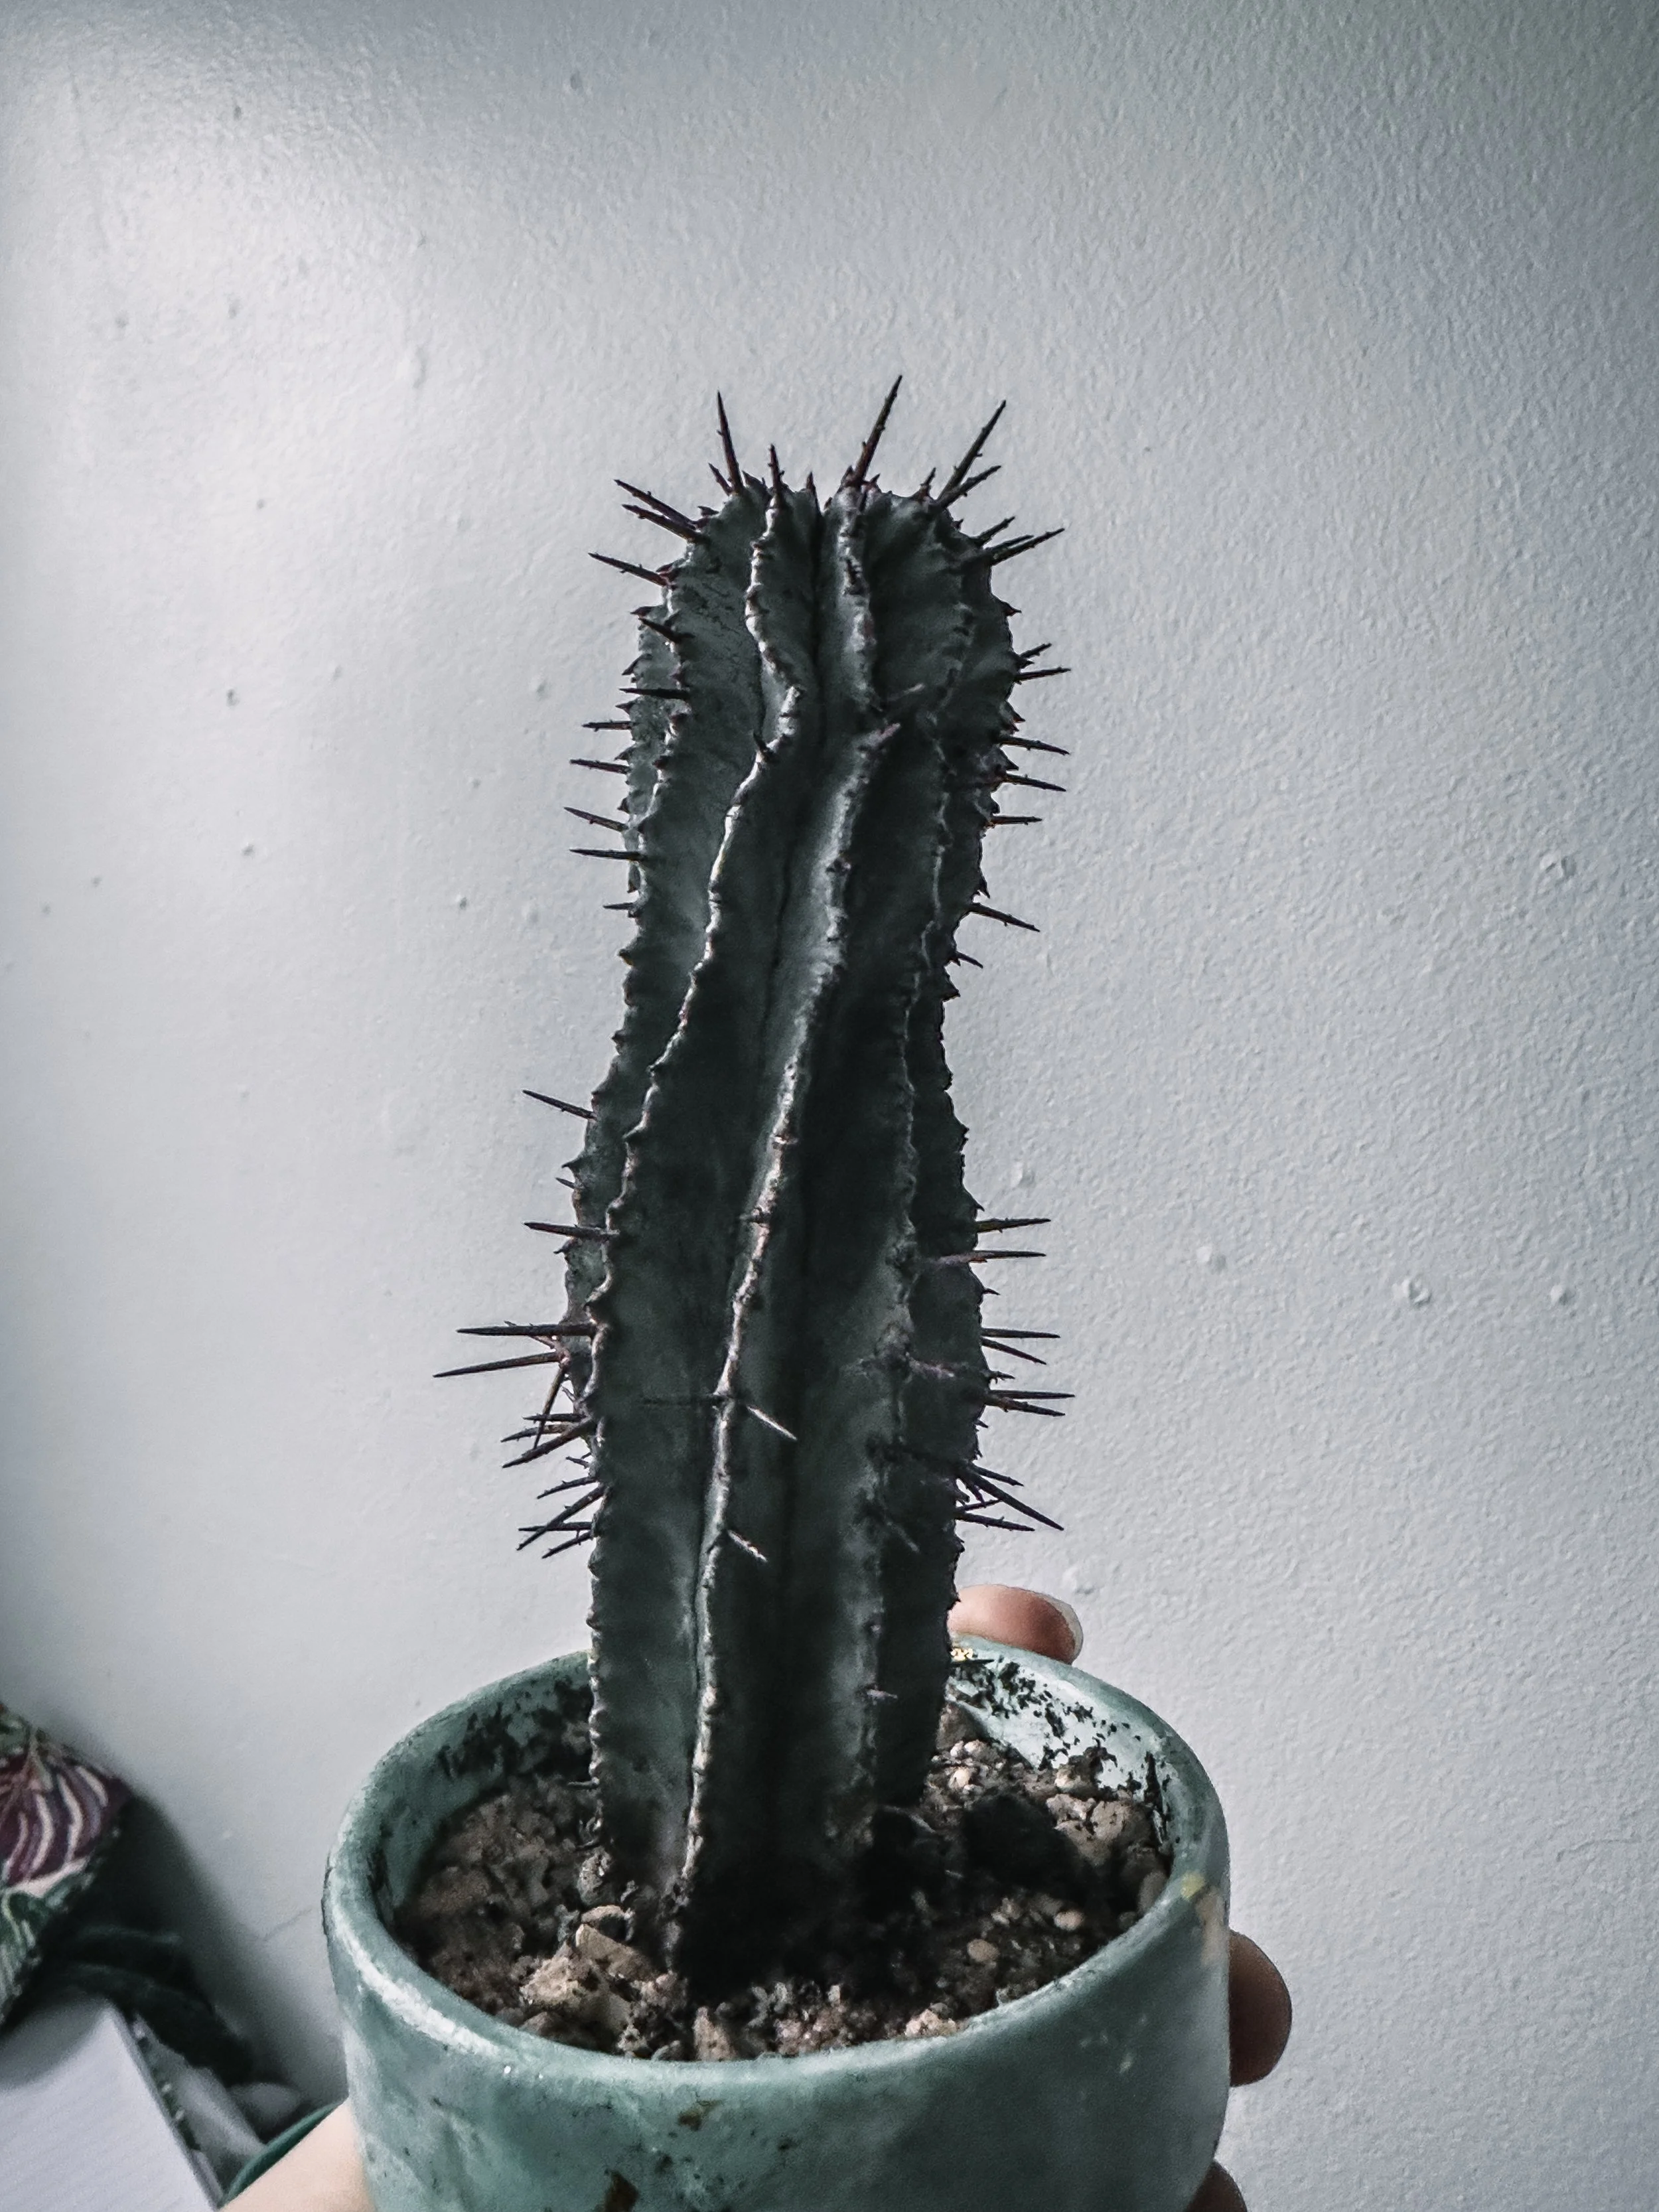
🌿 Euphorbia horrida Indoor Care
Chunky, sculptural, and thriving. This Euphorbia put out twisting new growth throughout the year, becoming a striking presence in my collection. Its slow but confident development felt grounding and steady.
4. 🌍 Exploring New Places (and Returning to Familiar Ones)
🌿 Cambridge University Botanical Gardens
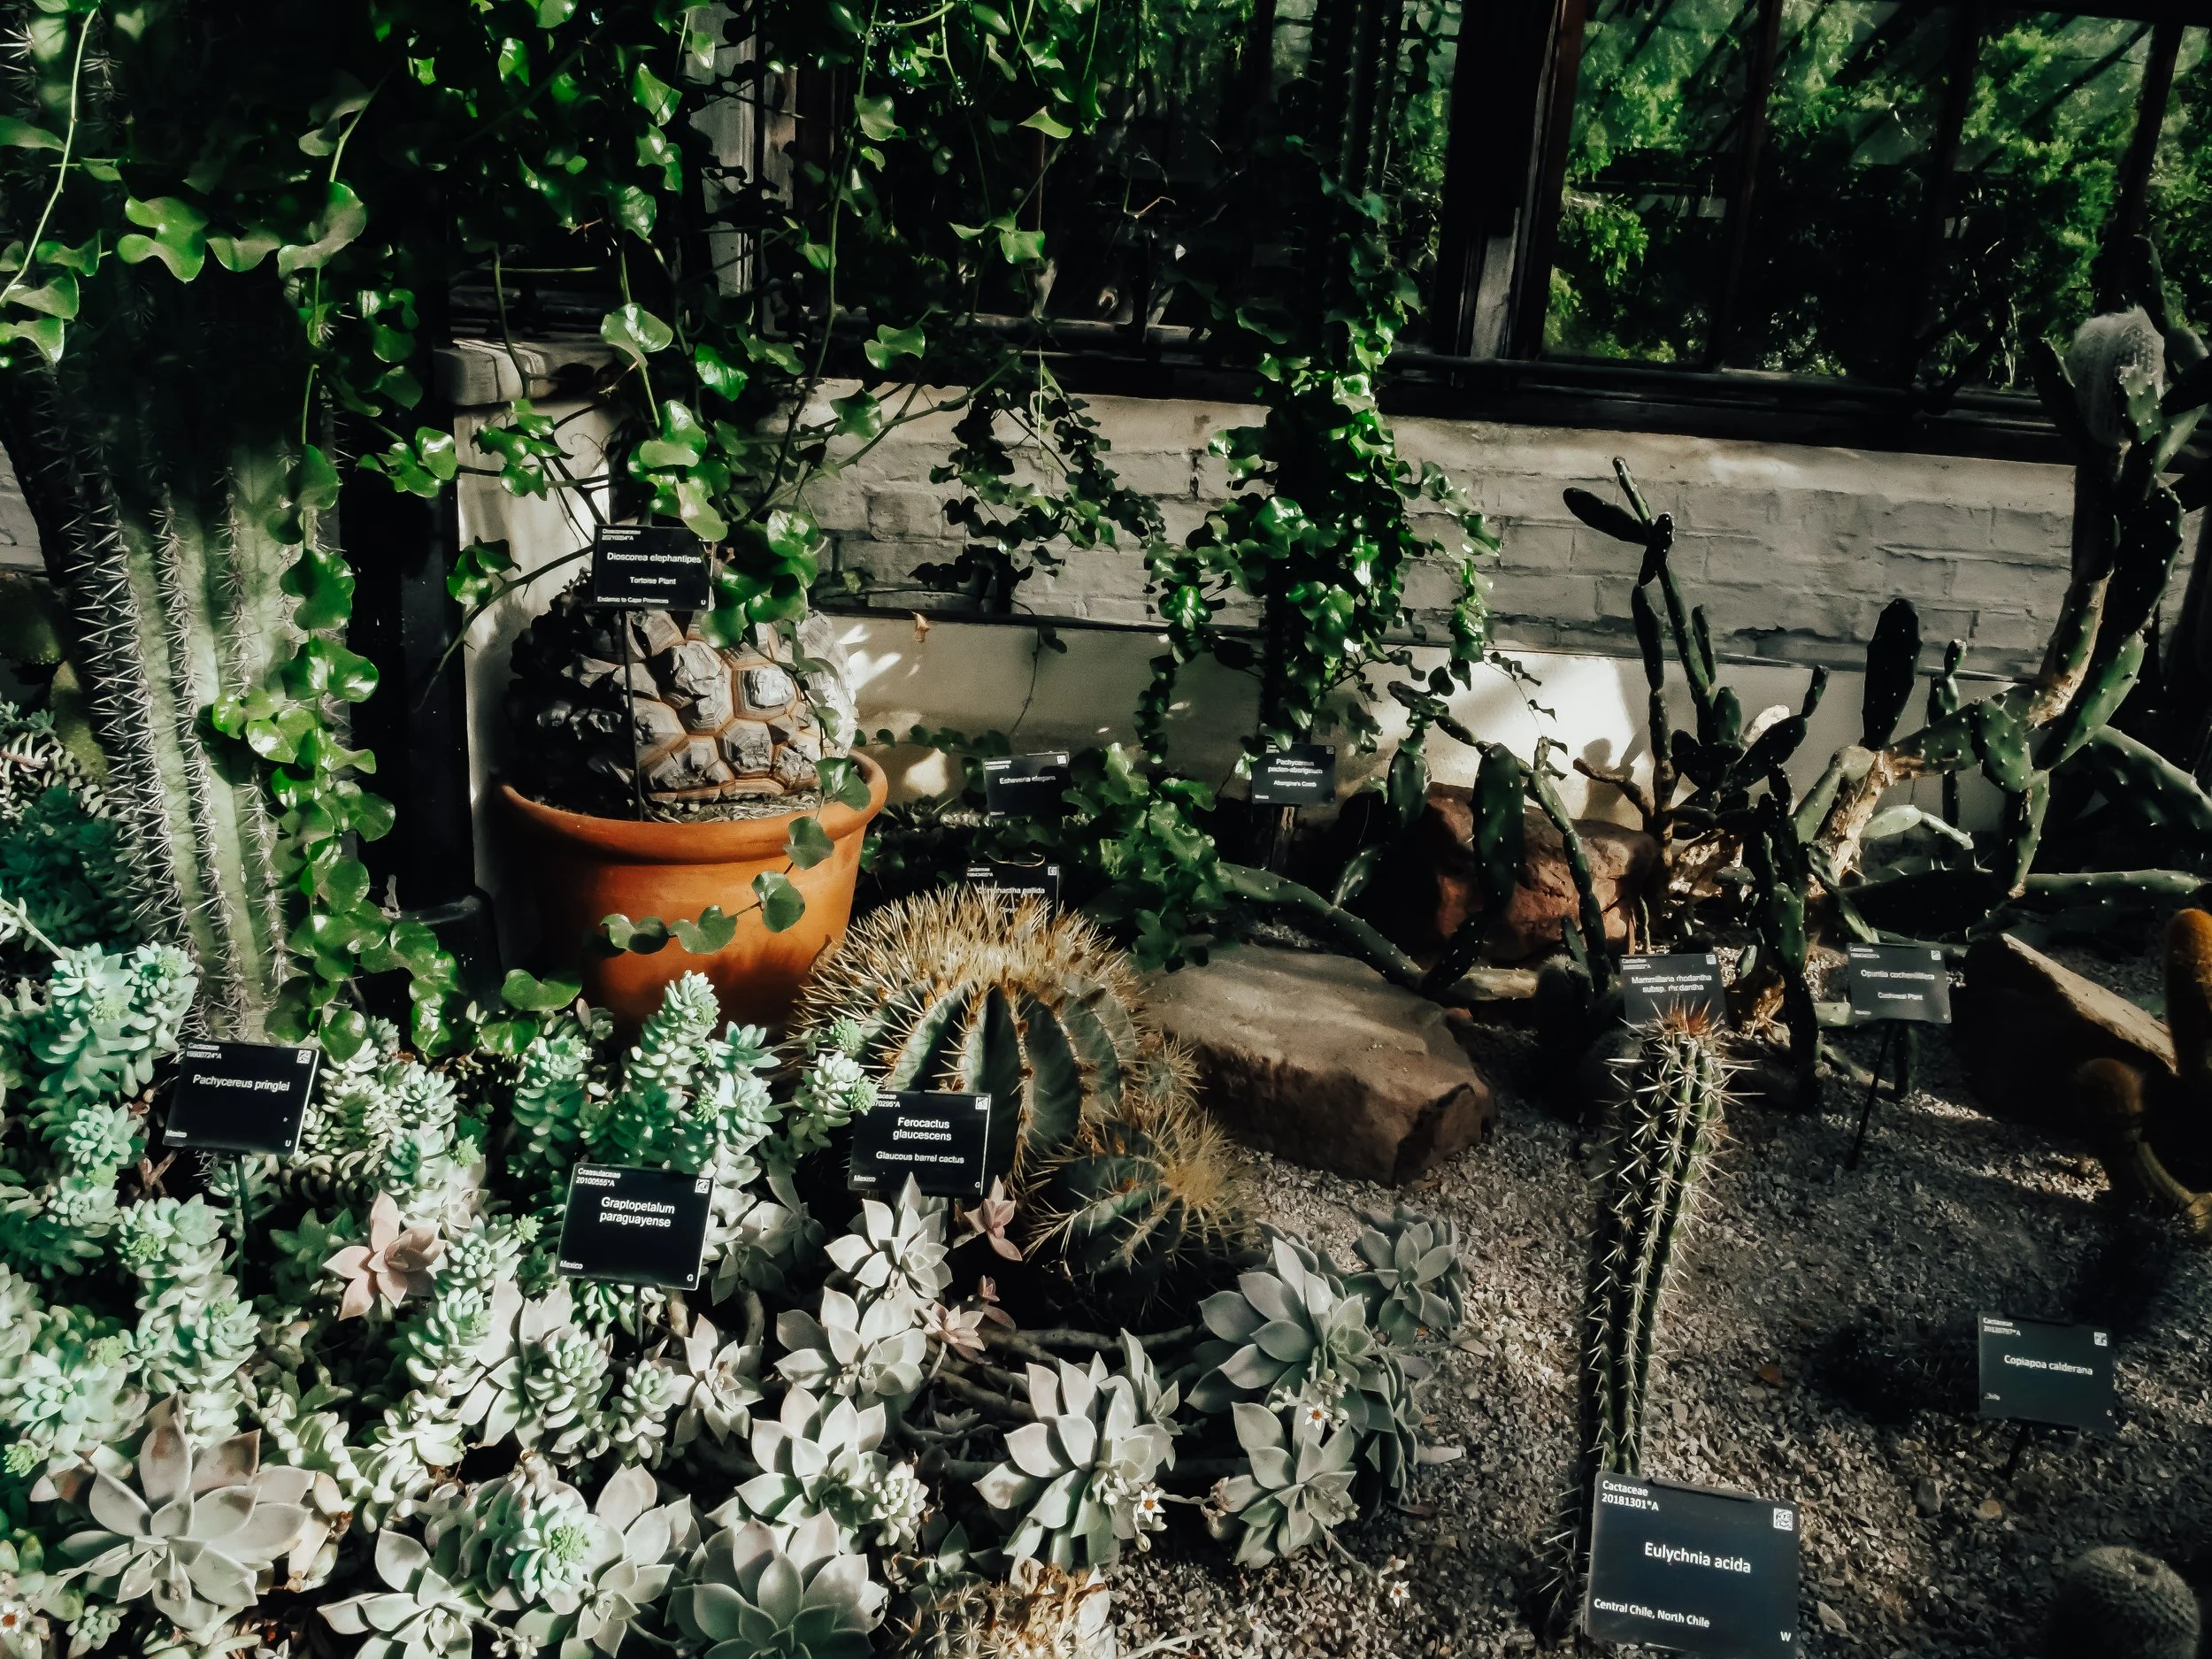
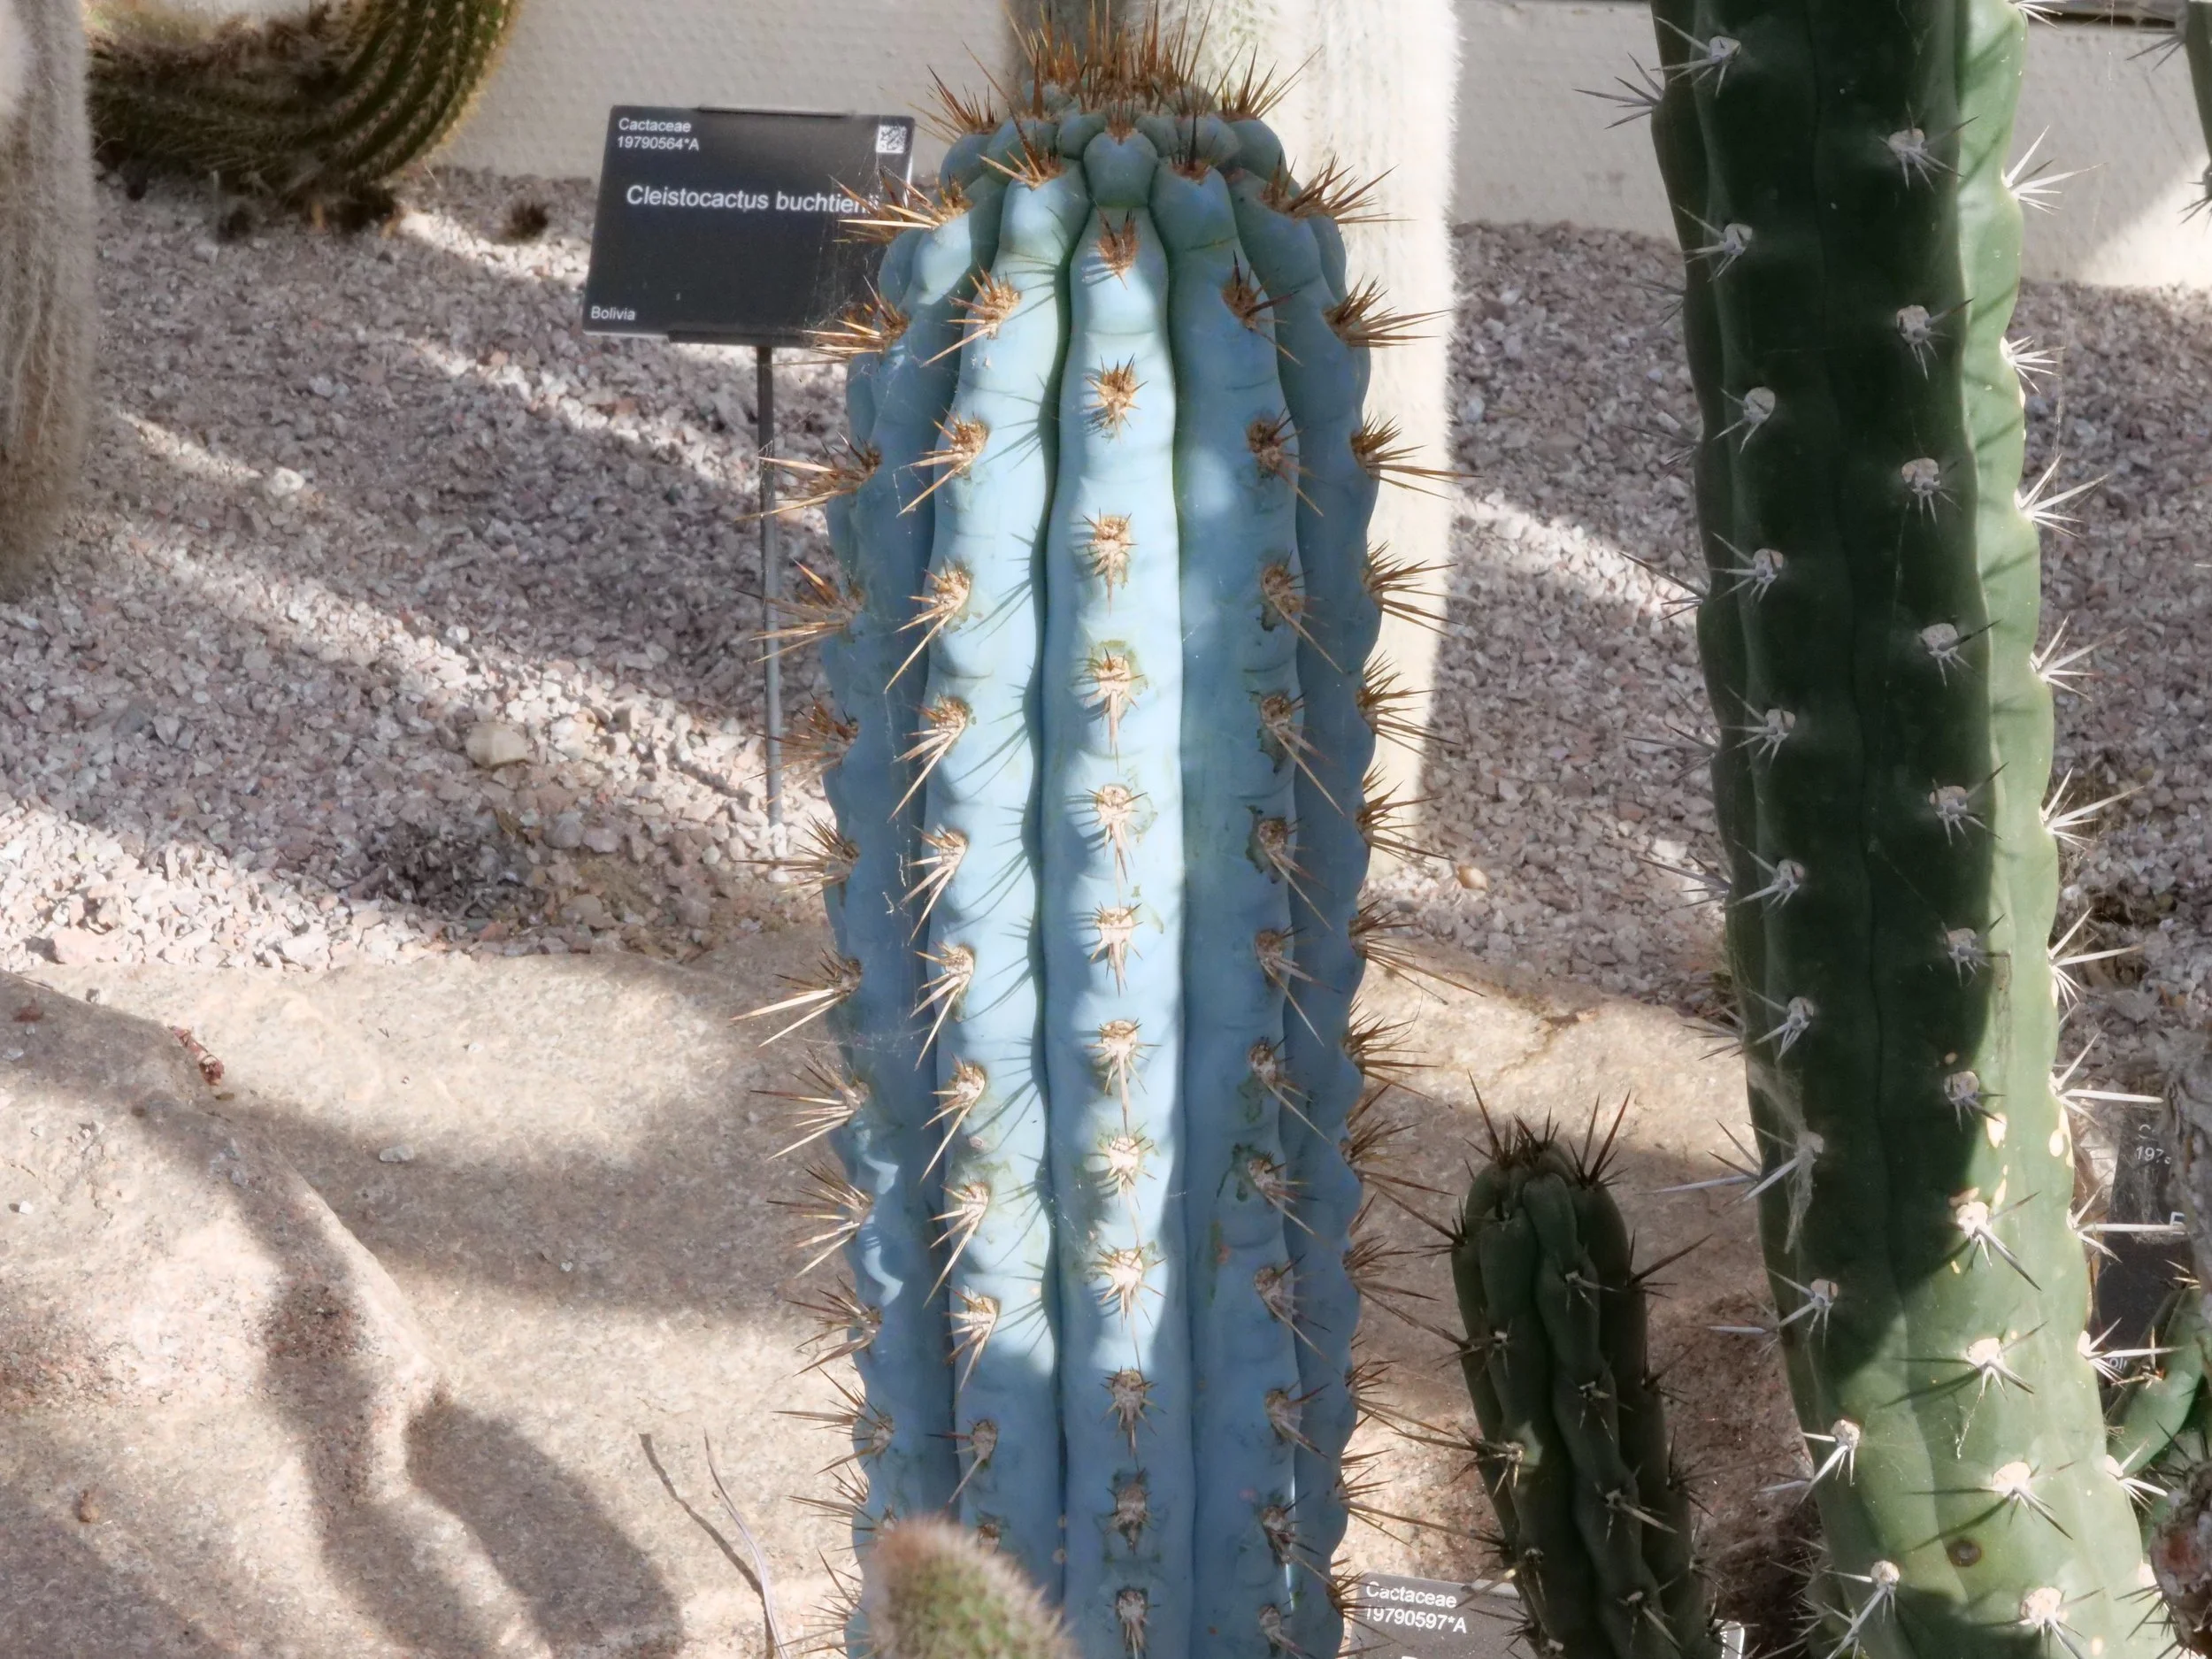
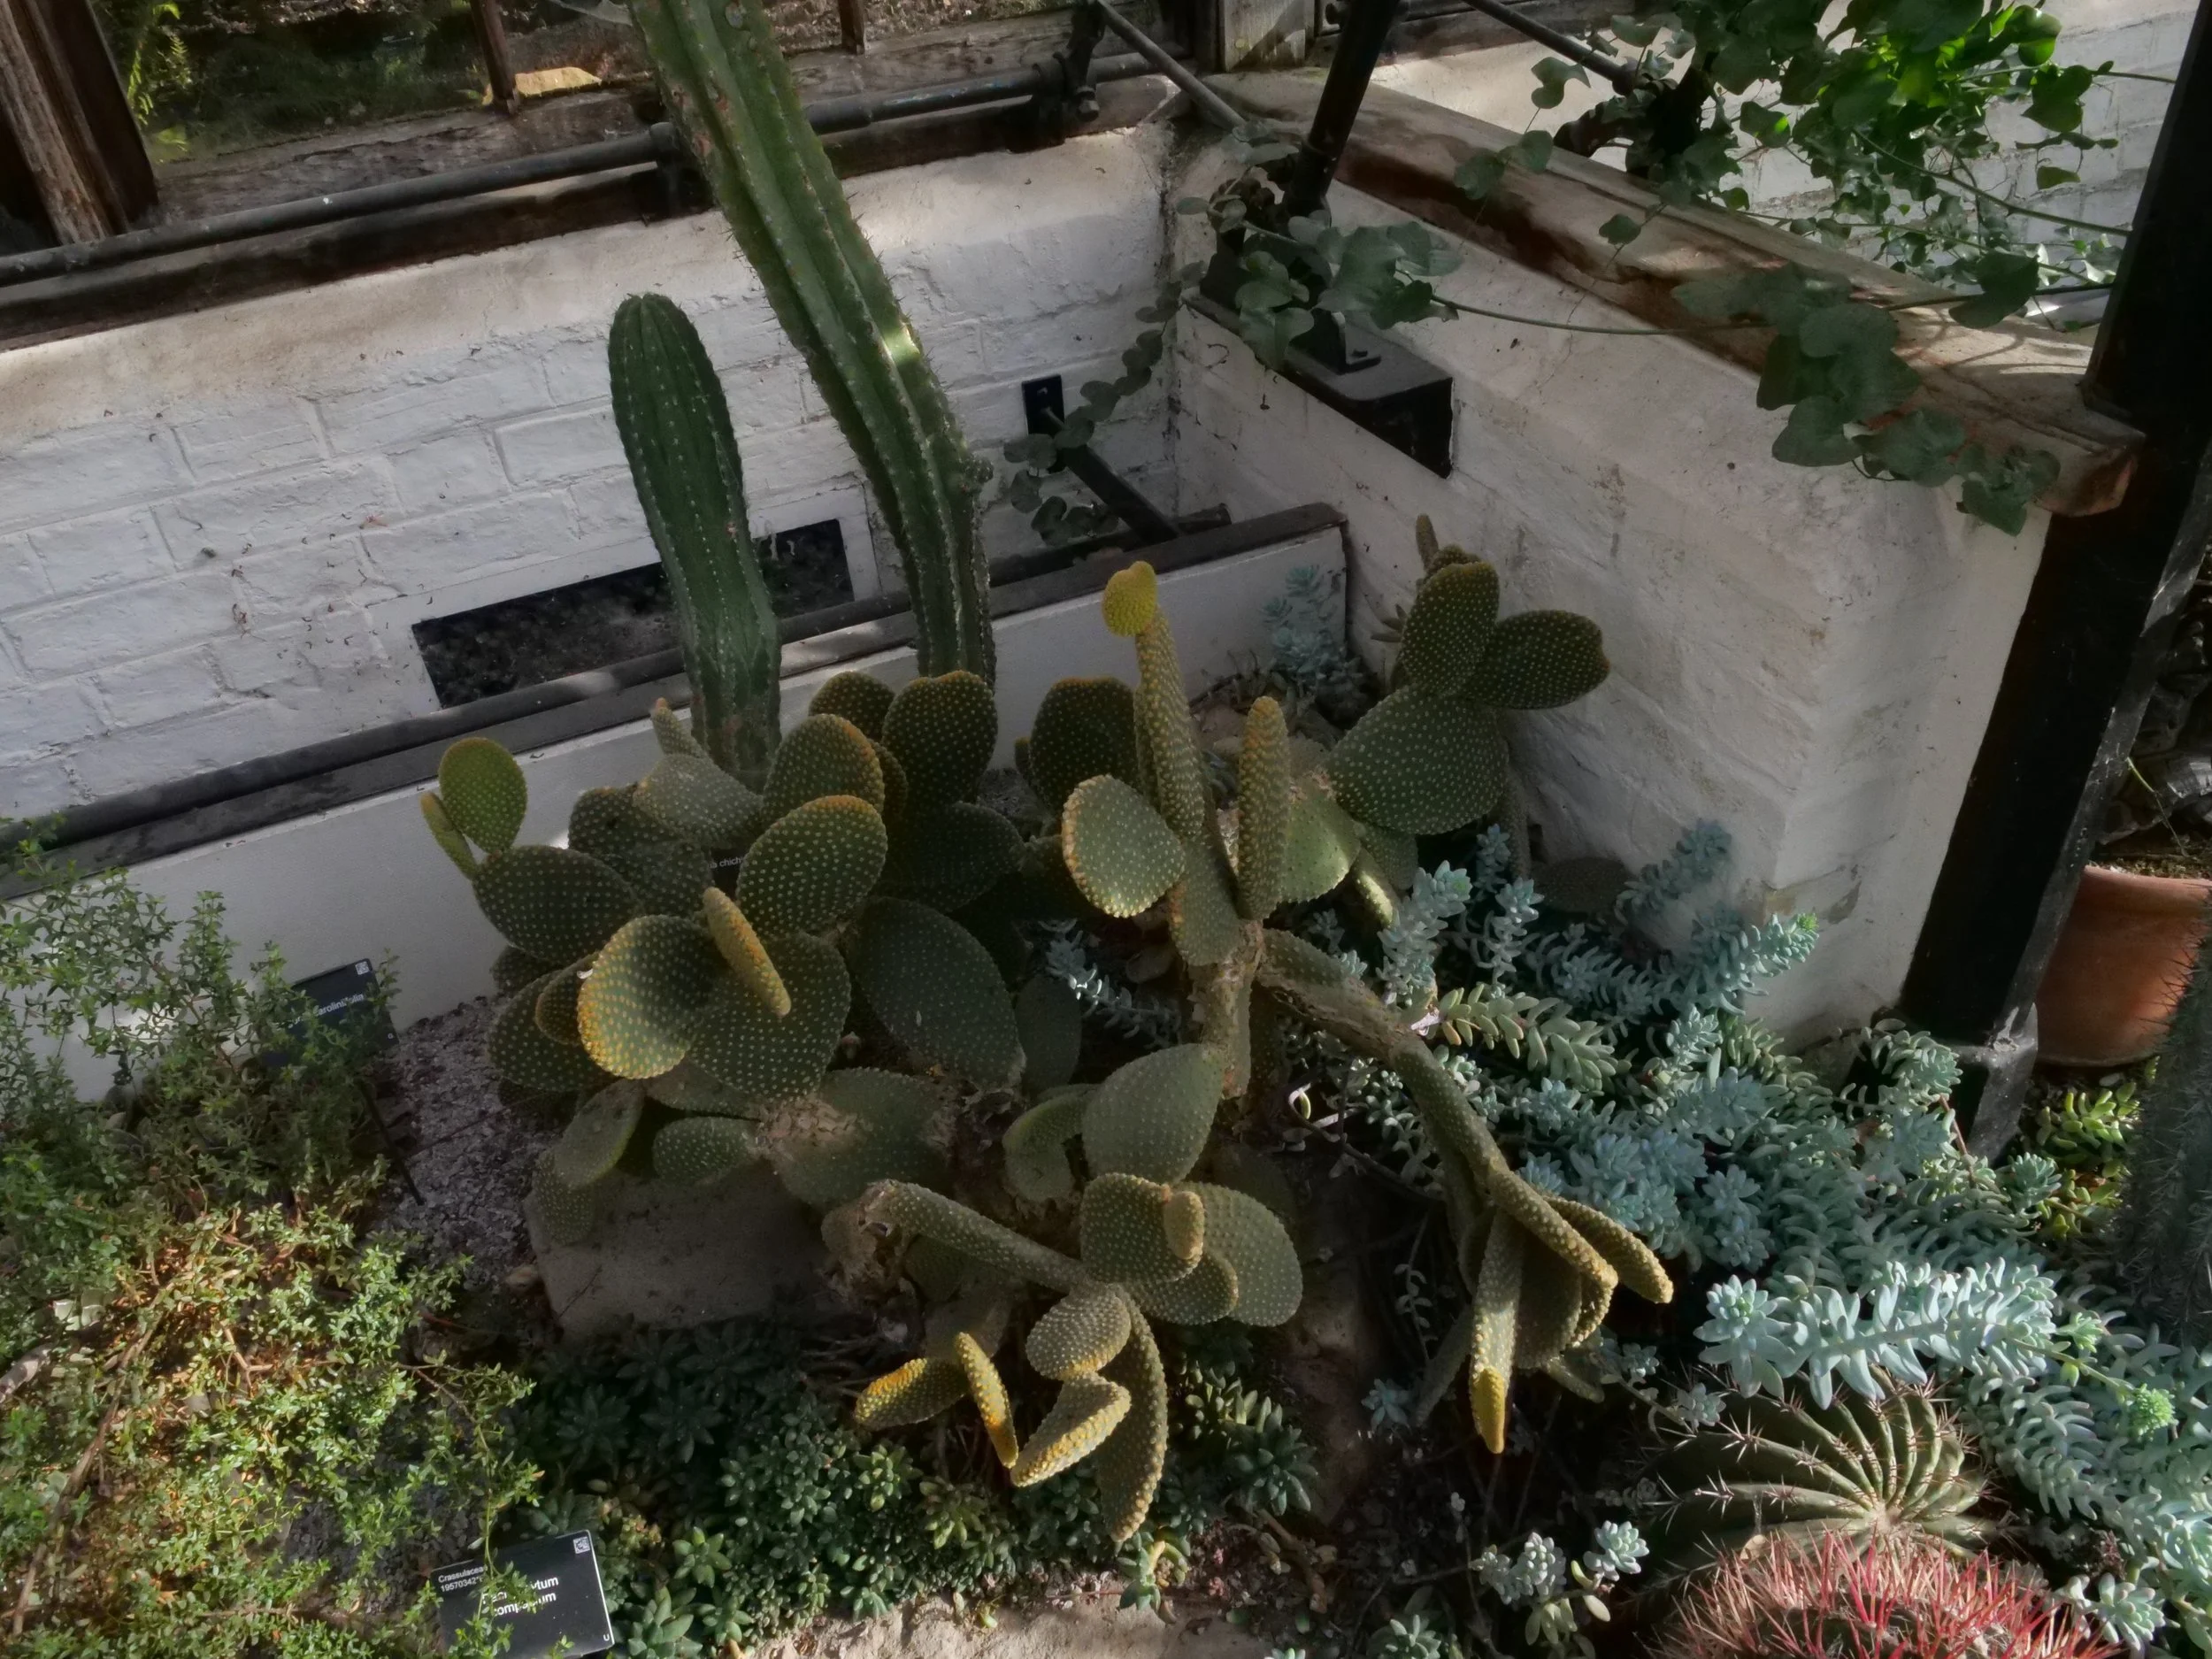
One of the most magical plant-filled days of 2025 was my visit to Cambridge University Botanic Garden, a 40-acre sanctuary of botanical diversity right in the heart of the city. This living museum of plants hosts over 8,000 species from around the world — from tropical glasshouse giants to subtle desert survivors — making it one of the UK’s most inspiring gardens for plant lovers and photographers alike.
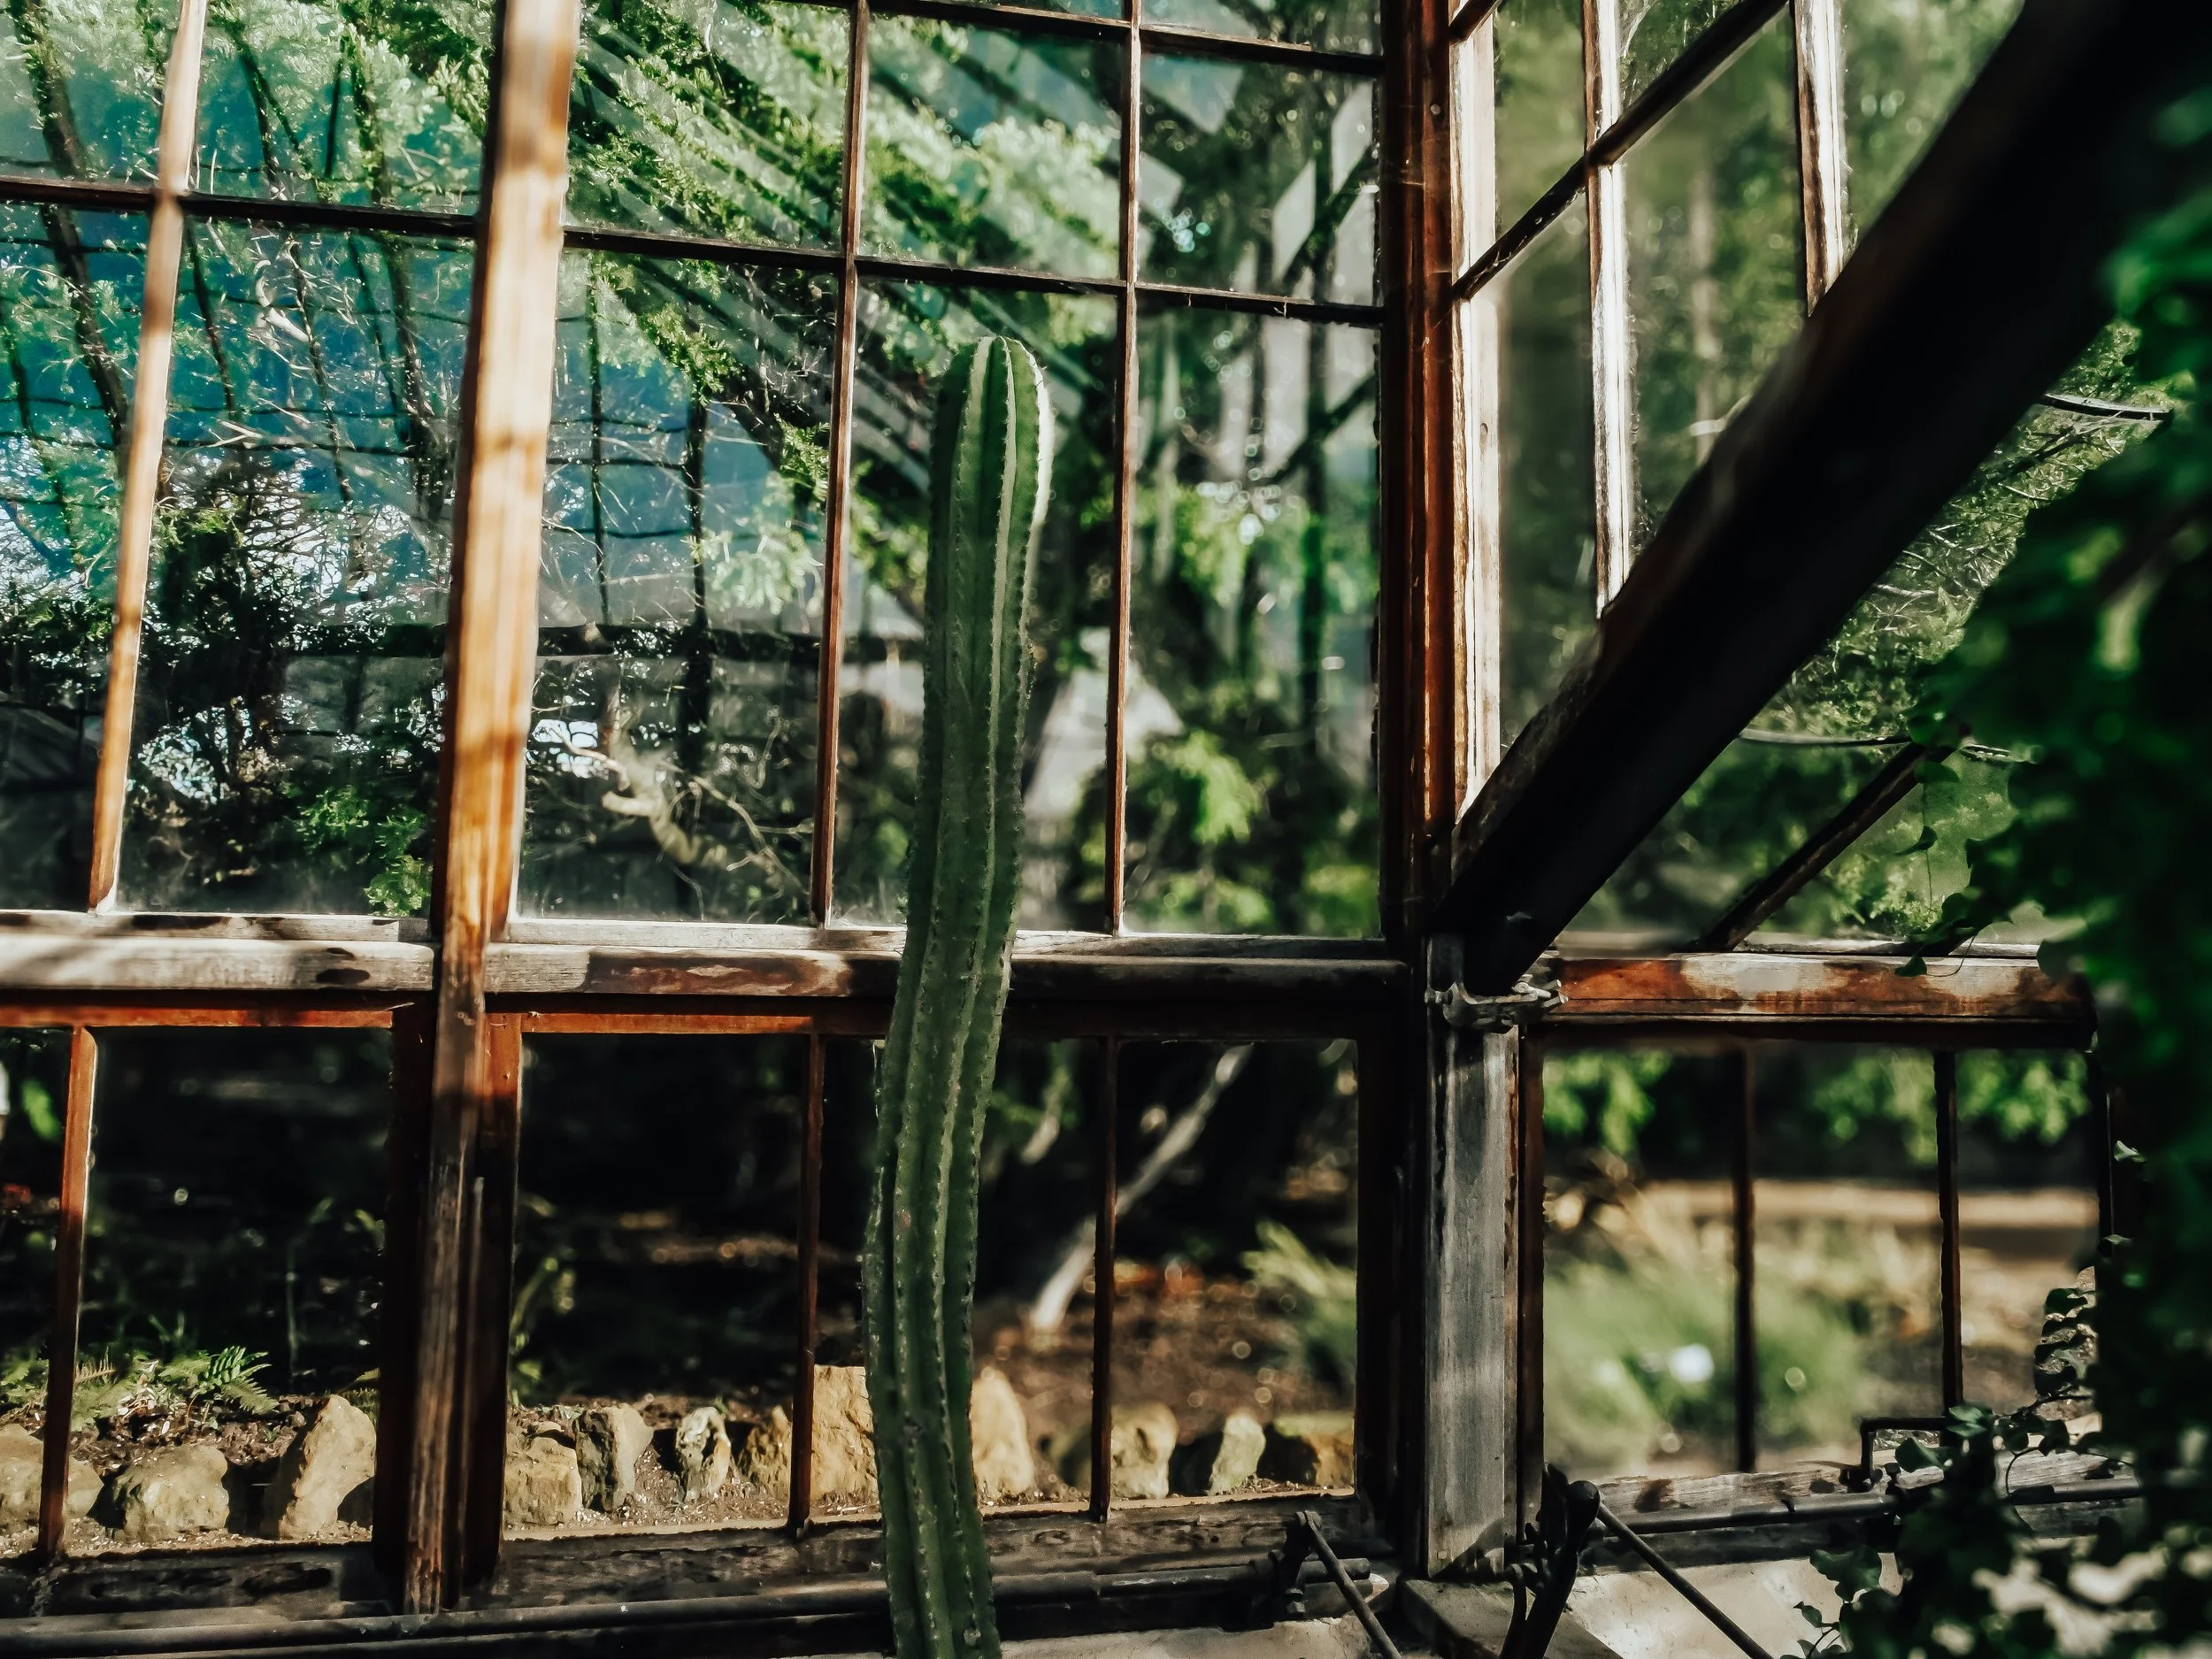
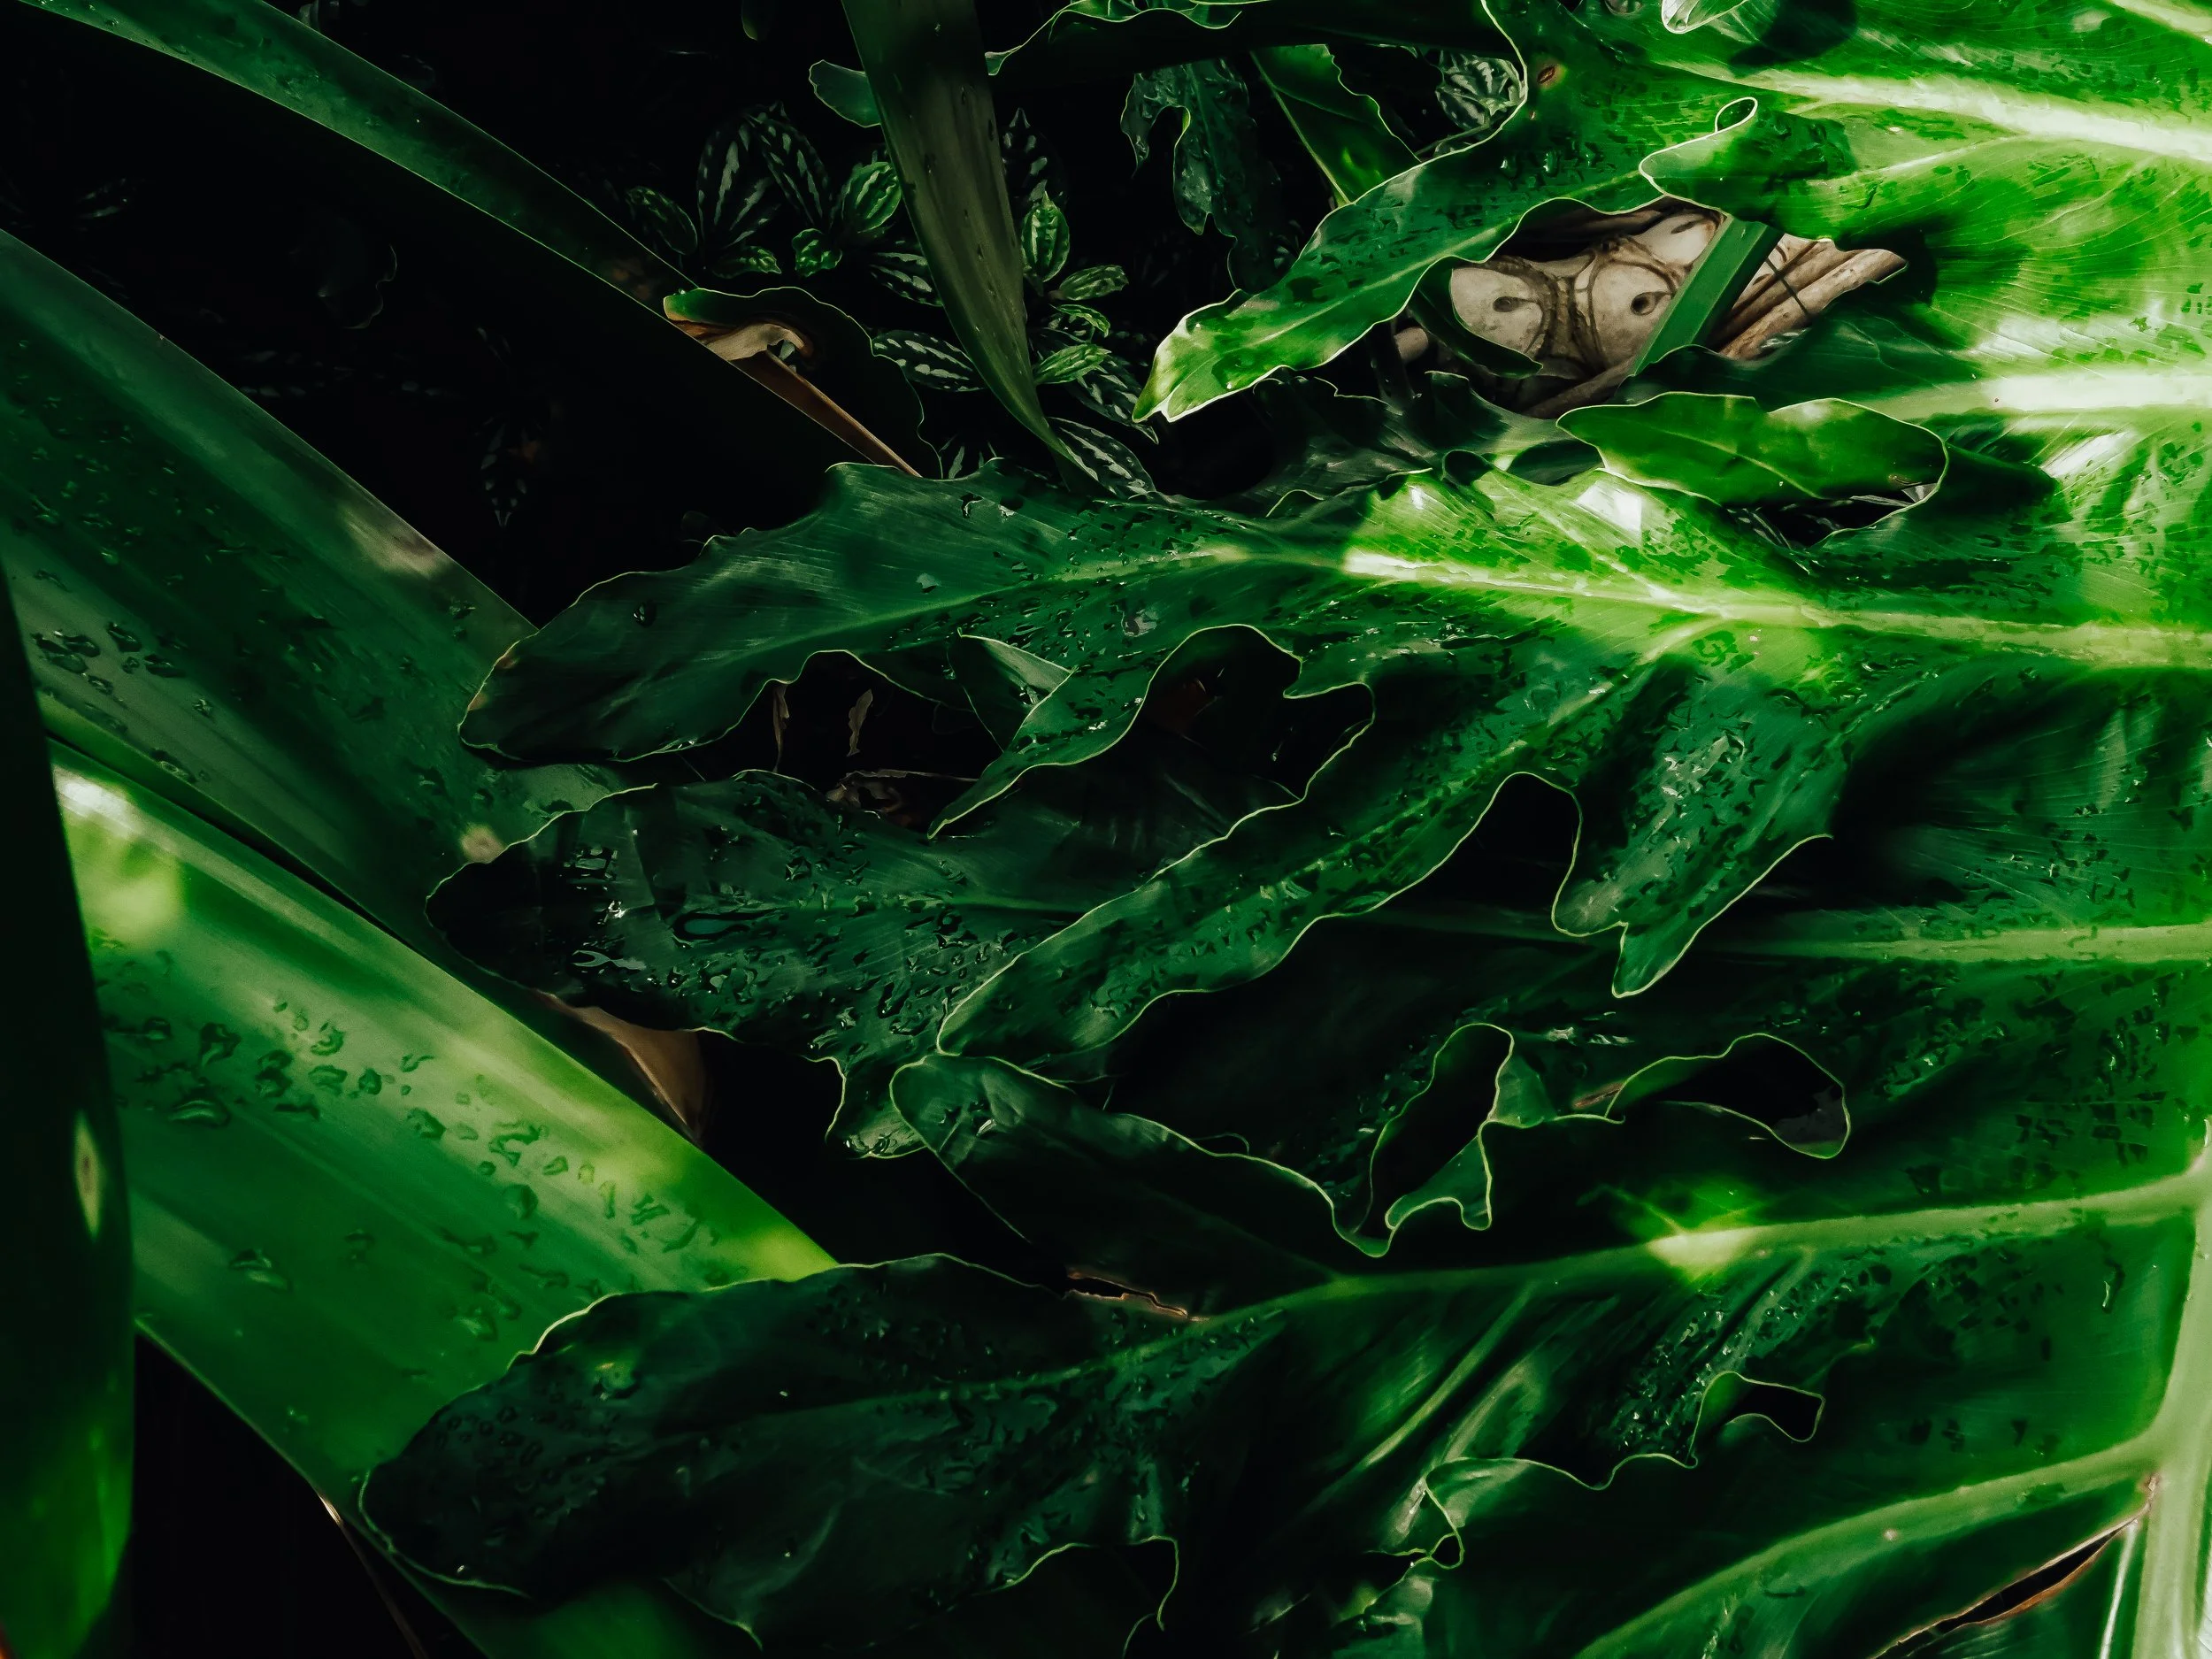
I arrived just as the rain finally washed months of dust from the leaves, and immediately the garden felt like a green exhale — soft, vibrant, and full of life. Walking through the lush glasshouses, I was struck by how every environment seemed to tell its own story: the steamy tropical humidity turned leaves into glossy canvases for light, while the arid house’s silvery succulents and cacti stood in calm dramatic contrast to their lush counterparts.
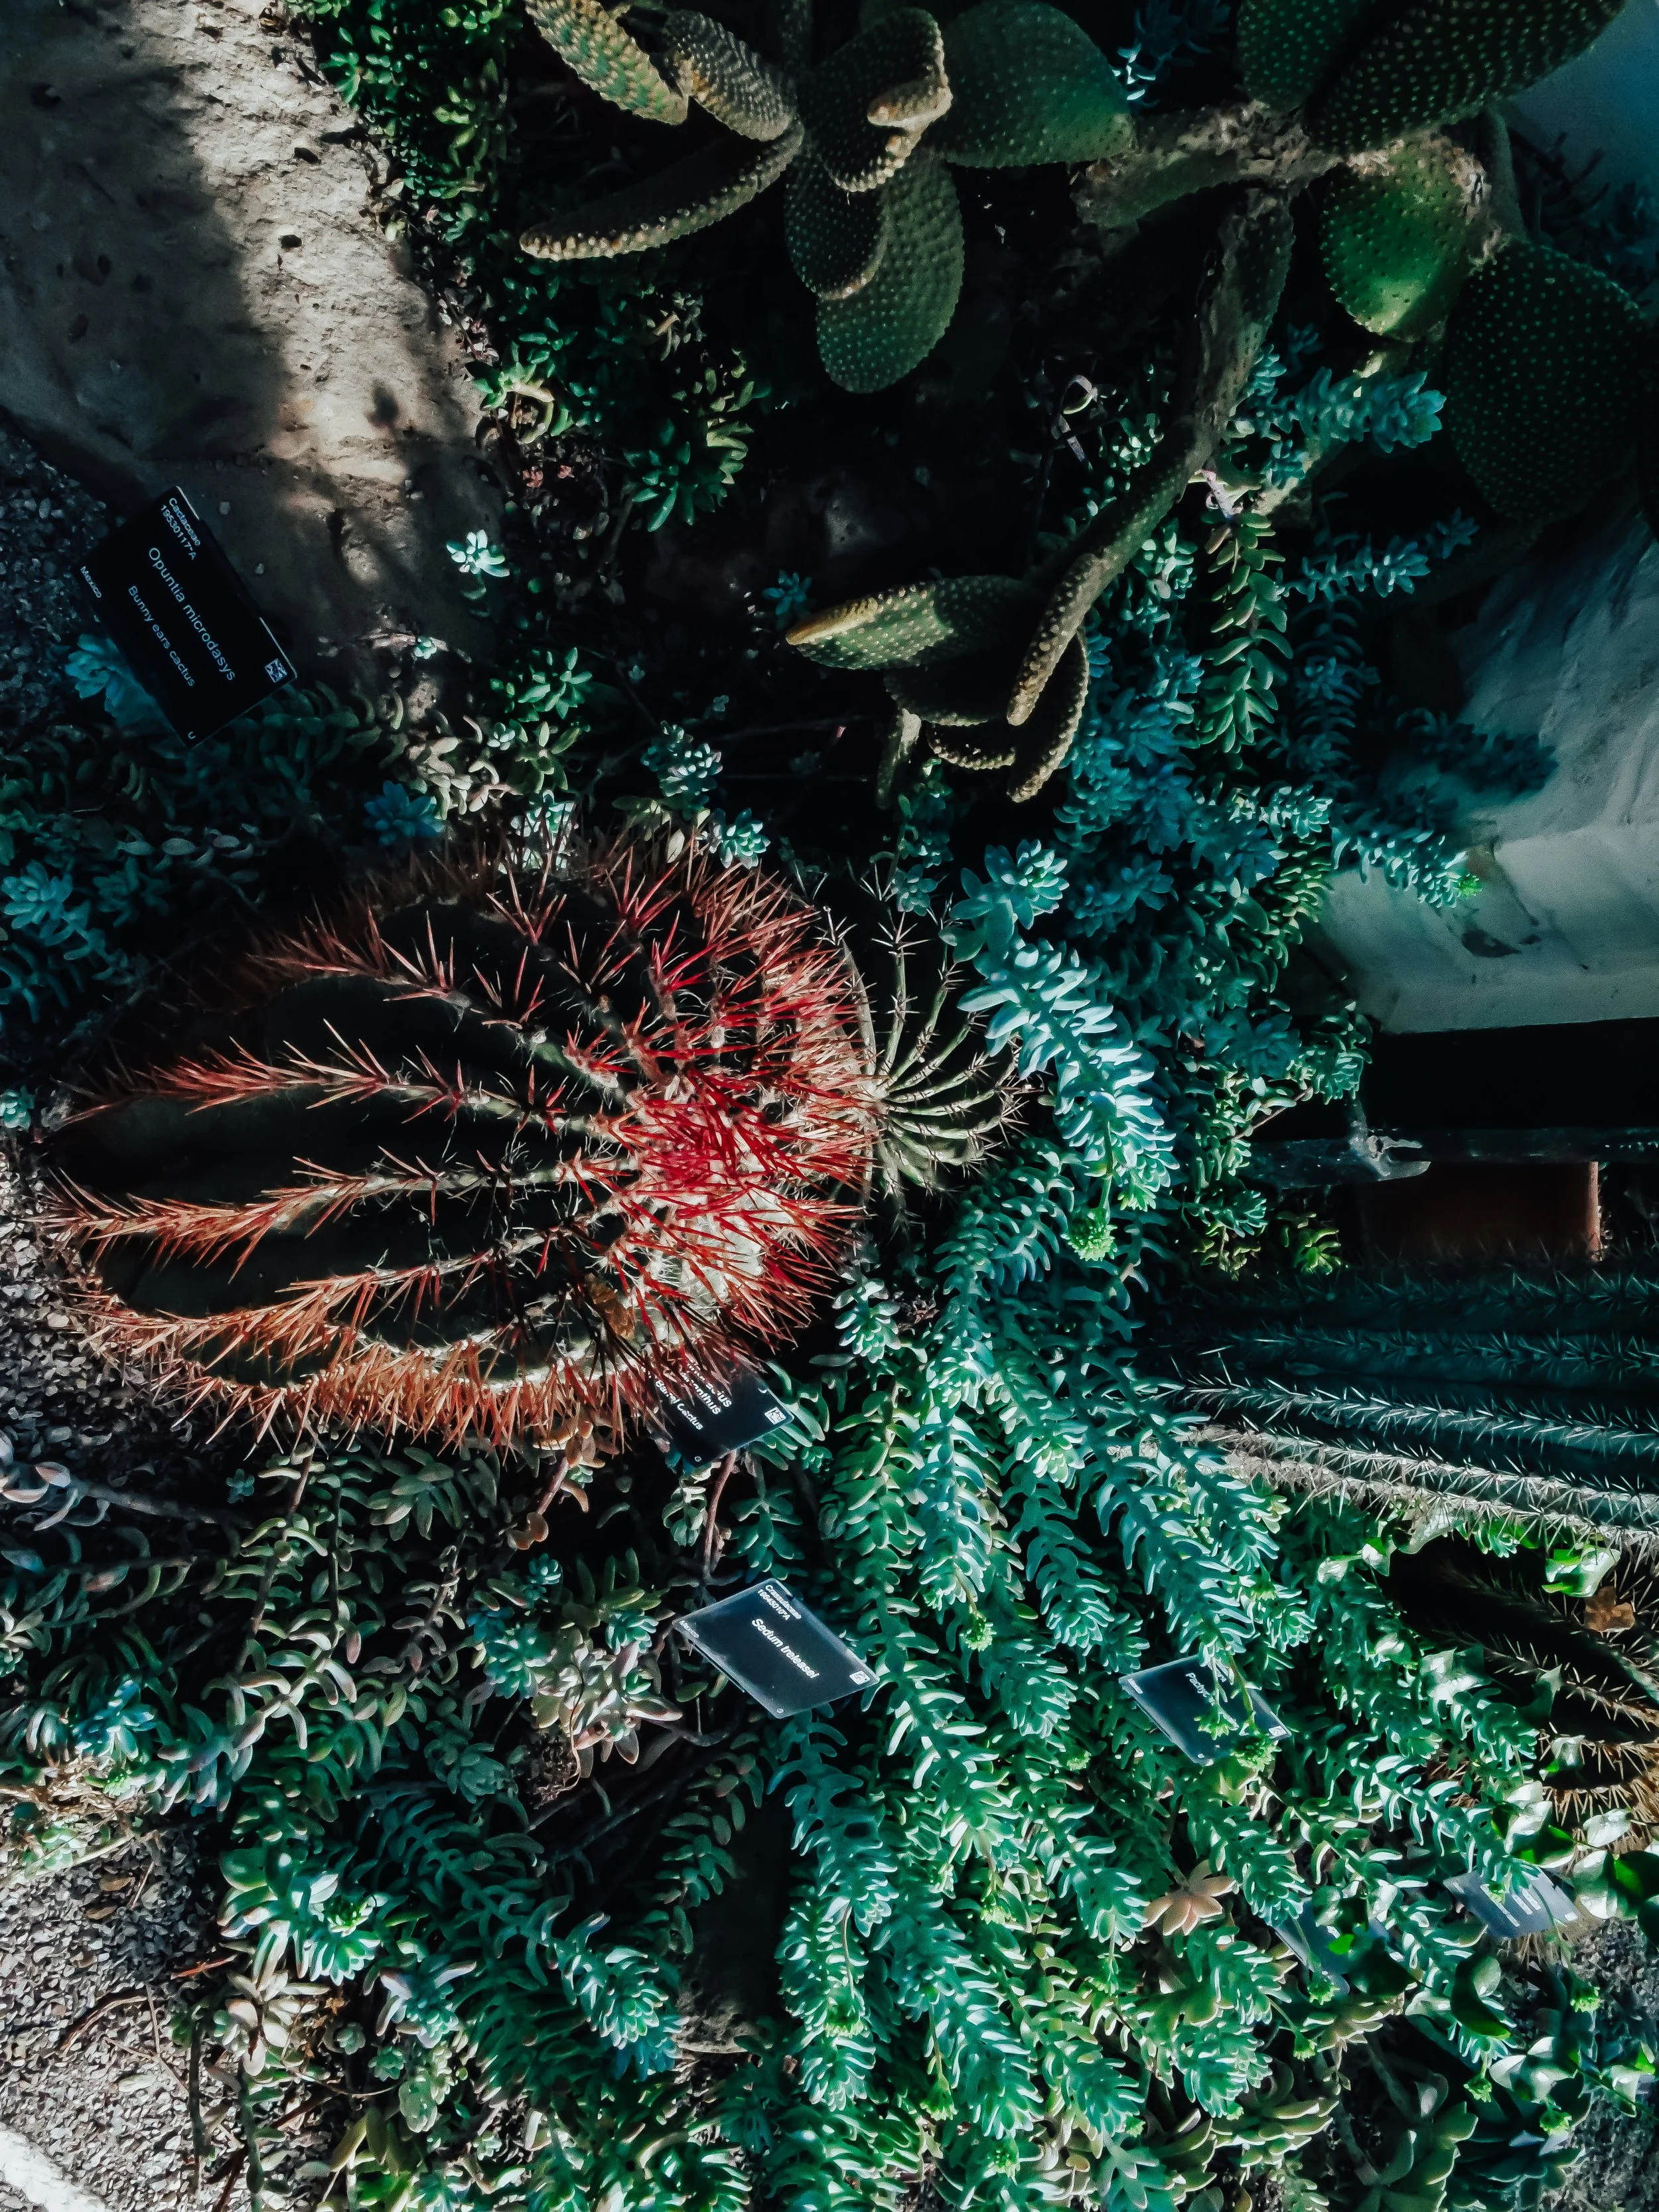
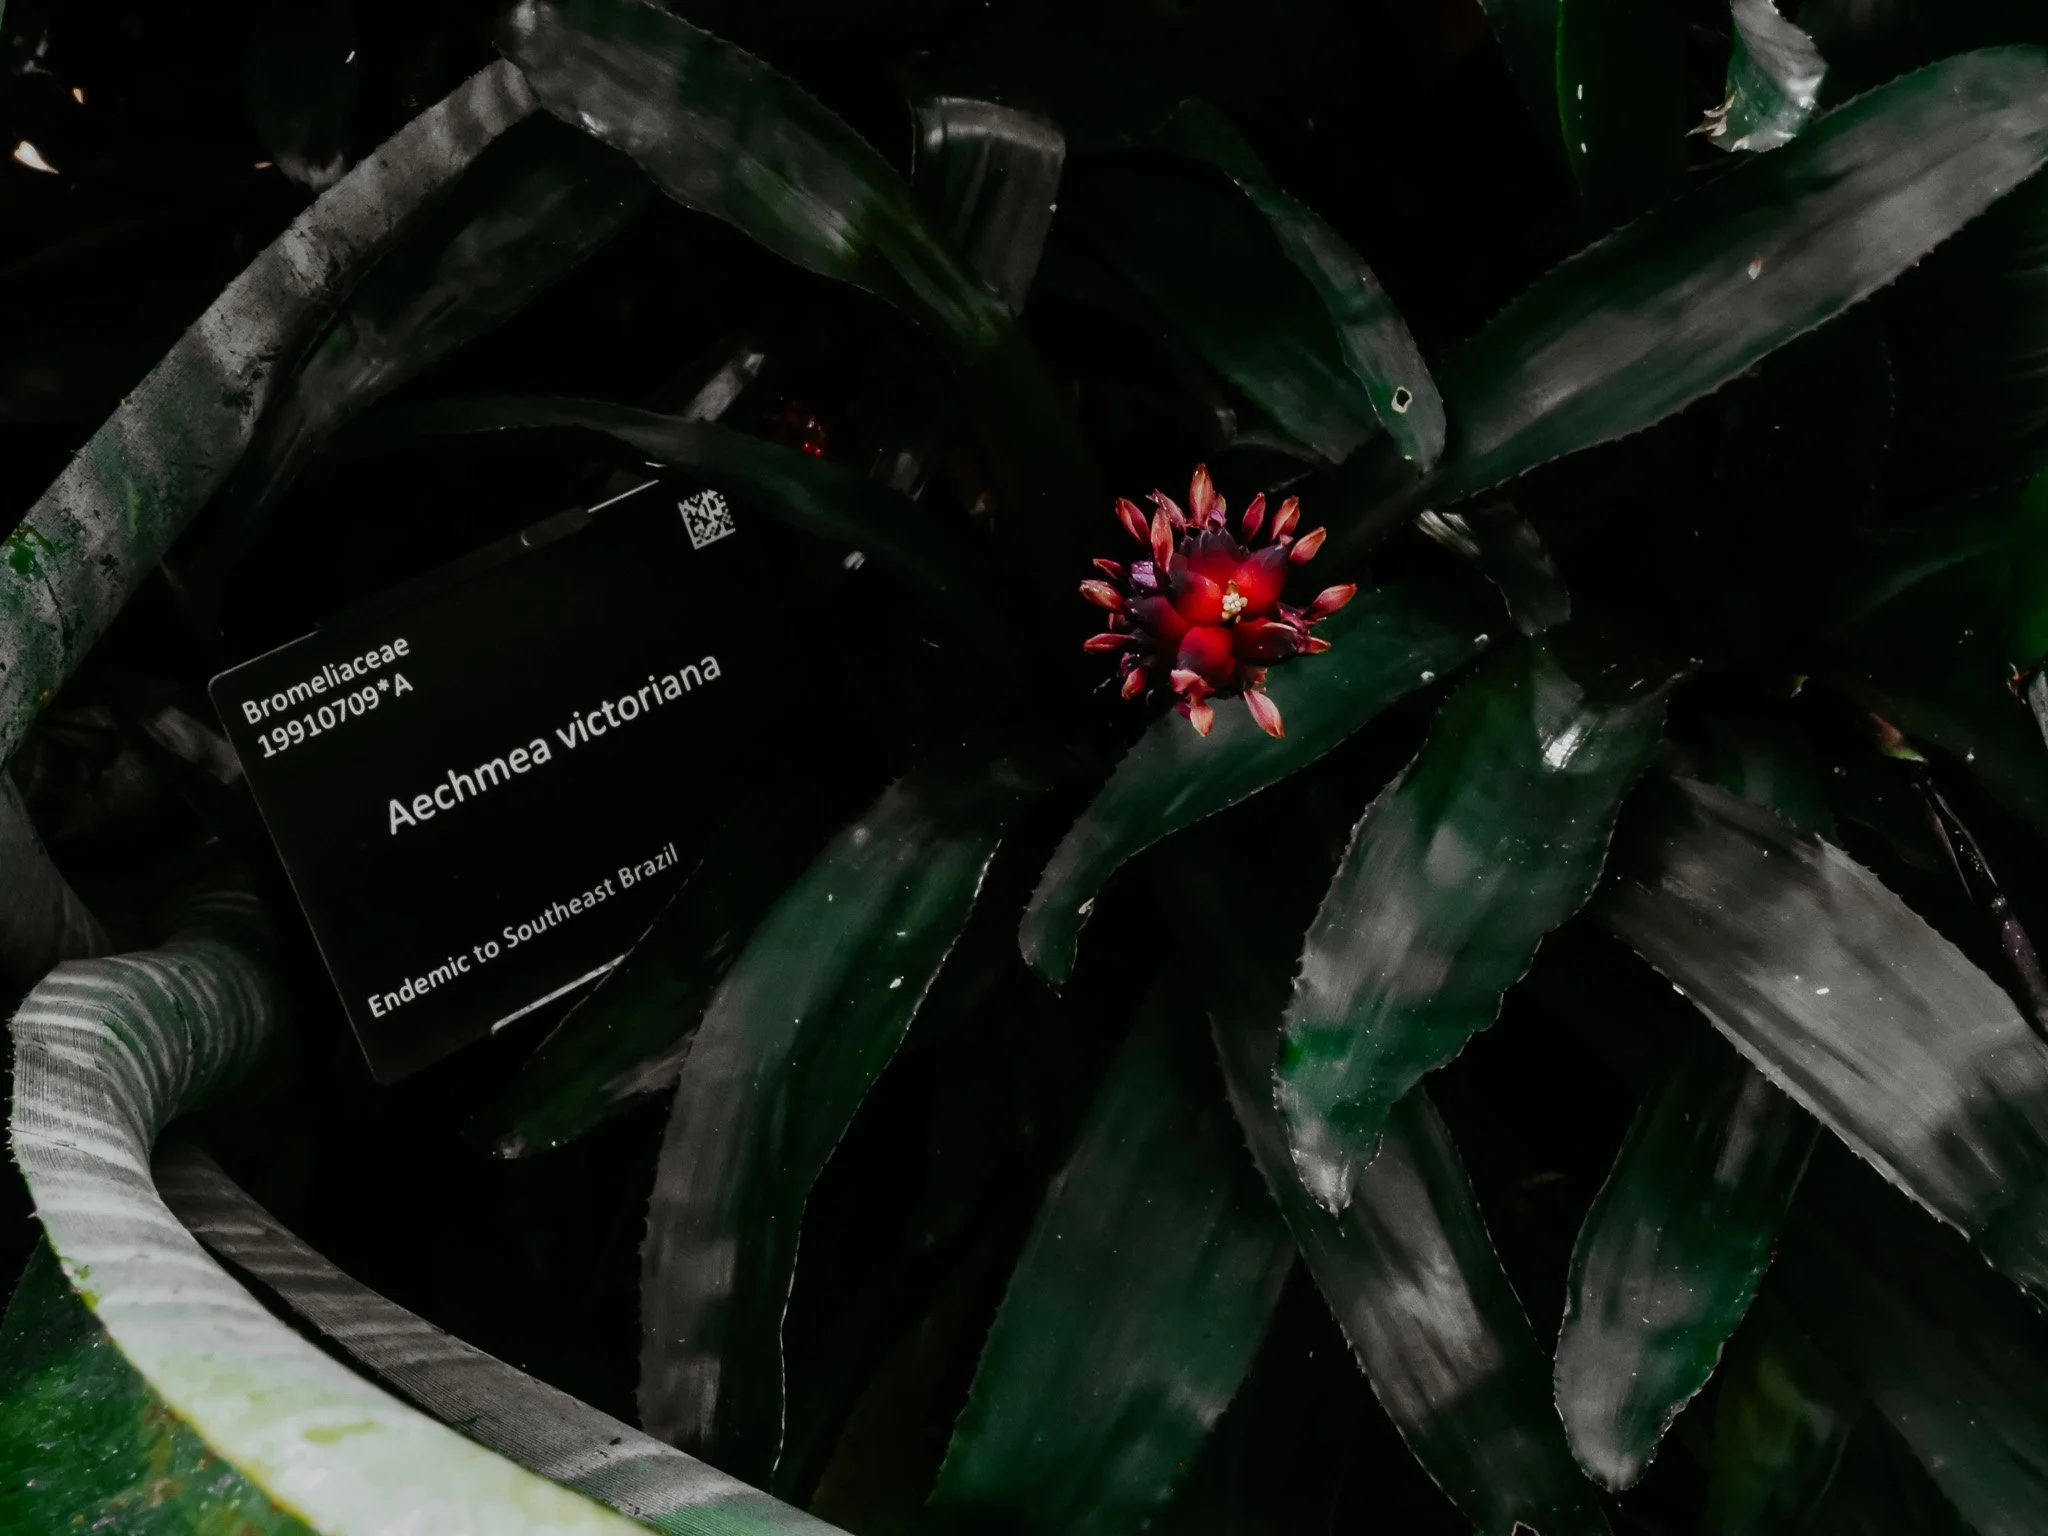
What really made the visit unforgettable were the textures, colours, and layers of planting — verdant tropical fronds, sculptural desert forms, and the subtle colour shifts across the garden’s many landscapes. It was a reminder that plants communicate through light and form, and that being present in spaces like this feeds both the eye and the creative soul.
Whether you’re wandering the glasshouses, pausing by the lake, or capturing reflections on mossy paths, Cambridge University Botanic Garden is a place where joy, wonder, and curiosity are all in bloom.
🌿 Blue Diamond Huntingdon — An Honest Reflection
In April, a new garden centre opened near me: Blue Diamond in Huntingdon. I want to share my honest experience. One thing that often doesn’t work for garden centres is placing the houseplant section right at the entrance. This spot can expose plants to cold and pests before anyone has a chance to browse properly.
The store layout felt like a maze, and as someone with ASD, navigating it became tense and anxiety-filled. Reaching the tills meant walking through the entire centre, with hardly any staff at the front to help. While the plants themselves were fine, the setup made me uncomfortable buying anything.
Even when visiting with support, the experience wasn’t enjoyable, and we left through the front entrance. I’ve not returned since — sometimes, even when a place has good stock, accessibility and atmosphere matter just as much as the plants themselves.
IKEA Milton Keynes (buying the Milsbo in May)
🌿IKEA Milton Keynes (plant cabinet shopping)
After saving for a bigger plant cabinet all year, I finally made the trip to IKEA Milton Keynes. I had been searching high and low on Facebook Marketplace, but nothing matched what I needed — so the IKEA trip was unavoidable.
I officially remembered why I don’t usually go to IKEA: it takes even longer than Blue Diamond to reach the tills, and wandering the vast store with my lovely friends meant we were moving at a slower, more leisurely pace. Walking through the maze of displays, I felt the familiar mix of determination and mild frustration.
But it was worth it. Not only did I come home with a new Milsbo cabinet, perfectly sized for my growing collection, but I also treated myself to a beautiful Philodendron ‘Ring of Fire’, which was massive and only £6.99 — a tiny price for such a striking plant. That moment of triumph — finding both the cabinet and the plant — was one of the small but magical highlights of my 2025 plant journey.
More Garden Centres
Visiting garden centres has become one of my favourite ways to reconnect with my own plant collection. Stepping outside my usual surroundings and seeing plants thrive in different conditions often helps me reflect on how my indoor jungle is evolving.
Poplars Garden Centre, Marks Tey
I’ve visited Poplars near Marks Tey a couple of times now, and it’s always a genuinely lovely experience. The staff are friendly and welcoming, making it an easy place to slow down, browse, and enjoy the process.
What I appreciate most is the variety. Alongside familiar favourites, Poplars often stocks slightly rarer plants, which makes each visit feel like a small moment of discovery. They also carry Soil Ninja mixes, decorative pots, and practical plant tools that quietly support healthier plants long-term.
This time, I was drawn to a Caladium ‘Tapestry’, its striking whites and rich reds standing out immediately — a reminder that sometimes one plant is enough to inspire a new chapter.
Perrywoods Garden Centre, Tiptree
Some garden centre visits feel calm and reflective. Others feel like stepping into a living archive of plant possibility.
My visit to Perrywoods, Tiptree fell firmly into the second category — helped along by a National Garden Centre voucher I received for my birthday, which made the whole experience feel like a small celebration.
Perrywoods has one of the largest houseplant selections I’ve ever seen. From a towering giant Euphorbia, to quirky cacti, lush Marantas, and some truly incredible Thai Monsteras, it’s a place where every corner offers something unexpected.
Where some visits invite slow contemplation, this one was about abundance, inspiration, and letting curiosity lead the way. Choosing plants here felt less about restraint and more about delight — a reminder that plant collecting can hold many moods, all equally valid.
Notcutts Garden Centre, Brampton
It was nice to revisit Notcutts in Brampton, partly because it feels familiar and comforting. The day I visited was quiet, which made it an easy place to wander and take things in at my own pace.
I no longer have a Notcutts card, simply because over the past year I didn’t find myself visiting often or connecting with what was on offer. Returning without expectations felt different this time — less about searching for something specific and more about enjoying the familiarity of the space itself.
-
After a chop that left it looking a little bare, this Pilea ‘Greyzy’ found a new rhythm in semi-hydro — and it’s been thriving ever since. Moving it into a more consistent setup has encouraged steady, healthy growth, filling out far better than I expected.
Semi-hydro has taken away much of the guesswork, keeping moisture levels even and roots happy without the peaks and dips of traditional soil. It’s been a gentle reminder that sometimes plants don’t need more effort — just a change in approach.
-
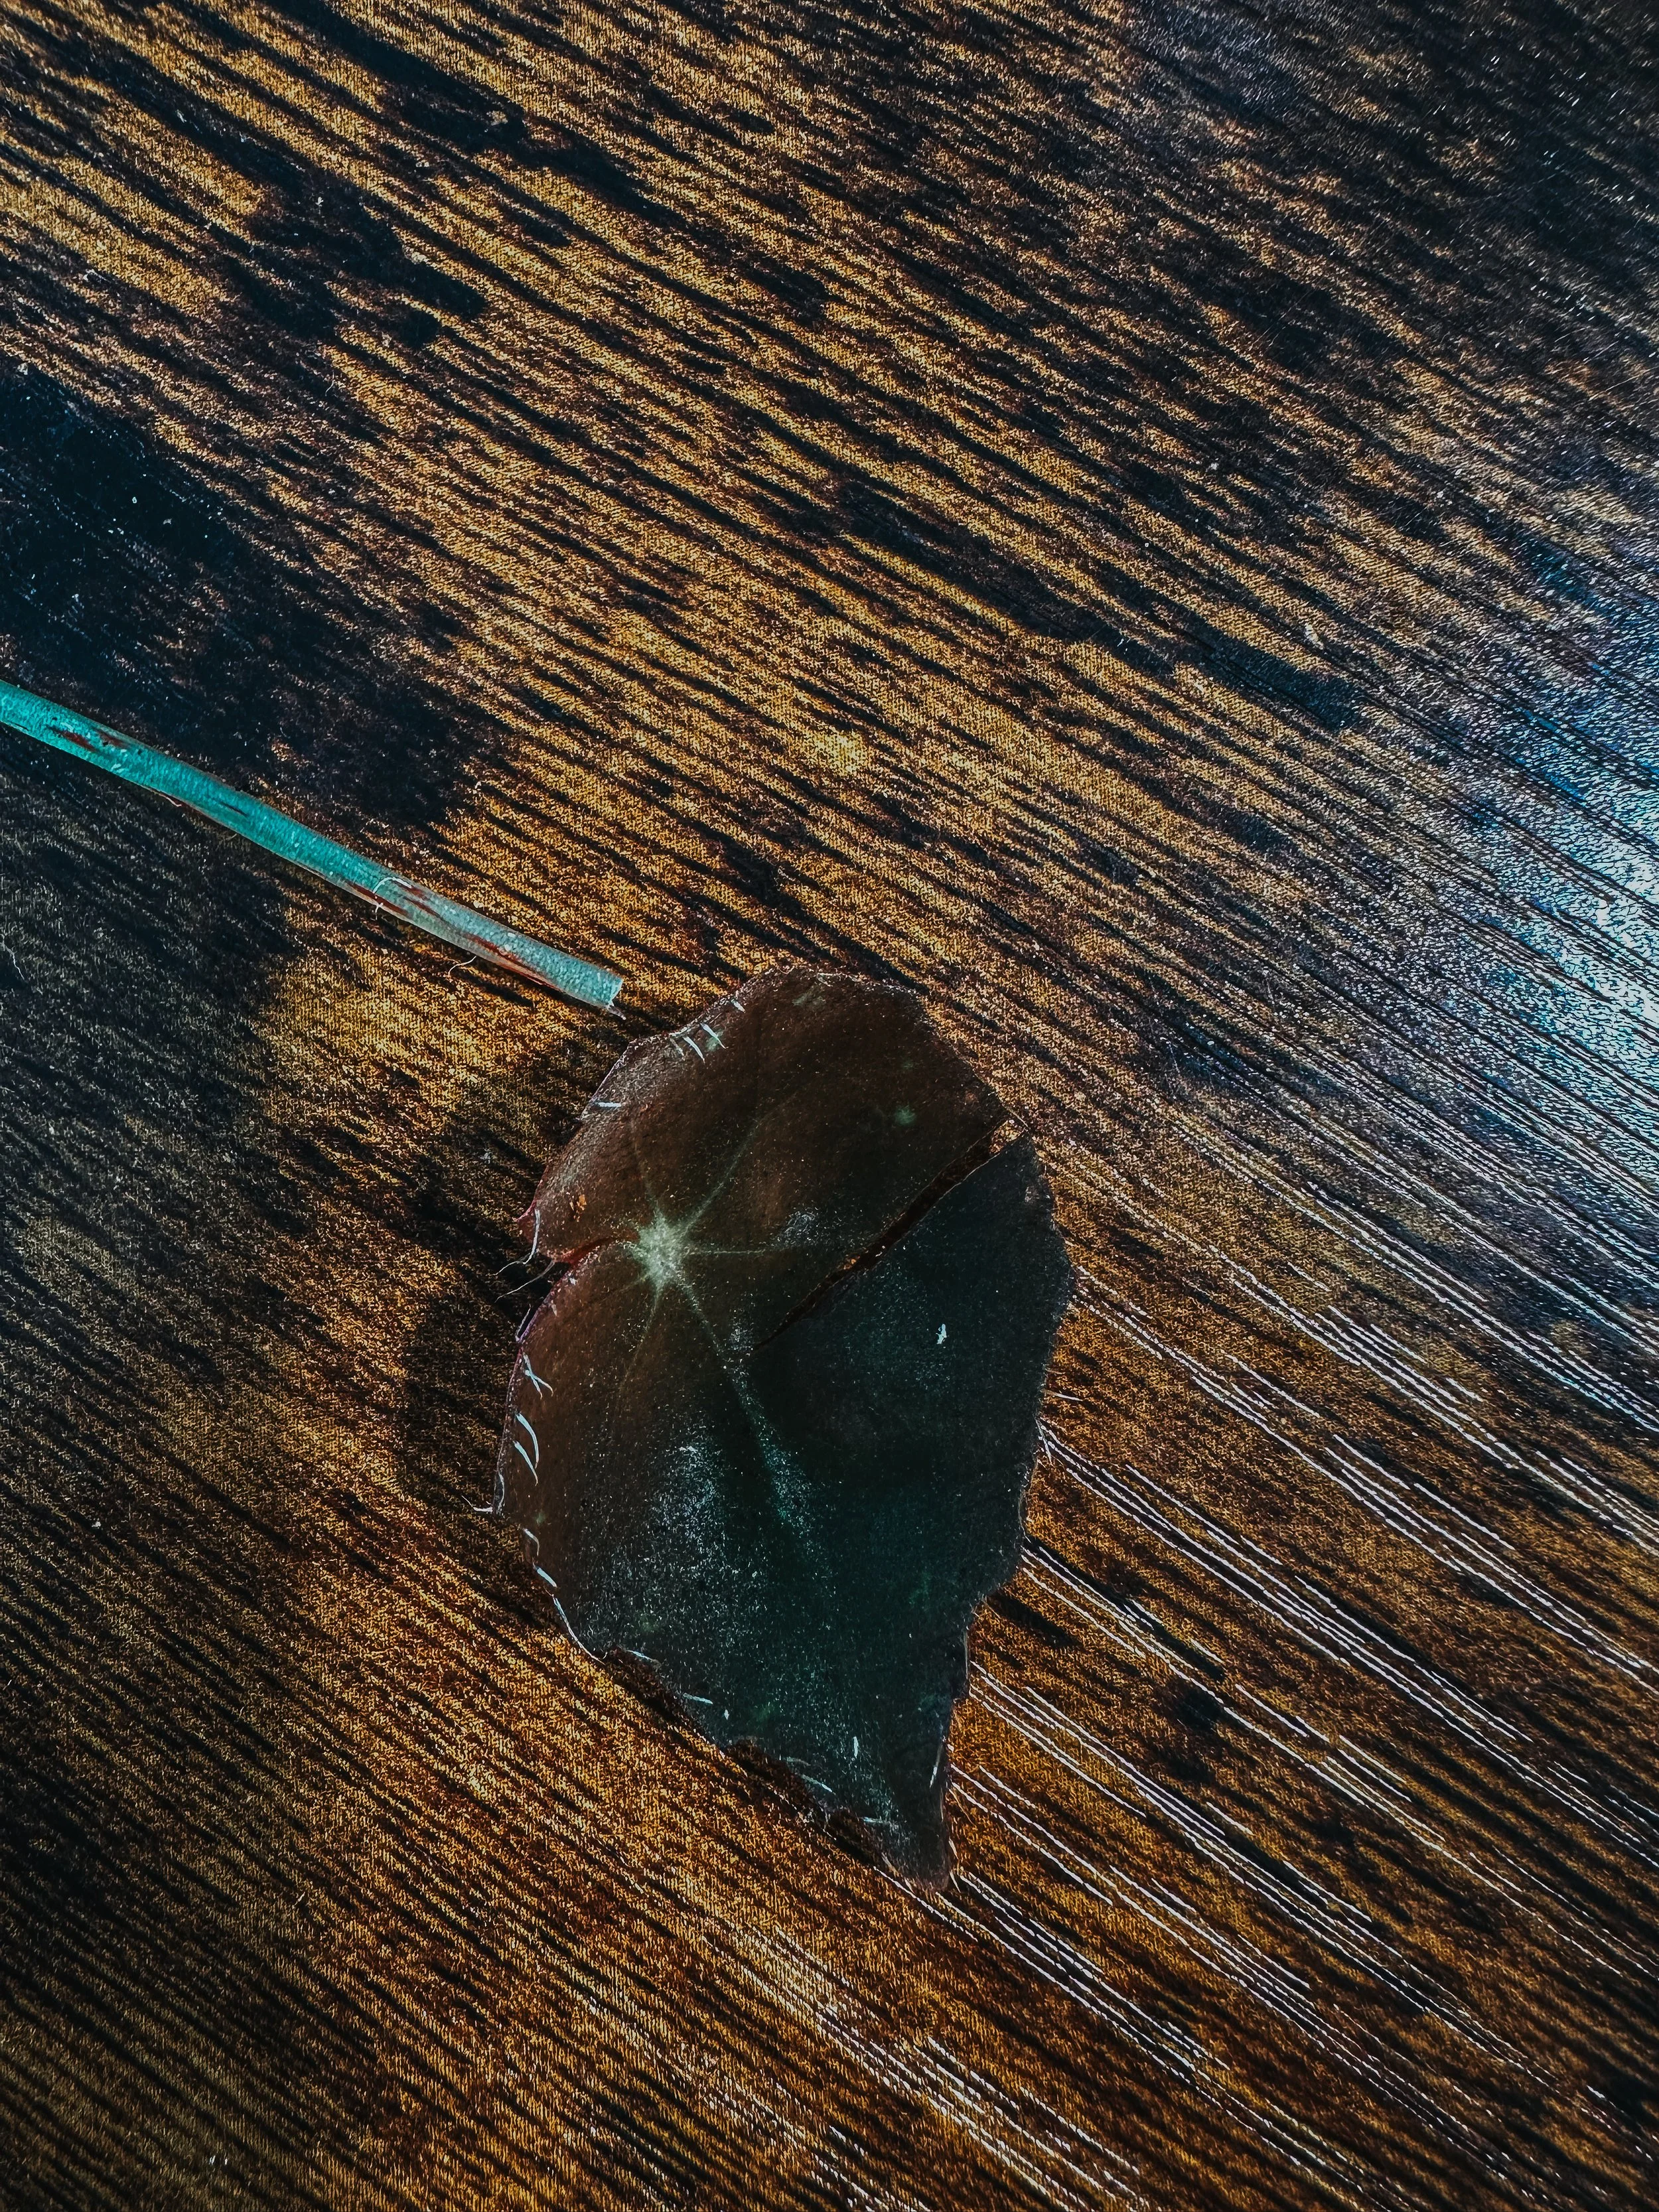
After months without rain, the first drops feel like a homecoming. The earth sighs, the air thickens, and suddenly, everything seems to drink. Greens deepen overnight — moss is plotting its next explosion of green, leaves glisten, even pavements catch the light like tiny mirrors. Dust, which has been quietly blocking sunlight from fuelling photosynthesis, is finally washed away. It’s the same dust that dulls a camera lens; once gone, suddenly the world snaps into focus.
-
PACHYPODIUM LAMEREI. Madagascar Palm.
Anthurium Pallidiflorum
Dracaena Fragrans White Jewel
Alocassia Sp. West Java
Alocasia Mandalay
-
I brought many beautiful plants for this shop this year pretty sure i spent most of my plant money there. Such great Quality plants.
I took the opportunity to film a pet-friendly houseplant reel, slowing down and noticing the smaller details, and in the end I did leave with something special: a lovely Pilea ‘Greyzy’ houseplant, chosen with pet safety in mind.
Since coming home, it’s found its place in semi-hydroponic plant care, where it’s been thriving beautifully. Moving this Pilea into semi-hydro has encouraged steady, healthy growth, making it one of my favourite plant success stories of the year and a gentle reminder that sometimes the simplest care changes make the biggest difference.
Sometimes revisiting a garden centre isn’t about what you plan to buy, but about the plant that quietly finds its way home with you.
Visiting Old Barn Garden Centre – A Houseplant Lover’s Dream
Towards the end of the year, a couple of my reels were filmed at Old Barn Garden Centre, and I was genuinely wowed by their houseplant selection. The range of indoor plants on offer was impressive, with something for every type of plant parent — from beginners to collectors.
I couldn’t resist coming home with an Alocasia melo and an Anthurium, both perfect additions to my growing houseplant collection and already settling beautifully into my indoor jungle.
Reflecting on 2025: A Year of Growth (In Plants and Business)
As 2025 comes to a close, I wanted to take a moment to reflect. This year has been incredibly rewarding — both creatively and professionally. My small business has grown more than I ever expected, especially through selling water-resistant potting mats, and I’ve loved sharing more of my life with houseplants along the way.
Inviting people into my plant-filled world through reels, blogs, and photography has been a real joy. I’m genuinely grateful to everyone who’s followed along, supported my work, and taken the time to read this year in review.
Intentions for 2026: Looking Ahead
As I step into 2026, I’m carrying a few clear intentions with me:
To continue growing my business and sell more plant potting mats
To share more of my plant and nature photography, including offering prints
To work with new photography clients, combining creativity with storytelling
Thank you for being part of this journey. I hope 2025 has been a year of growth for you too — and that 2026 brings steady roots, creative energy, and plenty of inspiration 🌱
Calling All Houseplant Lovers 🌿
If you’d like to learn more about Jungle Floor Creative and the houseplant lover behind the brand, you can explore the full collection over on the website.
From water-resistant potting mats and greenhouse mats, to plant shelf styling, soft plant cloths, soil scoops, and houseplant-inspired apparel, everything is designed with plant care, creativity, and everyday use in mind.
Whether you’re repotting, styling your plant shelves, or building your own indoor jungle, Jungle Floor Creative is made for fellow houseplant lovers who value thoughtful tools and beautiful details.
👉 Visit the website to discover the full range.